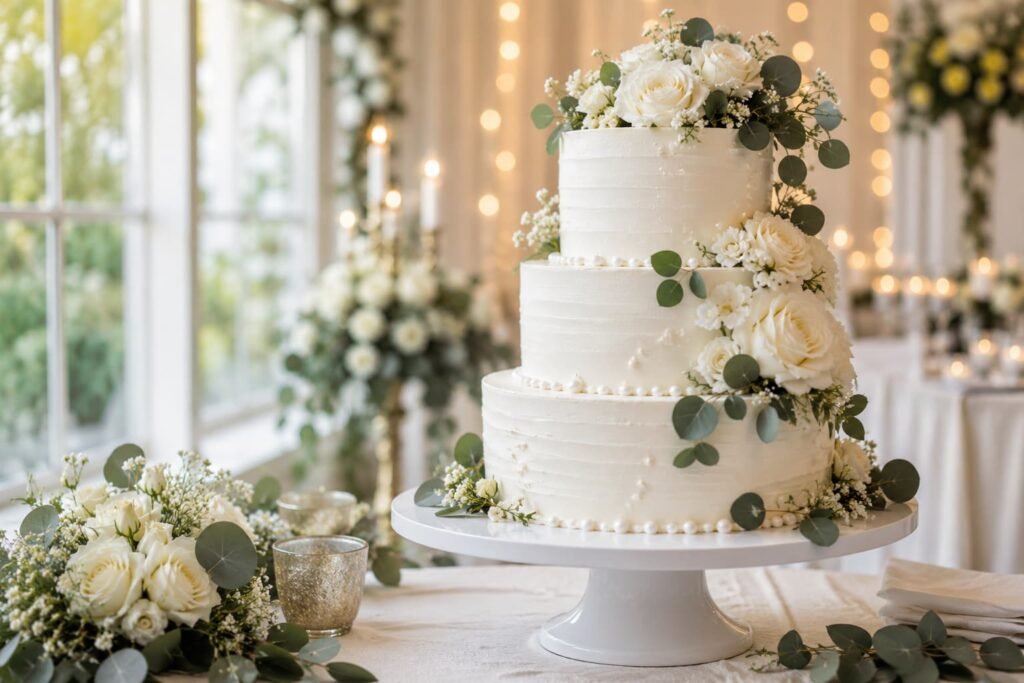
A stunning buttercream wedding cake doesn’t have to come from a professional bakery. With the right recipe, a few essential decorating tools, and some patience, you can create a homemade wedding cake that looks elegant and tastes even better than many store-bought options.
One of the biggest advantages of making your own wedding cake is having complete control over every detail. You can choose your favorite cake flavor, prepare a buttercream frosting that isn’t overly sweet, and decorate the cake to match the wedding theme without paying the high price of a custom bakery cake. Whether you’re baking for your own wedding, helping a family member, or surprising a close friend, creating a cake by hand adds a personal touch that guests often remember long after the celebration.
Many first-time bakers worry that a wedding cake is too complicated, but most of the challenge comes from organization rather than difficult techniques. When the cake layers are baked evenly, the buttercream has the right consistency, and each step is completed patiently, decorating becomes much easier. Even simple designs with smooth frosting and fresh flowers can look elegant without requiring advanced cake decorating skills.
In this guide, you’ll learn what makes a buttercream wedding cake different from other wedding cakes, how to choose the best buttercream for decorating, and the techniques that help create clean, professional-looking results. You’ll also find practical tips that can help you avoid common mistakes and build confidence before assembling your final cake.
What Is a Buttercream Wedding Cake?
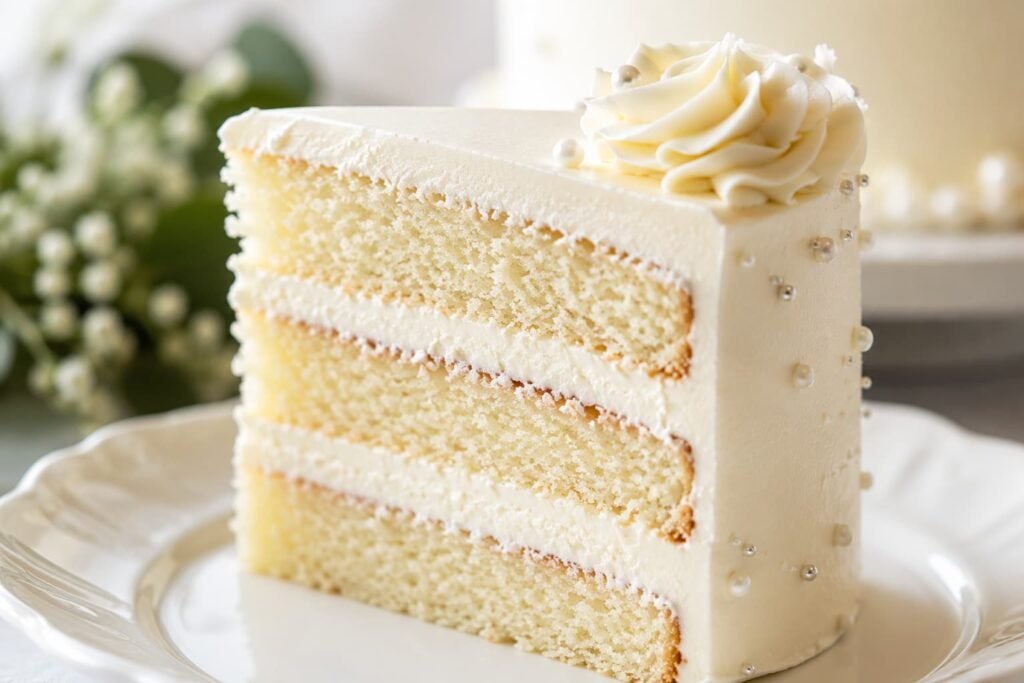
A buttercream wedding cake is a layered celebration cake covered with buttercream frosting instead of fondant. It is one of the most popular choices for weddings because it combines a rich homemade flavor with a soft, elegant finish that suits both classic and modern celebrations.
Unlike fondant-covered cakes, where the outer layer is made from rolled sugar paste, buttercream becomes part of every bite. The frosting is smooth, creamy, and easy to flavor with ingredients like vanilla, chocolate, lemon, or almond, making it a favorite for couples who want their wedding cake to taste as good as it looks.
One reason buttercream remains so popular is its versatility. A skilled decorator can create a perfectly smooth finish for a formal wedding or use textured buttercream, soft palette-knife patterns, piped flowers, or fresh blooms for a more natural design. Whether you’re planning a simple backyard ceremony or a large indoor reception, buttercream can be adapted to match almost any wedding style.
For home bakers, buttercream is also far more forgiving than fondant. Small imperfections can usually be smoothed with a bench scraper or offset spatula, and if the frosting becomes too soft while decorating, chilling the cake for 20 to 30 minutes makes it much easier to continue. These small adjustments help beginners achieve cleaner results without needing years of decorating experience.
Another advantage is that buttercream works well for both small and multi-tier cakes. When paired with sturdy cake layers, proper support dowels, and a stable buttercream recipe, it provides enough structure for two-tier and three-tier wedding cakes while keeping the finished cake light, fresh, and enjoyable to eat.
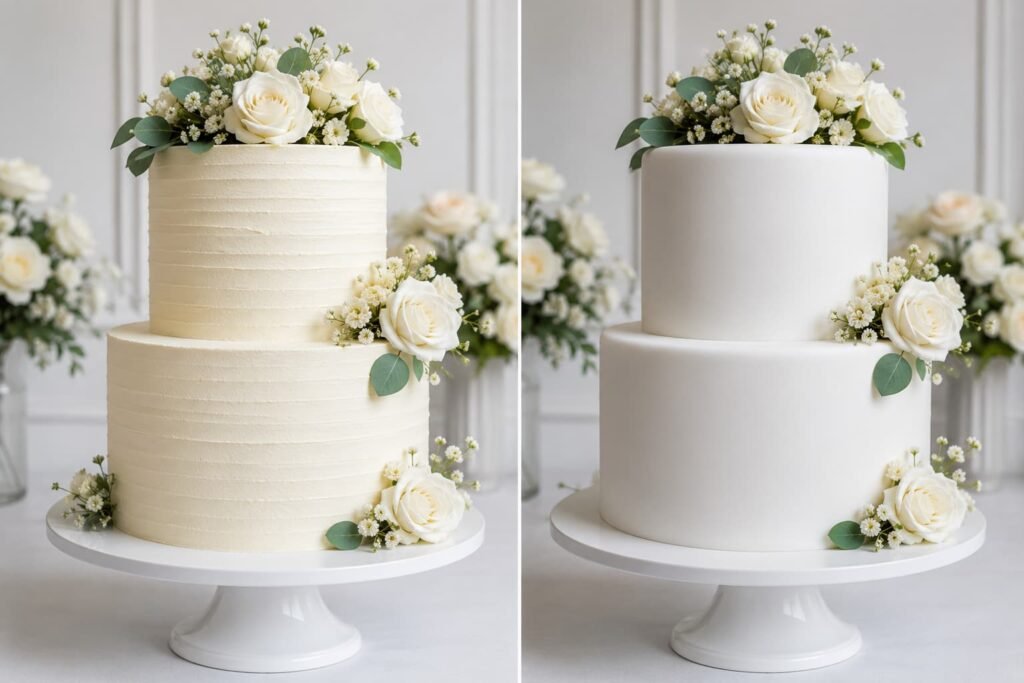
Buttercream vs Fondant: Which Is Better for a Wedding Cake?
Both buttercream and fondant can create beautiful wedding cakes, but the best choice depends on what matters most to you. If flavor is your priority, buttercream is often the preferred option. If you’re planning an elaborate decorative design with sharp edges or sculpted details, fondant may offer more flexibility.
Buttercream is appreciated for its rich, creamy texture and fresh homemade taste. It spreads easily over cake layers, making it ideal for smooth finishes, rustic designs, piped borders, and buttercream flowers. Because it remains soft after serving, guests usually enjoy eating every part of the cake instead of removing the frosting.
Fondant creates an ultra-smooth surface that is excellent for detailed decorative work, especially in warm environments where intricate designs need extra stability. However, its firm, chewy texture and sweeter taste are not always as popular with guests, and many people remove the fondant before eating their slice.
For most home bakers, a buttercream wedding cake is the more practical and beginner-friendly choice. It requires fewer specialized tools, allows small decorating mistakes to be corrected more easily, and delivers the homemade flavor that many couples prefer for such a special occasion.
| Feature | Buttercream | Fondant |
| Flavor | Rich, creamy, and buttery | Sweet with a firmer texture |
| Texture | Soft and smooth | Firm and chewy |
| Best For | Homemade and rustic designs | Intricate decorative designs |
| Beginner Friendly | Yes | More challenging |
| Easy to Repair | Yes, with chilling and smoothing | Repairs are more noticeable |
| Popular Choice | Excellent for homemade wedding cakes | Common for highly detailed professional cakes |
Now that you understand what a buttercream wedding cake is and why so many couples choose it, the next step is selecting the right ingredients and decorating tools. Using quality ingredients from the beginning will make every stage of baking, frosting, and decorating much easier.
Why Make Your Own Wedding Cake?
Choosing to make your own buttercream wedding cake is about more than reducing costs. It gives you the opportunity to create a centerpiece that reflects your personality, your favorite flavors, and the style of your celebration. While ordering from a bakery may be convenient, a homemade wedding cake often feels more meaningful because every layer has been prepared with care for a special occasion.
One of the most noticeable benefits is the money you can save. Custom wedding cakes are priced not only for the ingredients but also for the hours of decorating, design consultations, delivery, and setup. By baking your own cake, you can spend your budget on premium ingredients instead of expensive service fees. In many cases, the savings can be redirected toward photography, flowers, or other wedding details that matter most to you.
Making your own cake also gives you complete creative freedom. You’re not limited to a standard bakery menu or preset designs. You can choose your preferred cake flavor, experiment with different fillings, adjust the sweetness of the buttercream frosting, and decorate the cake to complement your wedding colors. Whether you prefer a smooth white finish, soft buttercream flowers, or a rustic textured design, every detail can be customized to match your vision.
Another reason many home bakers choose a homemade wedding cake is the quality of the ingredients. Fresh butter, pure vanilla extract, farm-fresh eggs, and high-quality dairy products create a richer flavor and softer crumb than many commercially produced cakes. Using fresh ingredients also gives you confidence in exactly what goes into every layer, especially if you’re accommodating personal preferences or dietary needs.
If you’re making a wedding cake for the first time, careful planning is more important than advanced decorating skills. Many experienced bakers prepare the cake layers one or two days before the event, wrap them well after cooling, and store them until assembly day. Buttercream frosting can also be made in advance and re-whipped before use, saving valuable time while making the decorating process more relaxed. Working in stages allows you to focus on one task at a time instead of rushing through everything in a single day.
Perhaps the greatest reward is seeing your guests enjoy something you created yourself. A homemade buttercream wedding cake is more than dessert it’s a personal contribution to the celebration and a memory that often becomes just as meaningful as the wedding itself.
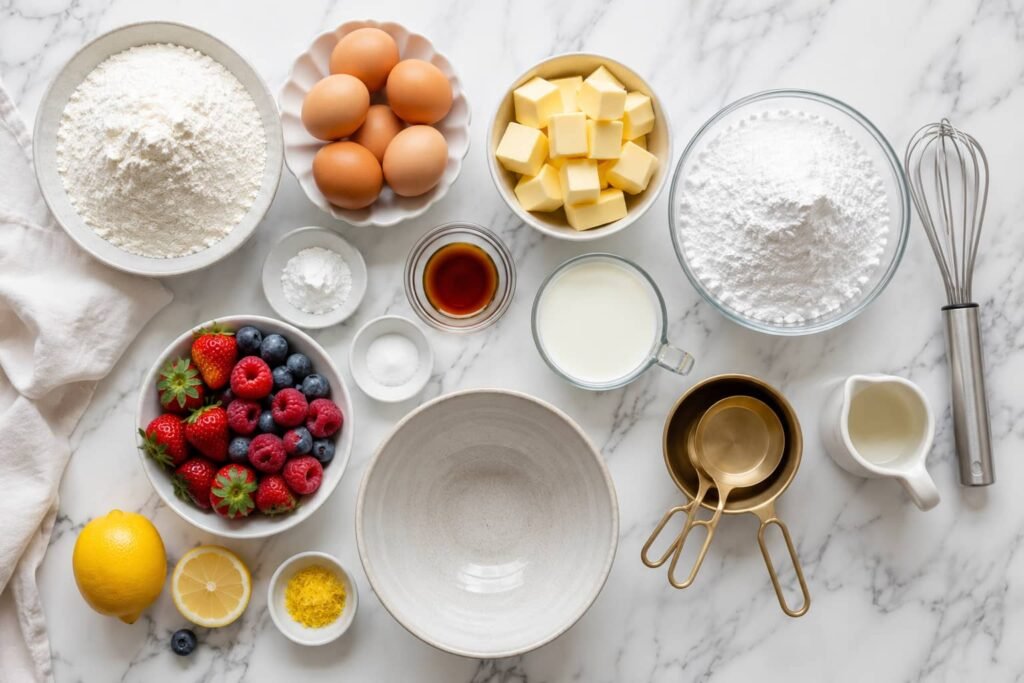
Ingredients You’ll Need
The quality of your ingredients has a direct impact on the taste, texture, and stability of your buttercream wedding cake. Even the best decorating techniques cannot compensate for low-quality ingredients, so choosing fresh, reliable products is one of the most important steps before you begin baking.
For a classic vanilla buttercream wedding cake, you’ll need ingredients for the cake layers, buttercream frosting, decorations, and optional fillings. Together, these create a cake that is sturdy enough for stacking while remaining soft, moist, and full of flavor.
| Category | Ingredients | Why They’re Important |
| Cake | All-purpose flour, baking powder, baking soda, fine salt, unsalted butter, granulated sugar, eggs, whole milk, pure vanilla extract | Creates light, moist cake layers with enough structure to support multiple tiers. |
| Buttercream Frosting | Unsalted butter, powdered sugar, heavy cream or whole milk, pure vanilla extract, pinch of salt | Produces a smooth, stable frosting for filling, crumb coating, and decorating. |
| Decorations | Buttercream flowers, fresh edible flowers, pearl sprinkles, food-grade gold leaf, fresh berries, cake topper | Adds an elegant finish while complementing different wedding styles. |
| Optional Fillings | Raspberry jam, strawberry preserves, lemon curd, chocolate ganache, vanilla pastry cream, fresh berries | Adds extra flavor, moisture, and variety between the cake layers. |
When choosing butter, unsalted butter is usually the better option because it allows you to control the salt level throughout the recipe. It also produces a cleaner butter flavor, which is especially noticeable in vanilla buttercream frosting. Likewise, using pure vanilla extract instead of artificial flavoring creates a richer aroma that enhances both the cake and the frosting.
Whenever possible, allow refrigerated ingredients such as butter, eggs, and milk to reach room temperature before mixing. This simple preparation step helps the batter blend more evenly, traps air more effectively during mixing, and produces lighter cake layers with a finer crumb. Cold ingredients can prevent the batter from emulsifying properly, which may affect both texture and baking consistency.
If you’re planning a two-tier or three-tier buttercream wedding cake, prepare slightly more frosting than the recipe suggests. Having extra buttercream makes it easier to smooth the final coat, repair small imperfections, and pipe decorative borders or flowers without worrying about running out halfway through the decorating process.
Finally, measure your ingredients as accurately as possible. While measuring cups work well for many home bakers, a digital kitchen scale provides the most consistent results, especially when measuring flour. Even a small difference in flour can change the texture of the cake, making it denser or drier than intended.
With your ingredients measured, prepared, and ready to use, the next step is gathering the essential baking and decorating tools that will help you assemble and frost your buttercream wedding cake with confidence.
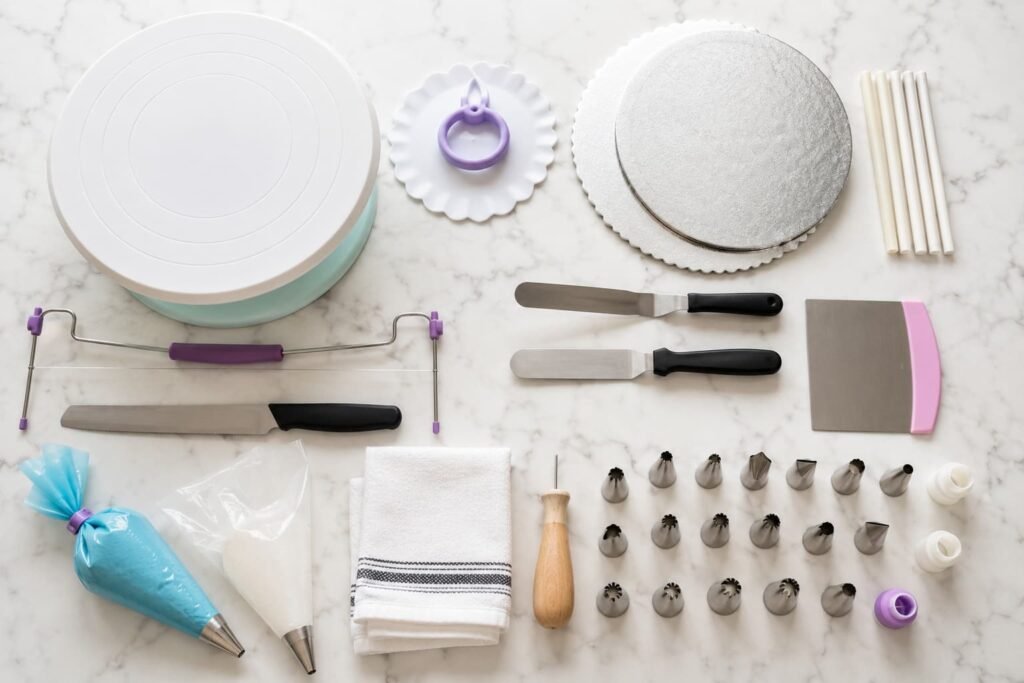
Essential Cake Decorating Tools
A beautiful buttercream wedding cake doesn’t require a professional bakery full of equipment, but having the right decorating tools makes the process much easier. Good tools help you create smoother frosting, straighter cake layers, and a stable finished cake without unnecessary frustration. If you’re making your first homemade wedding cake, investing in a few reliable decorating essentials will improve both the appearance of your cake and your overall baking experience.
Cake Turntable
A cake turntable is one of the most useful tools for decorating a wedding cake. It allows the cake to rotate smoothly while you spread buttercream, making it easier to create even frosting around every layer. Instead of moving around the cake, you simply rotate the turntable while keeping your spatula steady. This helps produce cleaner edges and a more professional-looking finish.
For beginners, a sturdy turntable also provides better control when applying the crumb coat and final layer of buttercream.
Offset Spatula
An offset spatula is designed with a slightly angled blade that keeps your hands away from the cake while spreading frosting. It is ideal for filling cake layers, applying the crumb coat, and smoothing buttercream over the top surface.
Many experienced bakers prefer using an offset spatula because it distributes frosting evenly without pressing too hard on the cake. A longer spatula works well for larger wedding cakes, while a smaller one offers better control around the edges.
Bench Scraper
Once the buttercream has been applied, a bench scraper helps create the smooth sides that are often seen on elegant wedding cakes. Hold the scraper at a slight angle while slowly rotating the cake on the turntable. This removes excess frosting and leaves a cleaner, more even finish.
If the buttercream becomes too soft while smoothing, chilling the cake for 15 to 20 minutes before continuing usually produces better results.
Piping Bags
Piping bags allow you to decorate the cake with borders, flowers, rosettes, leaves, and other decorative details. They also make it easier to add buttercream between cake layers without creating uneven filling.
Using reusable piping bags with different decorating tips gives you the flexibility to create both simple and detailed designs while reducing waste compared to disposable bags.
Cake Dowels
For a two-tier or three-tier buttercream wedding cake, cake dowels provide the internal support needed to keep each tier stable. Without proper support, the weight of the upper tiers can compress the lower layers, causing the cake to lean or crack.
Wooden or food-safe plastic dowels are commonly used to distribute the weight evenly throughout the cake, helping it remain stable during transportation and serving.
Cake Boards
Each cake tier should rest on its own cake board before stacking. Cake boards add strength and make it easier to move individual tiers during assembly. They also work together with dowels to create a stable structure for larger wedding cakes.
Choose sturdy boards that match the size of each cake layer to ensure proper support without being visible after decorating.
Cake Leveler
Even cake layers are the foundation of a beautiful wedding cake. A cake leveler helps trim away the rounded tops that naturally form during baking, creating flat layers that stack neatly on top of one another.
While a long serrated knife can also be used, a cake leveler provides more consistent results, especially for beginners. Level layers reduce the chances of leaning and make frosting much easier to apply evenly.
Having these essential tools ready before you begin decorating allows you to work more confidently and achieve cleaner, more polished results. Even a simple buttercream design becomes easier when your equipment is prepared in advance.
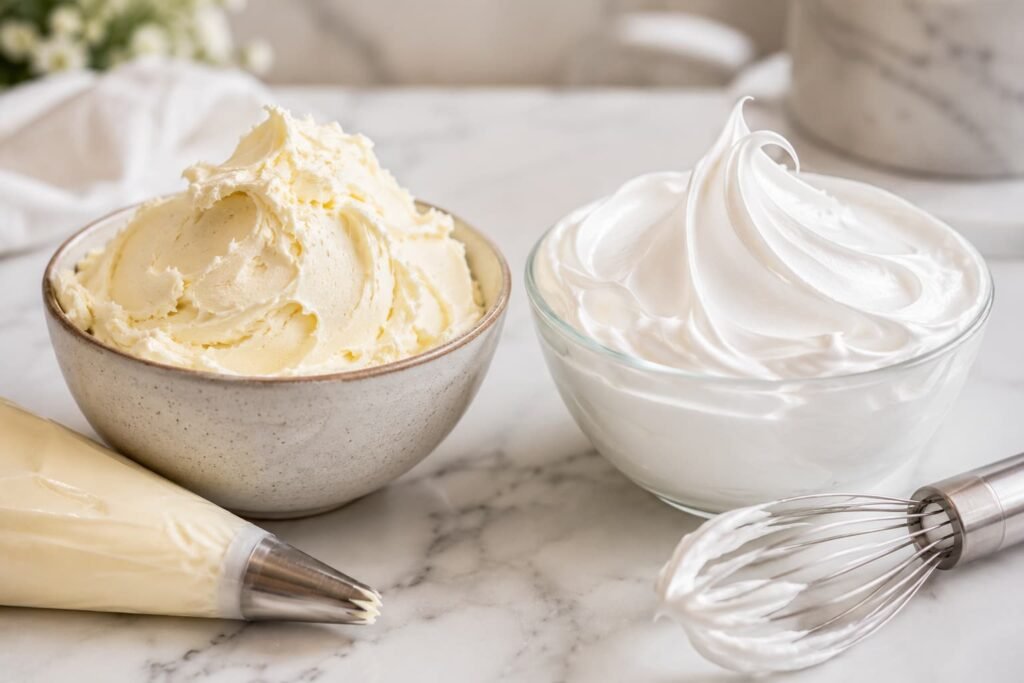
Best Buttercream for Wedding Cakes
Choosing the right buttercream frosting for a wedding cake is just as important as choosing the cake itself. Different types of buttercream vary in sweetness, texture, stability, and ease of decorating. Two of the most popular choices are American Buttercream and Swiss Meringue Buttercream. Each has its own strengths, and the best option depends on your decorating style, experience, and the conditions in which the cake will be served.
American Buttercream
American buttercream is one of the easiest frostings to prepare, making it a popular choice for home bakers and beginners. It is made by mixing butter with powdered sugar, vanilla extract, and a small amount of cream or milk until light and fluffy.
Its thick consistency makes it suitable for piping flowers, decorative borders, and textured finishes. It also develops a slight crust after sitting for a while, making it easier to smooth using a bench scraper.
Advantages
- Quick and simple to prepare with everyday ingredients.
- Excellent for decorating, piping, and textured buttercream designs.
- Holds its shape well for most indoor celebrations.
- Easy to repair if small decorating mistakes occur.
Limitations
- Sweeter than other buttercream varieties.
- Can become softer in very warm temperatures.
- The texture is slightly heavier than meringue-based buttercreams.
Best Use
American buttercream is ideal for beginners, rustic wedding cakes, textured buttercream finishes, piped flowers, and celebrations where simplicity and reliability are the priority.
Swiss Meringue Buttercream
Swiss Meringue Buttercream is made by gently heating egg whites and sugar before whipping them into a glossy meringue and gradually adding butter. The result is a silky, smooth frosting with a lighter texture and a less sweet flavor than American buttercream.
Its refined finish makes it a favorite for smooth wedding cakes and elegant modern designs. Although it requires a little more time and attention to prepare, many bakers appreciate its balanced flavor and luxurious texture.
Advantages
- Smooth, silky texture with a refined finish.
- Less sweet than American buttercream.
- Creates exceptionally smooth sides on wedding cakes.
- Pairs well with delicate cake flavors and fruit fillings.
Limitations
- Requires more preparation time.
- Can be challenging for first-time bakers.
- Sensitive to temperature changes during mixing.
Best Use
Swiss Meringue Buttercream is an excellent choice for elegant buttercream wedding cakes, smooth modern designs, and occasions where a lighter frosting is preferred.
Which One Should You Choose?
Both buttercream styles can produce beautiful wedding cakes, so the right choice depends on your experience and the look you want to achieve.
If you’re baking your first buttercream wedding cake, American buttercream is usually the better option. It is easier to prepare, more forgiving during decorating, and simpler to repair if you make small mistakes. For many home bakers, it provides the confidence needed to create a beautiful cake without unnecessary stress.
If you already have some cake decorating experience and prefer a frosting that is lighter, smoother, and less sweet, Swiss Meringue Buttercream offers a more refined finish. It works particularly well for elegant wedding cakes with clean edges and minimal decoration.
Whichever frosting you choose, consistency is the key to success. A properly prepared buttercream that is neither too stiff nor too soft will spread more smoothly, support decorative details more effectively, and help you achieve a professional-looking result from the first layer to the final finish.
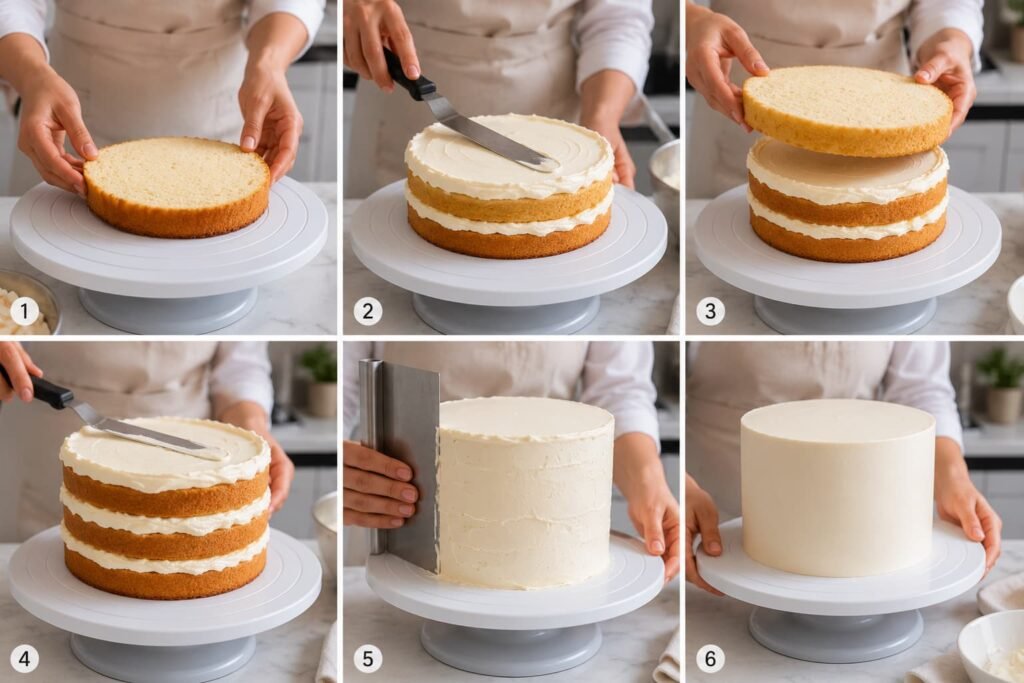
Step-by-Step Buttercream Wedding Cake Recipe
Making a buttercream wedding cake is much easier when you focus on one step at a time instead of trying to finish everything in a single day. Professional-looking results come from careful preparation, patience, and allowing enough time for cooling and chilling between stages. Whether you’re baking for your own wedding or creating a cake for someone special, following this step-by-step method will help you build a cake that’s stable, beautifully decorated, and delicious from the first slice to the last.
Bake the Cake Layers
Begin by preheating your oven to the temperature recommended in your recipe, usually 350°F (175°C) for most butter-based cakes. Grease your cake pans, line the bottoms with parchment paper, and lightly dust the sides with flour or baking spray to help the layers release cleanly after baking.
Divide the batter evenly between the prepared pans. Using a digital kitchen scale is one of the easiest ways to ensure each layer bakes to the same height, which makes stacking much easier later. Bake until the tops are lightly golden and a toothpick inserted into the center comes out clean or with a few moist crumbs. Avoid opening the oven during the first part of baking because sudden temperature changes can cause the cake to sink in the middle.
After removing the cakes from the oven, allow them to cool in the pans for about 10 minutes before carefully transferring them to a wire rack. Moving them too soon can cause delicate layers to crack, while leaving them in the pan for too long may trap steam and create a soggy bottom.
Cool Completely
Never frost a warm cake. Even slight warmth can melt buttercream, making it slide off the sides and creating an uneven finish that’s difficult to repair.
Allow the cake layers to cool completely on a wire rack. If you’re preparing the cake in advance, wrap each cooled layer tightly in plastic wrap and store it overnight at room temperature or freeze it for longer storage. Slightly chilled cake layers are often easier to handle because they produce fewer crumbs during frosting and hold their shape better while stacking.
If you’ve frozen the layers, let them thaw in their wrapping before decorating. This helps retain moisture and prevents condensation from forming directly on the cake.
Prepare the Buttercream
Prepare your buttercream frosting while the cake layers cool. Beat the butter until it’s pale, smooth, and fluffy before gradually adding powdered sugar and the remaining ingredients. This extra mixing time creates a lighter texture and helps eliminate small lumps that can affect the final finish.
Pay close attention to the consistency. If the buttercream feels too thick, add heavy cream or milk one tablespoon at a time until it spreads smoothly. If it becomes too soft, refrigerate it for 10 to 15 minutes rather than adding extra powdered sugar, which can make the frosting overly sweet and heavier than necessary.
A smooth, spreadable buttercream should hold soft peaks while still gliding easily across the cake without tearing the surface.
Level the Cake
Most cake layers develop a slight dome during baking, and leaving it in place can cause the finished cake to lean. Before assembling your homemade wedding cake, trim each layer with a cake leveler or a long serrated knife until the tops are completely flat.
Work slowly and remove only the raised portion. Cutting away too much cake can make the layers thinner than intended. Flat, even layers distribute weight more evenly, making both stacking and decorating much easier.
If you’re making a multi-tier cake, double-check that every layer is level before moving to the next step. Small differences become much more noticeable after the tiers are stacked.
Add Filling
Place the first cake layer on a sturdy cake board or serving plate and spread an even layer of buttercream or your chosen filling across the surface. Popular options such as raspberry jam, lemon curd, chocolate ganache, or vanilla pastry cream add extra flavor while complementing the buttercream instead of overpowering it.
Before adding softer fillings, pipe a ring of buttercream around the outer edge of the cake. This simple barrier, often called a buttercream dam, helps prevent fillings from leaking out once the upper layers are added. It’s a small step that can make a big difference, especially on taller cakes.
Spread the filling evenly without extending it beyond the buttercream border to keep the finished cake neat and stable.
Apply the Crumb Coat
The crumb coat is a thin layer of buttercream that seals loose crumbs before the final decoration. Although some beginners are tempted to skip this stage, it’s one of the easiest ways to achieve a clean, professional-looking finish.
Using an offset spatula, apply a thin layer of frosting over the entire cake. The goal isn’t perfection but simply trapping crumbs so they don’t mix into the final coat. If you notice crumbs collecting on your spatula, wipe it clean before continuing to keep the frosting smooth.
Taking a few extra minutes here saves time later and makes the final layer much easier to finish.
Chill the Cake
Place the crumb-coated cake in the refrigerator for 20 to 30 minutes or until the buttercream feels firm to the touch. Chilling creates a solid foundation that prevents the final layer from dragging crumbs through the frosting.
This resting period is especially important in warm kitchens, where soft buttercream can become difficult to control. Skipping the chilling step often results in uneven frosting, visible crumbs, or buttercream that shifts while smoothing.
Professional bakers rarely skip this stage because it makes the decorating process far more predictable.
Apply the Final Coat
Once the crumb coat has chilled, cover the cake with a generous layer of fresh buttercream. It’s easier to remove excess frosting than to add more later, so don’t worry about applying slightly more than you need.
If you’re assembling a two-tier or three-tier buttercream wedding cake, finish frosting each tier separately before stacking them. This approach provides better control and reduces the risk of accidentally damaging freshly smoothed buttercream.
Work slowly and rotate the cake as you frost to maintain an even thickness around the entire cake.
Smooth the Buttercream
For smooth, clean sides, place the cake on a turntable and gently rotate it while holding a bench scraper at a slight angle. Let the turntable do most of the work instead of pressing hard against the buttercream. Gentle pressure creates straighter edges and prevents excess frosting from being removed.
If tiny air bubbles appear, warm an offset spatula under hot water, dry it completely, and lightly glide it over the buttercream. This simple technique often produces a silky finish without damaging the frosting.
Don’t chase absolute perfection. Small handcrafted details often give a homemade wedding cake its charm and character.
Decorate Beautifully
Decorating is the stage where your buttercream wedding cake truly comes to life. Choose decorations that complement your wedding theme rather than competing for attention. Buttercream flowers, fresh edible blooms, seasonal berries, pearl sprinkles, and a simple cake topper often create a timeless design without overwhelming the cake.
Try stepping back every few minutes while decorating to view the cake from different angles. It’s much easier to spot uneven borders or decorations before the buttercream begins to set. Keeping some open space between decorative elements also creates a cleaner, more elegant appearance.
If you’re transporting the cake, keep it refrigerated until shortly before leaving and place it on a flat, non-slip surface inside an air-conditioned vehicle whenever possible. This helps protect the buttercream finish and reduces the risk of shifting during travel.
Once everything is complete, you’ll have a homemade buttercream wedding cake that’s not only beautiful to display but also delicious to share with family and friends on one of life’s most memorable occasions.
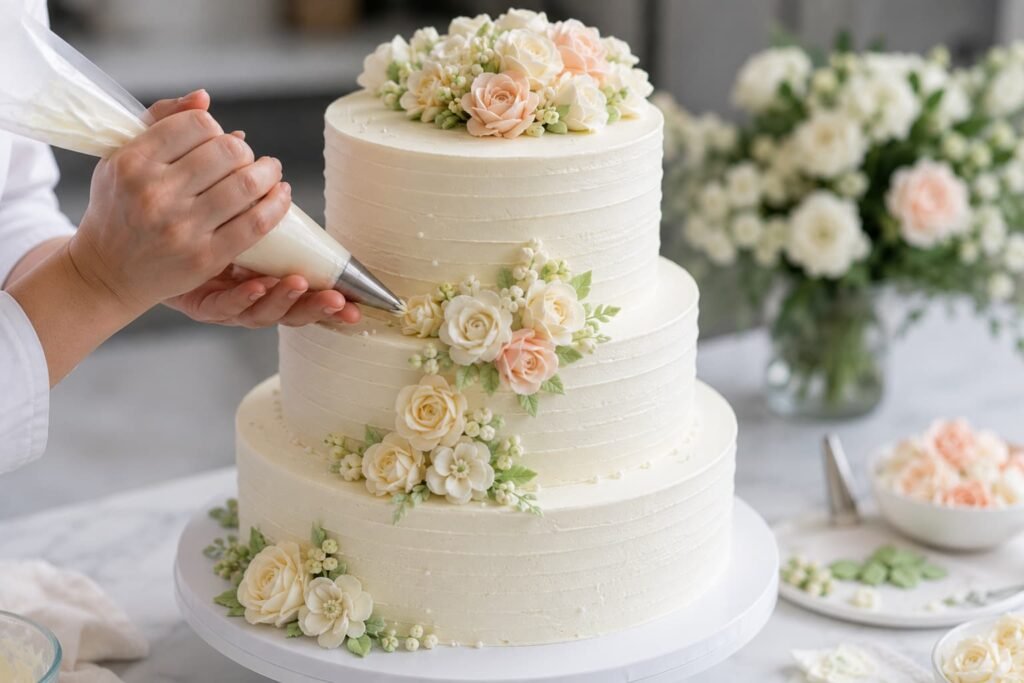
Popular Buttercream Wedding Cake Decorating Ideas
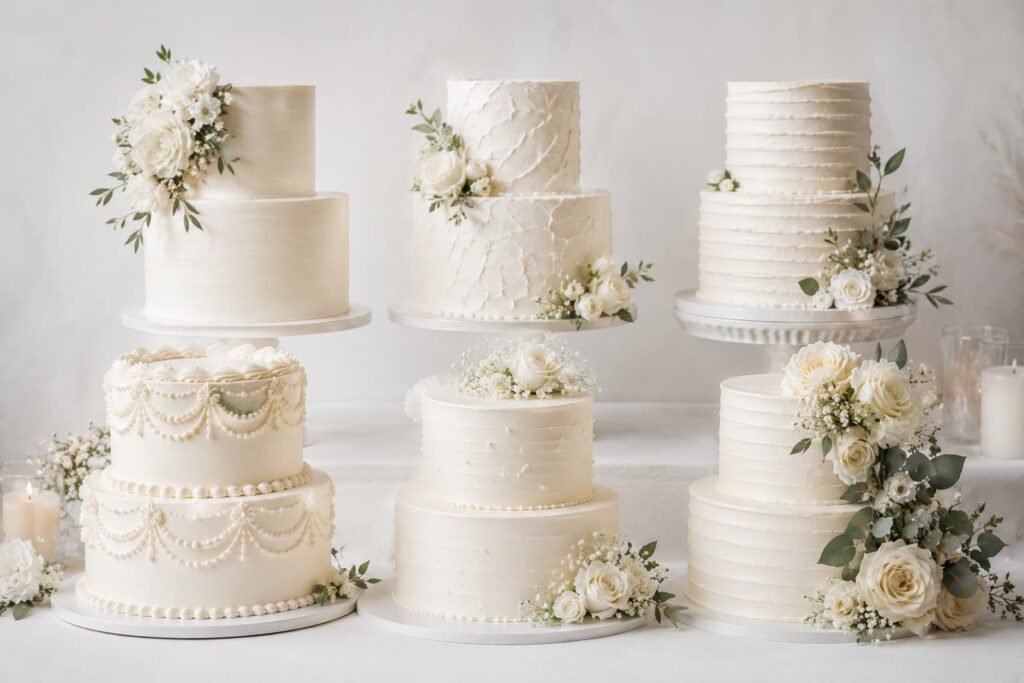
One of the biggest advantages of a buttercream wedding cake is how versatile it can be. Unlike fondant, buttercream allows you to create everything from elegant modern designs to rustic handmade finishes using simple decorating techniques. Whether you’re baking your own wedding cake or decorating one for a client, choosing a design that matches the wedding theme is often more effective than adding excessive decorations.
The best wedding cake designs focus on balance, clean finishing, and thoughtful details rather than complexity. Below are some of the most popular buttercream decorating styles, along with practical tips to help you achieve professional-looking results.
Textured Buttercream
Textured buttercream is perfect for couples who prefer a relaxed yet elegant look. Instead of creating perfectly smooth sides, the buttercream is shaped into soft waves, ridges, or sweeping spatula patterns that give the cake depth and character.
One reason this design remains popular is that it naturally hides small imperfections, making it an excellent choice for beginners. A simple offset spatula or palette knife is all you need to create beautiful textures, especially when working with medium-consistency buttercream. Pairing textured buttercream with fresh greenery or subtle gold accents creates a timeless finish that suits both indoor and outdoor weddings.
Buttercream Flowers
Piped buttercream flowers remain one of the most elegant ways to decorate a wedding cake because they add color and texture while remaining completely edible. Popular flowers include roses, peonies, ranunculus, hydrangeas, and delicate leaves, all created with different piping tips.
If you’re making flowers for the first time, pipe them onto small squares of parchment paper instead of directly onto the cake. Chill them in the refrigerator for 15 to 20 minutes before transferring them using flower scissors or an offset spatula. This simple technique helps preserve their shape and reduces the chance of damaging your finished design.
Instead of covering the entire cake, grouping flowers around the top edge or allowing them to cascade naturally down one side often creates a more refined and balanced appearance.
Rustic Buttercream Finish
Rustic buttercream is designed to celebrate the handmade beauty of a cake rather than hiding every small imperfection. Light spatula strokes, gentle texture, and natural movement create a warm, inviting appearance that’s especially popular for barn weddings, garden ceremonies, and countryside venues.
This style pairs beautifully with eucalyptus, dried flowers, seasonal fruit, wooden cake stands, and neutral color palettes. Because rustic cakes don’t require perfectly smooth sides, they’re also one of the most forgiving decorating styles for home bakers.
Minimalist White Buttercream
A smooth white buttercream wedding cake proves that simple designs can be incredibly elegant. Clean edges, balanced proportions, and a flawless buttercream finish often have a greater visual impact than heavily decorated cakes.
Rather than adding multiple decorative elements, consider using a single floral arrangement, a delicate cake topper, or a narrow band of edible pearls. The simplicity allows every detail to stand out while creating a timeless design that photographs beautifully.
Pearl Details
Edible pearl sprinkles add subtle elegance without overwhelming the overall design. They can be arranged around the base of each tier, scattered lightly across textured buttercream, or used to highlight piped flowers and decorative borders.
Using pearls with restraint usually creates the most sophisticated result. Concentrating them around focal areas rather than covering the entire cake helps maintain a clean, luxurious appearance.
Fresh Flowers (Food-Safe)
Fresh flowers instantly add height, color, and seasonal beauty to a wedding cake, but food safety should always come first. Not every flower is suitable for cake decorating, and some varieties can release harmful substances when placed directly against food.
Whenever possible, choose edible flowers or insert non-edible flowers into food-safe flower picks instead of pushing stems directly into the cake. Popular choices include roses, orchids, chamomile, and edible pansies, while flowers such as lilies, foxglove, hydrangeas, and daffodils should never touch edible surfaces.
Fresh flowers are often most effective when used sparingly, allowing both the flowers and the buttercream design to remain the focal point.
Gold Leaf Accents
Food-grade gold leaf adds a luxurious finish without requiring complicated decorating techniques. Small pieces placed around textured buttercream, beside floral arrangements, or along selected edges create an elegant contrast against white frosting.
Because gold leaf is extremely delicate, use dry tweezers or a clean dry brush during application. Touching it with damp fingers often causes it to tear or wrinkle before it reaches the cake.
Vintage Piping
Vintage piping has become increasingly popular for couples who appreciate timeless European-inspired wedding cakes. Decorative shells, scrolls, ruffles, and intricate borders add texture while maintaining a classic appearance.
Repeating the same piping pattern around every tier creates a balanced design, while limiting yourself to one or two decorative techniques prevents the cake from appearing overly busy.
Semi-Naked Finish
A semi-naked cake uses a very thin layer of buttercream that allows parts of the cake beneath to remain visible. The result feels relaxed, natural, and perfect for outdoor weddings, vineyard celebrations, and rustic venues.
Because less buttercream protects the cake, semi-naked cakes are best decorated close to serving time or stored carefully to prevent the exposed sponge from drying out. Fresh berries, edible flowers, or simple greenery complete this style without overpowering its natural appearance.
Whichever decorating style you choose, remember that consistency is more important than complexity. A clean, thoughtfully decorated cake almost always looks more professional than one filled with too many competing design elements.
How to Make a Stable 2-Tier or 3-Tier Buttercream Wedding Cake
A beautiful 2-tier or 3-tier buttercream wedding cake should not only look impressive but also remain stable from assembly to serving. Proper internal support is what separates a reliable tiered cake from one that leans, cracks, or shifts during transport. Fortunately, creating a stable wedding cake is straightforward when you follow a few essential techniques.
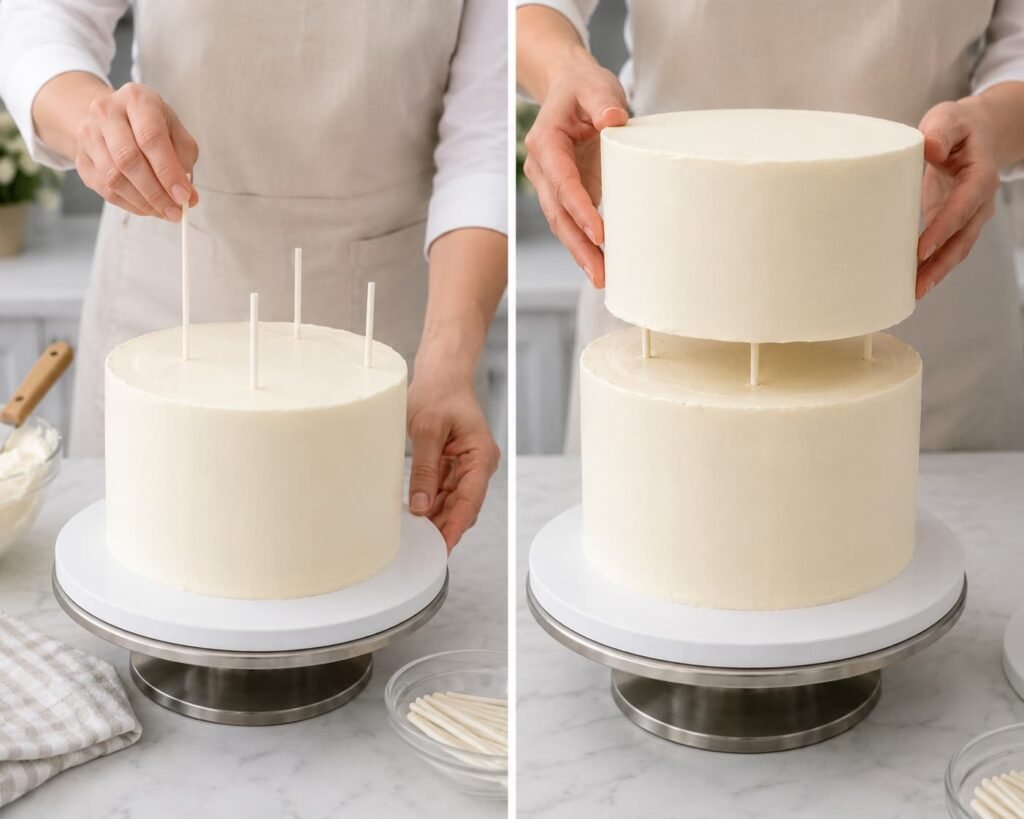
Use Cake Dowels for Internal Support
Cake dowels act as hidden support columns that carry the weight of the upper tiers instead of allowing it to rest directly on the cake below. After frosting the bottom tier, insert food-safe wooden or plastic dowels in a circular pattern beneath where the next tier will sit.
Trim each dowel individually after inserting it into the cake. Even cakes baked in identical pans often vary slightly in height, and dowels that are even a few millimeters uneven can cause the finished cake to tilt.
Place Every Tier on Its Own Cake Board
Every cake tier should sit on a sturdy cake board cut to the same diameter as the cake itself. The board spreads weight evenly across the dowels while making each tier easier to lift during assembly.
Without individual boards, upper tiers can compress the cake beneath them, causing bulging buttercream, cracked frosting, or an uneven appearance. Strong cake boards are just as important as the dowels supporting them.
Stack the Cake Carefully
Always chill each tier before stacking. Firm buttercream is easier to handle, less likely to collect fingerprints, and far less prone to shifting during assembly.
Lower each tier gently into position while checking that it’s centered from every angle. For taller wedding cakes, inserting one central dowel through all completed tiers provides extra stability and helps keep the cake secure throughout transportation.
Never rush the stacking process. Taking a few extra minutes to align each tier properly can prevent hours of repair work later.
Transport the Cake Safely
Transportation is often the final challenge for a buttercream wedding cake. Before leaving, refrigerate the completed cake for at least one hour so the buttercream firms up. A chilled cake is much more resistant to movement, fingerprints, and accidental bumps.
Place the cake on a flat, non-slip surface in an air-conditioned vehicle rather than on a seat. Avoid sudden braking, sharp turns, and uneven roads whenever possible. Never leave the cake inside a parked vehicle during warm weather, as rising temperatures can soften the buttercream surprisingly quickly.
For large weddings, transporting each tier separately and completing the final assembly at the venue is often the safest approach. Professional bakers use this method regularly because it significantly reduces the risk of damage during travel.
With properly trimmed dowels, sturdy cake boards, careful stacking, and thoughtful transportation, your 2-tier or 3-tier buttercream wedding cake will remain stable, attractive, and ready to impress guests from the first photograph to the final slice.
Common Mistakes to Avoid When Making a Buttercream Wedding Cake
Making a beautiful buttercream wedding cake takes more than following a recipe. Small mistakes during baking, frosting, or stacking can affect both the appearance and stability of the finished cake. The good news is that most of these problems are easy to avoid once you know what to look for. Understanding these common mistakes before you begin will help you decorate with more confidence and achieve a cleaner, more professional result.
Frosting a Warm Cake
Applying buttercream before the cake has cooled completely is one of the fastest ways to ruin a smooth finish. Even a small amount of leftover warmth can soften the frosting, causing it to slide down the sides, lose its shape, and become difficult to smooth.
Allow every cake layer to cool completely before decorating. If you’re unsure, gently touch the center of the cake. It should feel completely cool with no warmth remaining. Waiting a little longer is always better than trying to repair melted buttercream later.
Using Buttercream That Is Too Thin
The consistency of your buttercream frosting plays a major role in the final appearance of the cake. Frosting that is too soft struggles to hold sharp edges, support piped decorations, or keep cake layers securely in place.
If the buttercream becomes too loose, place the bowl in the refrigerator for 10 to 15 minutes before mixing it again on low speed. Avoid adding large amounts of powdered sugar as a quick fix because this can make the frosting overly sweet and heavier than necessary. The ideal buttercream should spread smoothly while still holding soft peaks and clean decorative details.
Skipping the Crumb Coat
It may be tempting to skip the crumb coat to save time, but doing so often creates more work later. Without this thin layer of frosting, loose crumbs can become trapped in the final coat, making it difficult to achieve a smooth, clean finish.
A crumb coat locks those crumbs in place and creates a stable surface for decorating. After applying it, refrigerate the cake until the buttercream feels firm before continuing. This simple step makes the final coat easier to apply and produces a much more polished buttercream wedding cake.
Overmixing the Buttercream
After all the ingredients have been combined, excessive mixing can trap tiny air bubbles inside the buttercream. These bubbles often appear when smoothing the cake, leaving small holes across the surface that are difficult to remove.
Mix only until the frosting becomes smooth and creamy. If air bubbles develop, gently fold the buttercream with a silicone spatula or mix on the lowest speed for a few minutes. This helps release trapped air while keeping the buttercream silky and easy to spread.
Unstable Stacking
A tiered wedding cake depends on proper internal support. Placing one cake tier directly on another without dowels and cake boards can cause leaning, bulging buttercream, cracked frosting, or even collapse under the weight.
Always insert food-safe dowels into the lower tiers and place every tier on its own sturdy cake board. Before stacking, check that each dowel has been trimmed individually to match the exact height of the cake. Even small differences can affect the balance of the finished cake.
Using Butter That Is Too Soft
Butter should be soft enough to mix easily but not so warm that it loses its structure. Overly soft butter creates frosting that feels loose, making it difficult to pipe flowers, create sharp edges, or support decorative details.
For the best results, use butter at cool room temperature. It should leave a slight indentation when pressed with your finger while still holding its shape. This balance produces buttercream that is creamy, stable, and much easier to decorate with.
Not Chilling Between Coats
Applying the final layer of frosting immediately after the crumb coat often causes crumbs to drag through the buttercream or creates uneven patches while smoothing.
Allow the crumb-coated cake to chill in the refrigerator for about 20 to 30 minutes before applying the final coat. Professional bakers rarely skip this step because firm buttercream provides a much more stable surface for achieving clean edges and smooth sides.
Every experienced cake decorator has made one or more of these mistakes at some point. Taking your time and following each stage carefully will almost always produce better results than rushing to finish quickly.
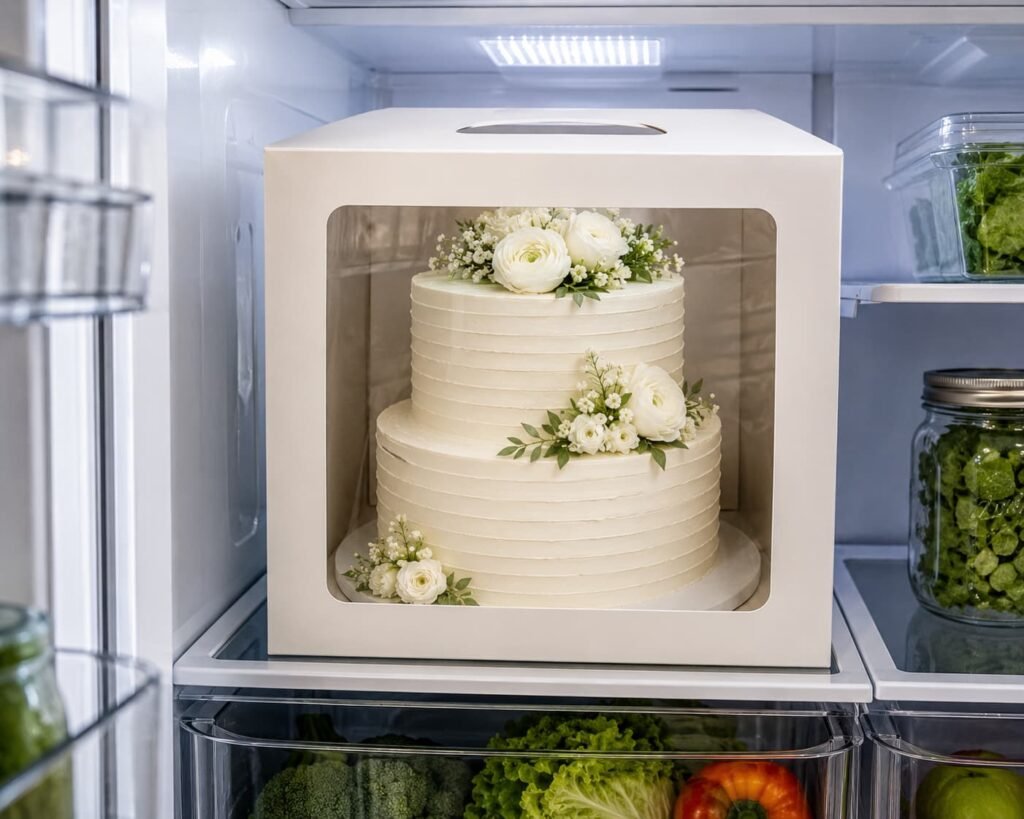
Storage Tips for a Buttercream Wedding Cake
Once your buttercream wedding cake is finished, proper storage becomes just as important as careful decorating. Correct storage helps preserve the cake’s moisture, keeps the buttercream looking fresh, and protects delicate decorations until it’s time to serve. Whether you’re preparing the cake a day in advance or several weeks ahead, choosing the right storage method will help maintain both its appearance and flavor.
Storing in the Refrigerator
If you’ll be serving the cake within the next two or three days, refrigeration is usually the best choice. Once the buttercream has firmed up, cover the cake loosely with a cake box or cake dome to protect it from dust while preventing it from absorbing odors from other foods stored in the refrigerator.
About one to two hours before serving, remove the cake from the refrigerator and allow it to come closer to room temperature. As the buttercream softens slightly, its texture becomes creamier and the cake’s flavor is easier to appreciate.
Freezing for Longer Storage
A buttercream wedding cake freezes surprisingly well when prepared correctly. Begin by placing the decorated cake in the freezer uncovered for about one hour so the buttercream becomes firm. Once the frosting has hardened, wrap the cake carefully in several layers of plastic wrap followed by aluminum foil or place it inside a large airtight container.
When it’s time to thaw the cake, transfer it to the refrigerator while keeping it fully wrapped. Allow it to thaw slowly overnight before removing the wrapping. This method helps reduce condensation and protects the buttercream from becoming sticky or damaged.
Keeping the Cake at Room Temperature
If the wedding or celebration is taking place later the same day, the cake can usually remain at room temperature for several hours in a cool environment. Keep it away from direct sunlight, ovens, heaters, and windows where temperatures can increase unexpectedly.
Warm or humid conditions soften buttercream quickly and may affect decorative details such as piped flowers, textured finishes, or sharp edges. During hot weather, it’s safer to keep the cake refrigerated until shortly before serving.
Transporting the Cake Safely
Transporting a wedding cake requires careful planning, especially if you’re working with multiple tiers. Before moving the cake, chill it until the buttercream feels firm. Cold buttercream is far less likely to develop fingerprints or shift during transportation.
Place the cake on a flat, non-slip surface inside an air-conditioned vehicle rather than on a passenger seat. Drive carefully, avoiding sudden braking, sharp turns, and rough roads whenever possible. Never leave the cake inside a parked vehicle during warm weather, as the temperature can rise quickly and soften the buttercream.
For larger celebrations, many professional bakers transport each tier separately and complete the final assembly at the venue. This greatly reduces the risk of damage and makes handling a 2-tier or 3-tier buttercream wedding cake much safer.
Proper storage and careful transportation protect the time and effort you’ve invested in your cake. By following these simple practices, your buttercream wedding cake will remain fresh, stable, and ready to impress guests from the first photograph to the final slice.
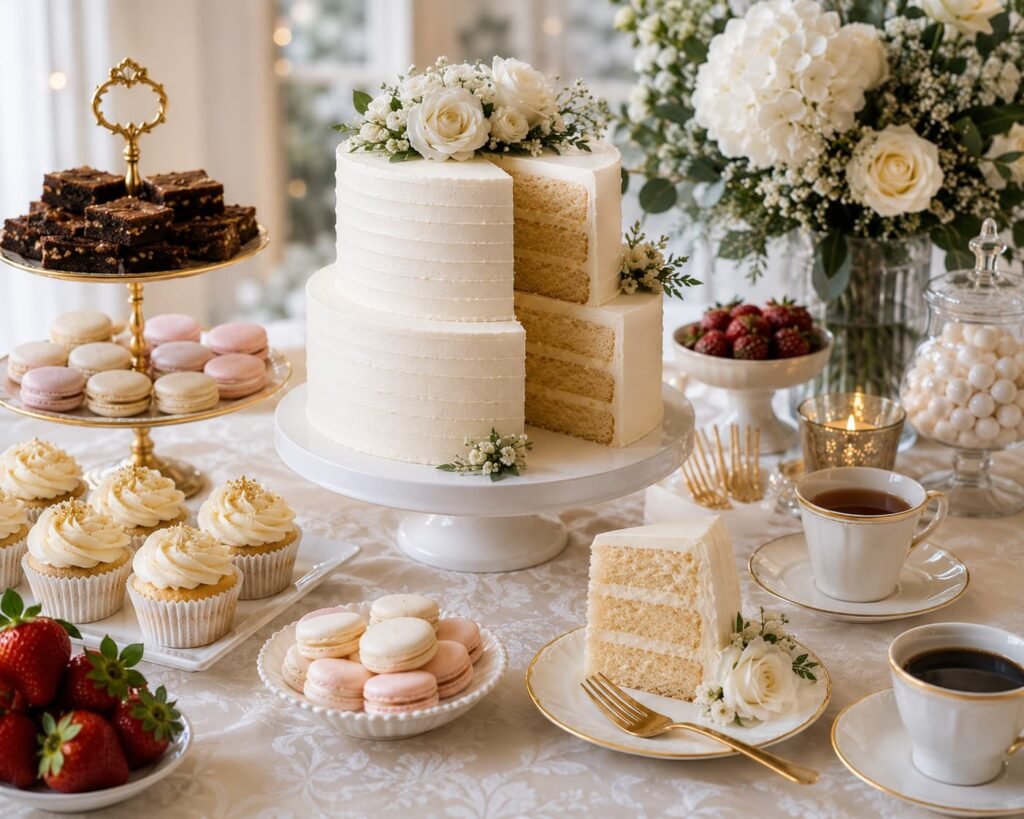
Serving Suggestions for a Buttercream Wedding Cake
A beautifully made buttercream wedding cake deserves to be served with the same attention to detail that went into baking and decorating it. The way you slice, present, and pair the cake with drinks and desserts can make the entire dessert experience more memorable for your guests. Whether you’re hosting a small family wedding or a large reception, thoughtful serving choices help your homemade cake become the highlight of the celebration.
Serving Sizes by Cake Tier
Before baking your buttercream wedding cake, it’s helpful to estimate how many guests you’ll be serving. Wedding cake slices are usually smaller than everyday dessert portions, allowing each tier to serve more people while still providing a satisfying piece.
As a general guideline, a 6-inch cake usually serves 12 to 18 guests, an 8-inch cake serves approximately 24 to 32 guests, and a 10-inch cake serves around 38 to 50 guests when cut into traditional wedding portions.
If you’re planning a 2-tier buttercream wedding cake using 6-inch and 8-inch tiers, you can typically expect 35 to 50 servings. A 3-tier buttercream wedding cake with 6-inch, 8-inch, and 10-inch tiers generally serves 70 to 100 guests, depending on slice size.
If your guest count falls between two cake sizes, preparing a few extra servings is usually the safer choice. Having leftover cake is far better than running out before everyone has been served.
Best Beverages to Serve
Because buttercream has a rich, creamy texture, it pairs best with drinks that refresh the palate instead of adding more sweetness.
Freshly brewed coffee and espresso remain classic choices because their bold flavor balances sweet buttercream beautifully. Tea is another excellent option, especially varieties such as Earl Grey, English Breakfast, chamomile, jasmine, or green tea, which pair well with vanilla, almond, lemon, and fruit-flavored cakes.
For spring and summer weddings, sparkling water with citrus slices, homemade lemonade, iced tea, or lightly flavored fruit-infused water offers a refreshing contrast. If children are attending, cold milk or chocolate milk also complements classic vanilla and chocolate buttercream cakes surprisingly well.
Choosing beverages with balanced flavors allows the wedding cake to remain the centerpiece of the dessert course instead of competing with overly sweet drinks.
Wedding Dessert Table Pairings
A buttercream wedding cake naturally becomes the focal point of a dessert table, but adding a few complementary desserts gives guests more variety while creating a polished presentation.
Mini cupcakes, French macarons, chocolate-covered strawberries, cake pops, decorated sugar cookies, lemon bars, brownies, fruit tarts, mini cheesecakes, and fresh seasonal berries all pair beautifully with buttercream. Offering desserts with different textures, such as crisp cookies alongside soft cakes and fresh fruit, creates a more balanced dessert selection.
Instead of filling the table with too many choices, focus on four or five desserts that coordinate in color and style with the wedding cake. A clean, thoughtfully arranged dessert table often looks more elegant than one crowded with too many different items.
Frequently Asked Questions About Buttercream Wedding Cake
Can beginners make a buttercream wedding cake?
Yes. Many beginners successfully make their first buttercream wedding cake by choosing a simple design and following each step carefully. Starting with a single-tier or two-tier cake allows you to build confidence before attempting more advanced decorations or larger stacked cakes.
Which buttercream is easiest for beginners?
American buttercream is generally the easiest choice because it uses simple ingredients, comes together quickly, and holds its shape well for piping and smoothing. It is also more forgiving if you’re still learning decorating techniques.
How far ahead can I bake the cake layers?
Cake layers can usually be baked two or three days before decorating if wrapped tightly and refrigerated. For longer preparation, the layers freeze well for several weeks when properly wrapped, making wedding planning much less stressful.
Can I freeze a buttercream wedding cake?
Yes. A decorated buttercream wedding cake freezes well when stored correctly. Freeze the cake until the buttercream becomes firm, then wrap it securely with plastic wrap followed by aluminum foil or place it inside a large airtight container. Thaw the cake slowly in the refrigerator while keeping it wrapped to reduce condensation.
Does buttercream melt in warm weather?
Buttercream doesn’t melt immediately, but it softens as temperatures increase. Direct sunlight, outdoor summer weddings, and hot reception venues can affect both the texture and stability of the frosting. Keeping the cake refrigerated until shortly before serving helps preserve its appearance.
How many servings does a buttercream wedding cake provide?
Serving size depends on the diameter of each tier and how the cake is sliced. A typical 2-tier buttercream wedding cake often serves 35 to 50 guests, while many 3-tier cakes comfortably serve 70 to 100 guests. Wedding-style slices are smaller than traditional dessert portions, allowing the cake to serve more people.
Can I decorate the cake with fresh flowers?
Yes, provided the flowers are food-safe. Edible flowers are always the safest option. If using decorative flowers that are not edible, place each stem inside food-safe flower picks before arranging them on the cake. This prevents direct contact between the stems and the cake.
How long does decorating usually take?
The decorating time depends on the complexity of the design. A smooth buttercream finish may take around one to two hours, while piped flowers, textured finishes, and multiple tiers may require several additional hours. Planning extra decorating time allows you to work carefully without feeling rushed.
Can I prepare the buttercream in advance?
Yes. Buttercream can be made one or two days ahead and stored in the refrigerator. Before decorating, allow it to soften slightly at room temperature, then remix on low speed until smooth and creamy again. This restores the texture without adding unnecessary air bubbles.
Why isn’t my buttercream perfectly smooth?
Several factors can affect the finish, including trapped air bubbles, frosting that is too warm or too cold, or buttercream that is either too thick or too soft. Adjusting the consistency, mixing gently on low speed, and finishing with a slightly warmed offset spatula usually produces a much smoother surface.
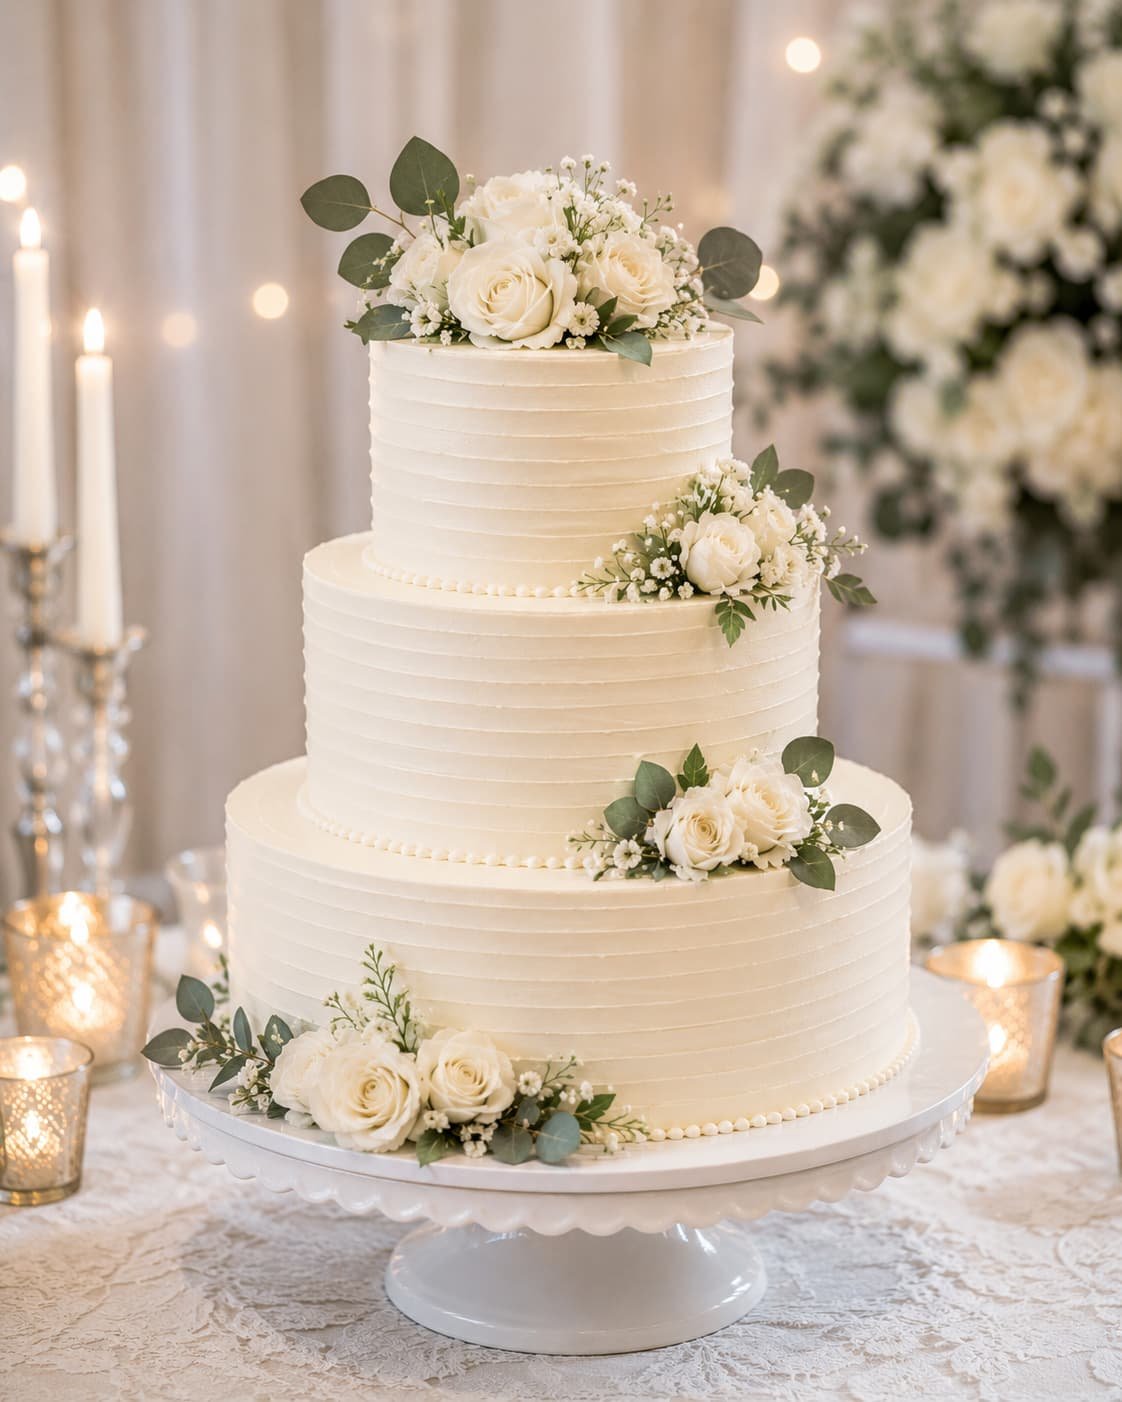
Final Thoughts
Creating a buttercream wedding cake is a rewarding project that combines careful planning, patience, and creativity. While the process may seem challenging at first, each stage becomes much easier when you focus on one step at a time. From baking even cake layers and preparing smooth buttercream to stacking the tiers securely and choosing decorations that suit your wedding style, every detail contributes to the finished cake.
The most successful homemade wedding cakes are not necessarily the most elaborate. They are the ones built on good preparation, proper techniques, and attention to detail. Allowing enough time for cooling, chilling between frosting coats, and supporting each tier correctly will improve both the appearance and stability of the cake.
Don’t be discouraged if your first attempt isn’t flawless. Every experienced baker improves through practice, and even small refinements in smoothing, piping, or stacking can make a noticeable difference. Taking time to practice one or two decorating techniques before the big day will help you work more confidently when assembling the final cake.
Whether you’re baking for your own wedding, helping a family member, or surprising a close friend, a homemade buttercream wedding cake carries a personal touch that no store-bought cake can replace. With thoughtful preparation, the right tools, and the guidance you’ve learned throughout this article, you’ll be well prepared to create a beautiful centerpiece that’s every bit as enjoyable to serve as it is to admire.