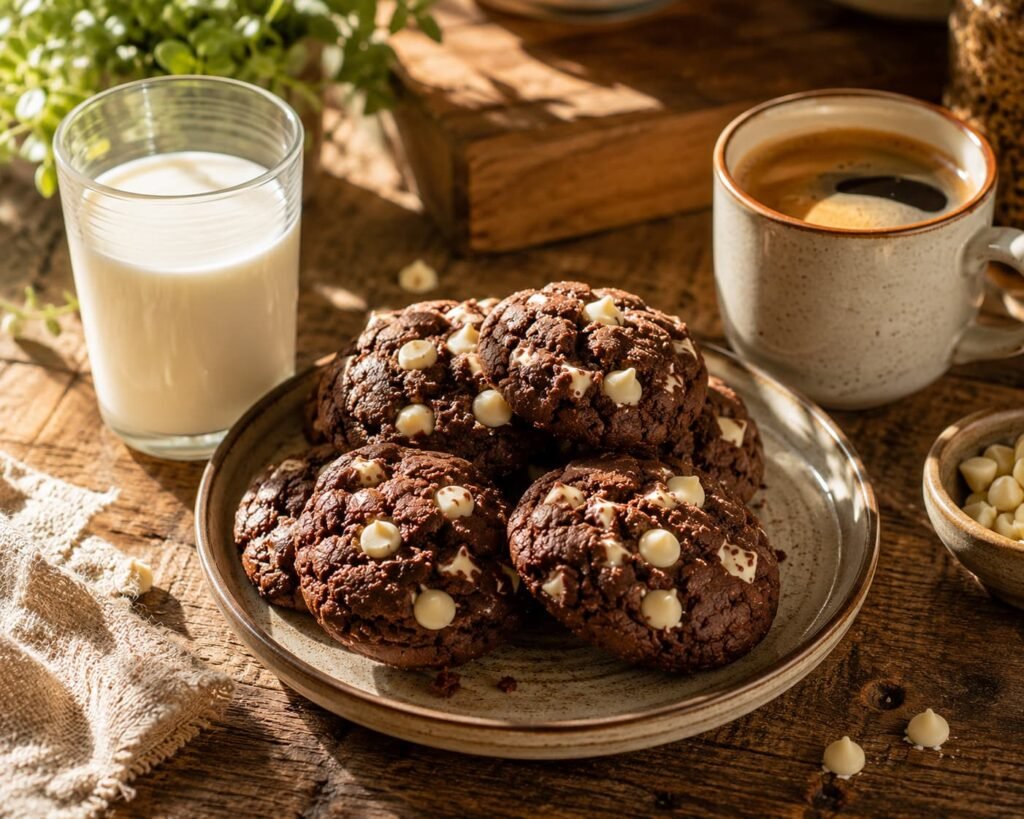
chocolate cookies

Soft and Chewy Chocolate Cookies with White Chocolate Chips

Facebook
LinkedIn
Pinterest
WhatsApp

Table of Contents

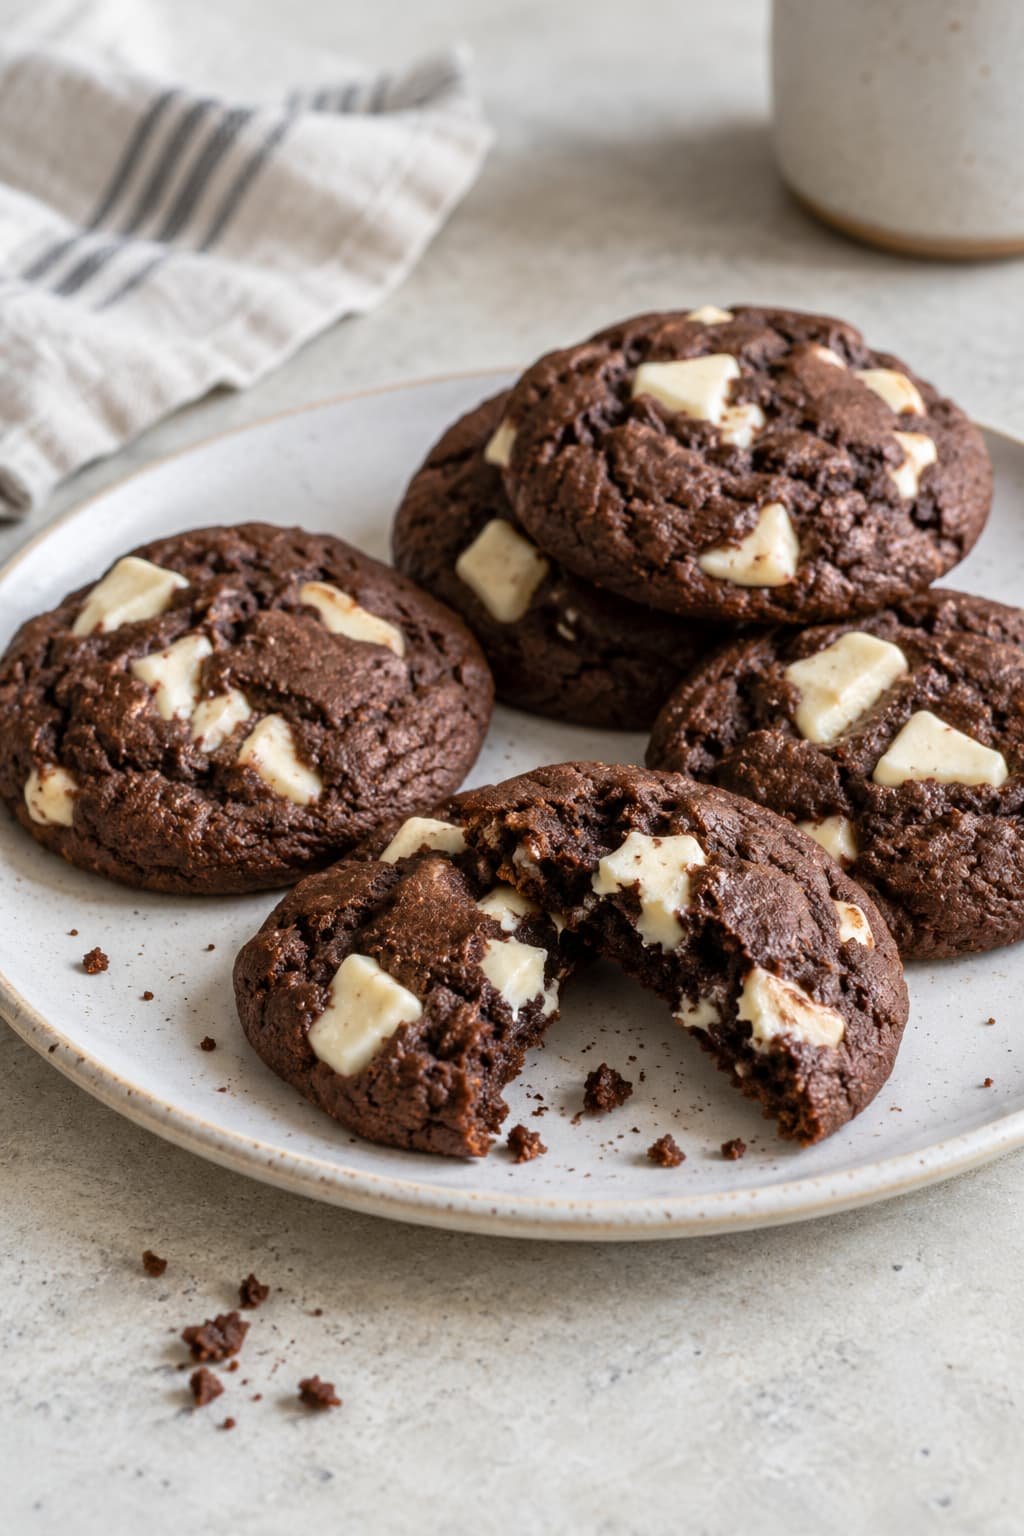
These chocolate cookies with white chocolate chips pair a rich cocoa cookie base with smooth, creamy pieces of white chocolate. Each cookie has lightly crisp edges, a soft center, and a chewy texture that remains tender after cooling.

The dough is made with simple baking ingredients and requires only a short chilling time to reduce excessive spreading. Because chocolate cookie dough is already dark, color is not a reliable sign of doneness. The most important step is removing the cookies when the edges are set but the centers still appear slightly soft.

Quick Recipe Overview

Recipe detail Information
Prep time 15 minutes
Chill time 30 minutes
Bake time 9 to 11 minutes per batch
Total time About 55 minutes for one batch; allow extra time when baking on multiple trays
Yield About 18 medium cookies
Cookie texture Lightly crisp edges with soft, chewy centers
Difficulty Beginner friendly
Best served Slightly warm or fully cooled
Essential equipment Mixing bowls, electric mixer or sturdy whisk, cookie scoop, baking sheet, parchment paper, and cooling rack

For the best texture, take the cookies out of the oven as soon as the edges look firm and the surface of the centers no longer appears wet. The middle may still seem underdone, but the cookies will continue to set on the warm baking sheet.

Leave them on the tray for about five minutes before transferring them to a cooling rack. Baking until the centers feel firm in the oven can result in dry, hard cookies once they cool.

breakfast pastry recipes

Why You Will Love These Chocolate Cookies

These homemade chocolate cookies combine a soft texture, clear cocoa flavor, and creamy white chocolate in a recipe that is easy to prepare. The dough needs no rolling or complicated shaping, making the cookies suitable for everyday baking, dessert trays, and casual gatherings.

Soft Centers and Chewy Edges

The cookies bake with set edges and centers that remain slightly soft when they come out of the oven. As they rest on the warm baking sheet, the centers finish setting without becoming dry.

This produces a cookie that holds its shape but still bends and breaks apart easily. The texture is denser and chewier than a cakey cookie, without becoming hard or overly crisp after cooling.

Clear Cocoa Flavor

Cocoa powder gives the dough a noticeable chocolate taste throughout each cookie. Its deeper flavor helps balance the sweetness of the white chocolate, so neither element completely overpowers the other.

The finished cookies have a chocolate-forward base rather than tasting like ordinary chocolate chip cookies with a small amount of cocoa added.

Creamy White Chocolate in Every Bite

White chocolate chips soften during baking and create smooth, sweet pockets throughout the darker cookie dough. Their creamy flavor contrasts with the stronger cocoa base while keeping the overall taste balanced.

The pale chips also remain visible on the surface of the cookies, giving the finished batch a clear chocolate and white chocolate appearance without icing or decoration.

A Straightforward Homemade Method

The dough is prepared with basic mixing equipment and portioned with a cookie scoop or spoon. There is no rolling, cutting, or individual shaping beyond forming even portions for the baking sheet.

A short chilling period firms the dough before baking and helps the cookies spread more evenly. The method is approachable for less-experienced bakers, provided the ingredients are measured accurately and the cookies are removed while the centers are still slightly soft.

Ingredients You Will Need

homemade breakfast pastries

These chocolate cookies with white chocolate chips use basic baking ingredients, but accurate measurements are essential. Too much flour or cocoa can make the dough dry, while butter that is too warm may cause the cookies to spread excessively.

The full measurements are listed in the recipe card. The notes below explain the ingredients that have the greatest effect on flavor, texture, and spreading.

All Purpose Flour

All purpose flour gives the cookies enough structure to hold their shape while keeping the centers tender. For the most consistent result, weigh the flour with a kitchen scale.

When using measuring cups, loosen the flour, spoon it into the cup, and level the top without pressing it down. Scooping directly from the container can pack in too much flour, resulting in stiff dough and dry or cakey cookies.

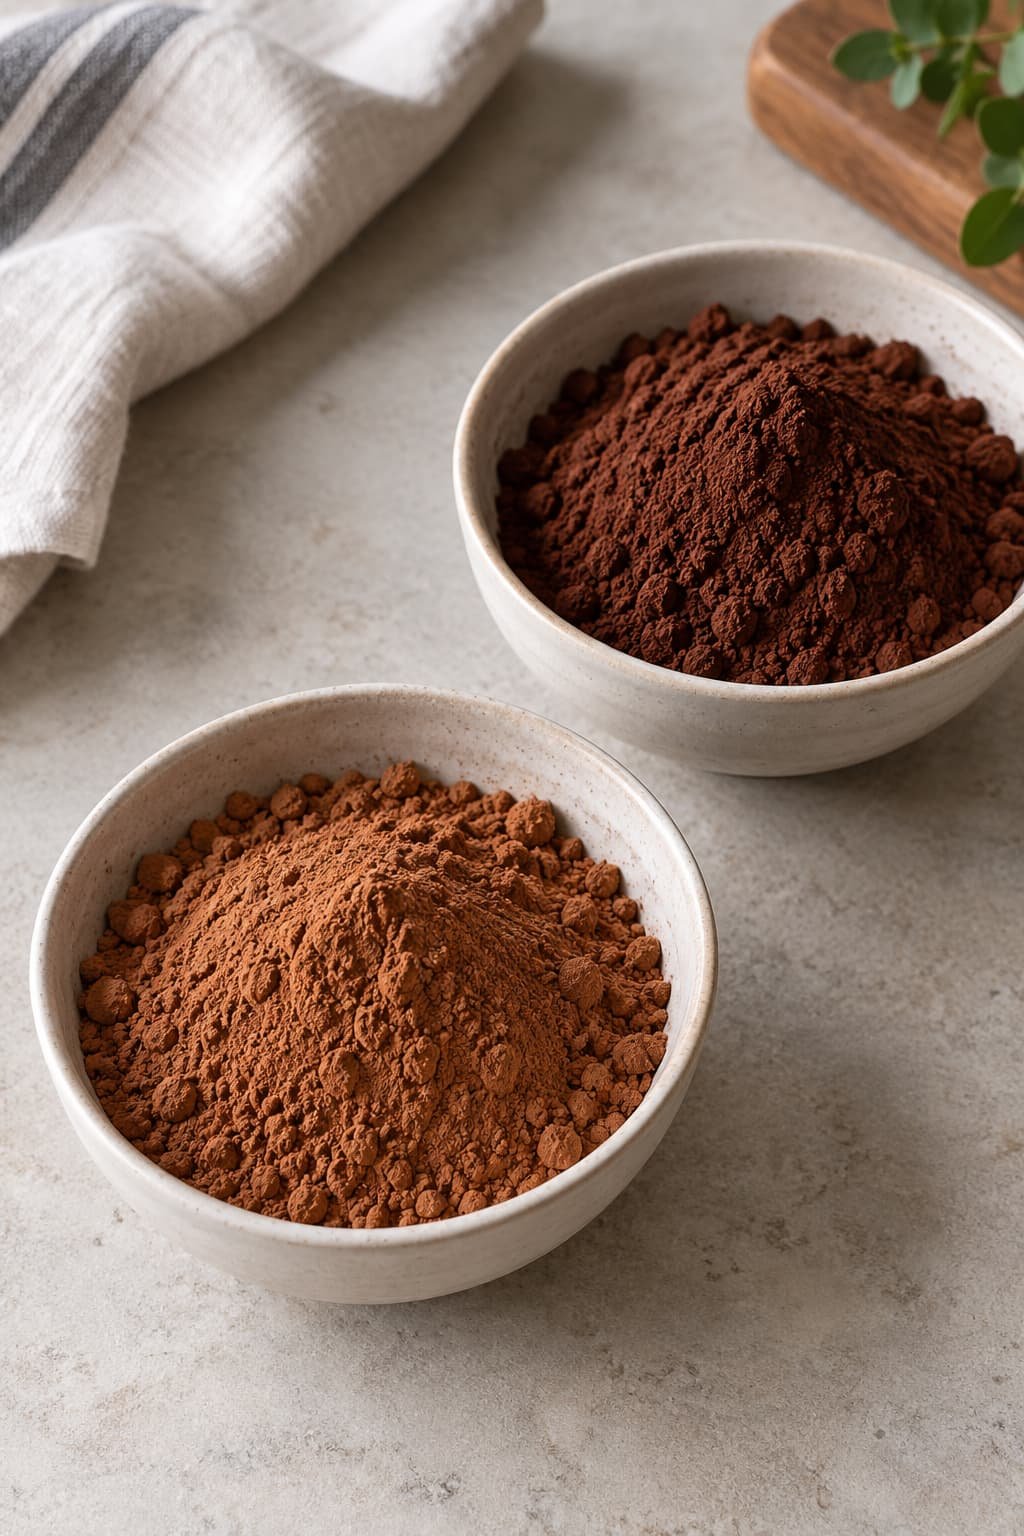
Natural Unsweetened Cocoa Powder

This recipe is developed with natural unsweetened cocoa powder, which gives the cookie dough its dark color and clear chocolate flavor.

Natural cocoa and Dutch process cocoa have different acidity levels. Replacing one with the other may change the cookies’ color, taste, spreading, and texture, especially when baking soda is the main leavener. Use the cocoa specified in the recipe unless another type has been tested successfully.

Cocoa powder absorbs moisture, so measure it carefully. Even a small excess can make the dough dry or crumbly.

Softened Unsalted Butter

Use softened unsalted butter that gives slightly when pressed but still holds its shape. It should not look shiny, greasy, or partially melted.

When softened butter is mixed with sugar, it combines evenly and helps create a consistent cookie texture. Butter that is too cold can be difficult to mix, while overly warm butter may cause the dough to spread too quickly in the oven.

Unsalted butter provides better control over the final flavor. Salted butter can be used when necessary, but reduce the added salt slightly and expect the salt level to vary.

Brown Sugar and Granulated Sugar

Both sugars contribute to the final texture, but they perform different roles.

Brown sugar adds moisture and supports a softer, chewier center. Its mild caramel notes also complement the cocoa flavor.

Granulated sugar encourages spreading and helps the edges set during baking. Changing the balance between the two sugars can produce cookies that are thicker, flatter, softer, or crisper than intended.

Egg and Vanilla Extract

The egg provides moisture and structure, helping the dough hold together as the cookies bake. A room temperature egg combines more smoothly with softened butter and reduces the chance of the mixture separating.

Vanilla supports the cocoa and white chocolate flavors without becoming noticeable on its own. It adds depth but should remain a background flavor.

Baking Soda and Salt

Baking soda works with the other ingredients to support spreading and create the intended cookie texture. Measure it accurately, as too much can cause excessive spreading and leave an unpleasant aftertaste.

Salt balances the sweetness of the sugars and white chocolate while making the cocoa flavor more noticeable. A small amount is enough to keep the finished cookies from tasting flat or overly sweet.

White Chocolate Chips or Chunks

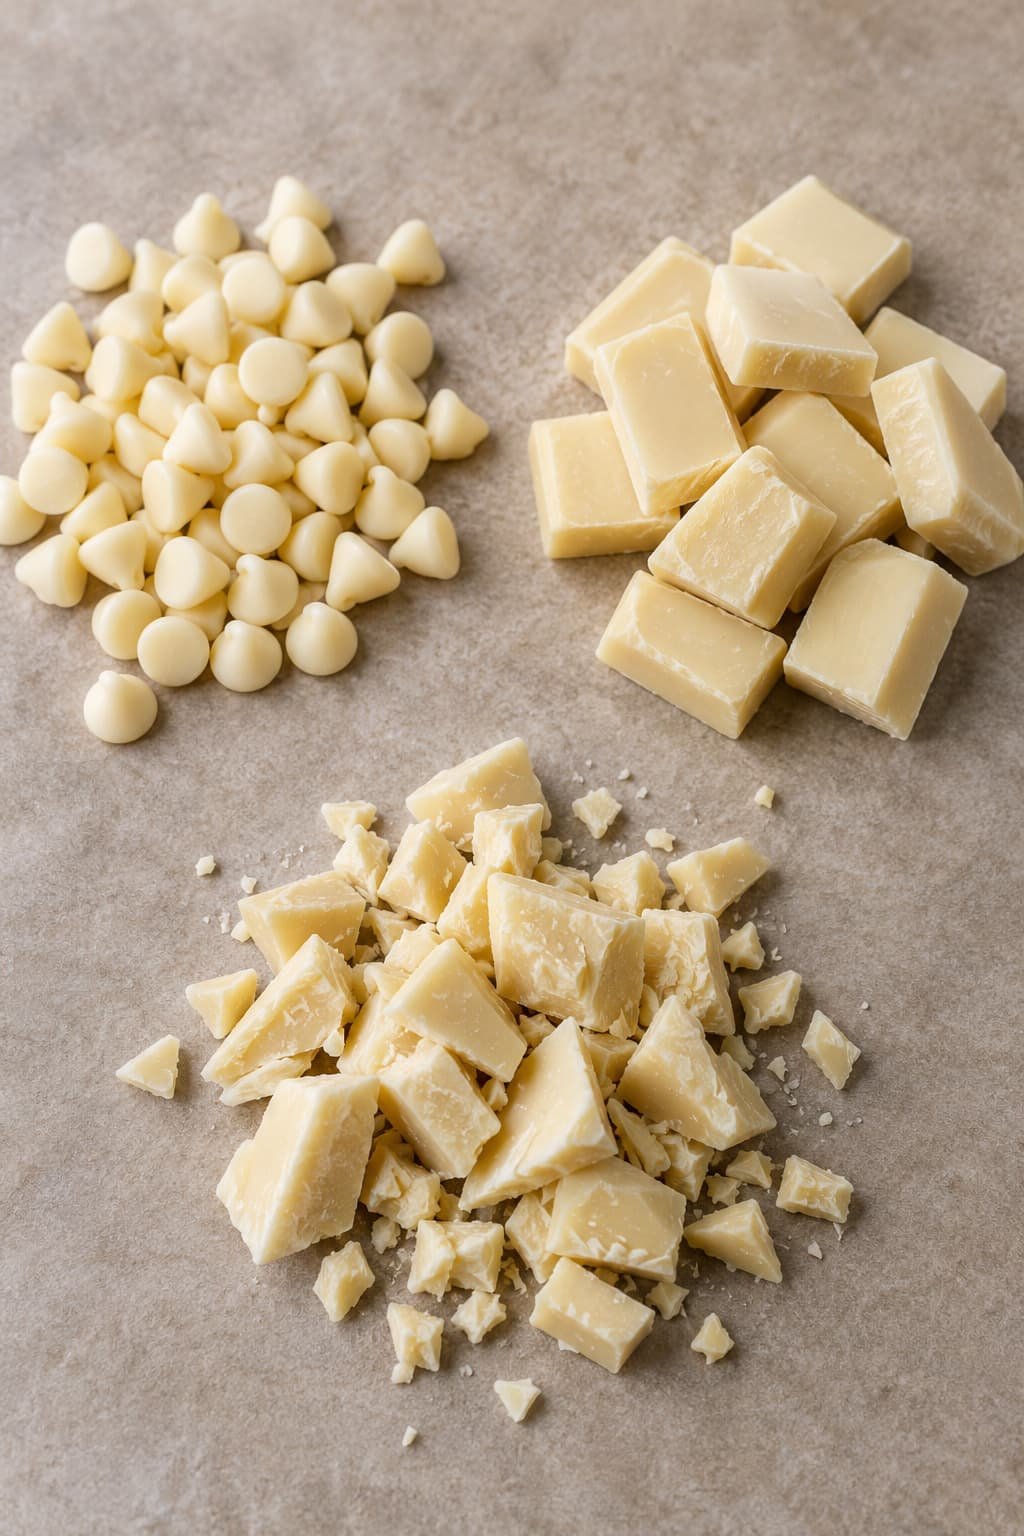
White chocolate chips are designed to hold their shape during baking. They create evenly distributed pieces and give each cookie a more consistent appearance.

Chopped white chocolate melts into irregular pools because the pieces vary in size. Smaller fragments may melt into the dough, while larger pieces create softer, more noticeable pockets of chocolate.

Chips and chunks can generally be exchanged by weight, although the finished appearance and texture will differ. Choose chips for a neat, even result or chopped white chocolate for a more rustic finish with varied melted pockets.

White Chocolate Chips vs White Chocolate Chunks

This recipe uses white chocolate chips because they distribute evenly and retain their shape during baking. They provide a consistent amount of white chocolate in each cookie and remain visible against the dark cocoa dough.

sweet breakfast pastries

Chopped white chocolate produces a different result. Smaller pieces melt into the dough, while larger pieces form soft, irregular pockets. This creates concentrated areas of sweetness and a more rustic appearance.

White chocolate chips and chopped white chocolate can generally be exchanged by weight. Use chips for even distribution and a neater finish. Choose chopped chocolate for varied melted pockets, cutting the pieces to a similar size so they bake more consistently.

How to Make Chocolate Cookies with White Chocolate Chips

Butter temperature, dough consistency, and baking time all affect how these cookies spread and set. Measure the ingredients before starting and use a cool baking sheet for every batch.

Step 1: Prepare the Oven and Baking Sheet

Preheat the oven to 350°F (175°C) and position a rack in the center. Line a light colored baking sheet with parchment paper.

Allow the pan to cool completely before adding another batch. Cookie dough placed on a warm tray begins softening before it enters the oven, which can cause uneven or excessive spreading.

Step 2: Combine the Dry Ingredients

Whisk the all purpose flour, natural unsweetened cocoa powder, baking soda, and salt in a medium bowl. Break apart any visible cocoa lumps as you mix. If the cocoa is heavily clumped, sift it before combining it with the other ingredients.

The mixture should have an even color with no pockets of flour or cocoa remaining.

Step 3: Cream the Butter and Sugars

Place the softened butter, brown sugar, and granulated sugar in a large mixing bowl. Beat with an electric mixer for about two minutes, or until the mixture is smooth, evenly blended, and slightly aerated.

The butter should feel soft but still hold its shape. Butter that looks shiny, greasy, or partially melted can make the dough loose and cause the cookies to spread too far.

Step 4: Mix in the Egg and Vanilla

Add the egg and vanilla extract. Mix on medium low speed just until the egg is fully incorporated, then scrape the bottom and sides of the bowl.

Do not continue beating after the mixture becomes smooth. Prolonged mixing is unnecessary and can add more air than the dough needs.

Step 5: Add the Dry Ingredients

puff pastry breakfast recipes

Add the flour mixture to the wet ingredients and mix on low speed until only a few dry streaks remain. Finish combining the dough with a rubber spatula to avoid overmixing.

The finished chocolate cookie dough should be thick, soft, and slightly tacky. A scooped portion should hold a rounded mound instead of immediately flattening.

Step 6: Fold in the White Chocolate Chips

Fold most of the white chocolate chips into the dough until they are evenly distributed. Reserve a small amount for the tops of the cookies.

Mix only until the chips are incorporated. Continuing stirring after the dough comes together can make the cookies firmer than intended.

Step 7: Chill the Cookie Dough

Cover the bowl and refrigerate the dough for 30 minutes. Chilling firms the softened butter, gives the flour and cocoa time to absorb moisture, and makes the dough easier to portion.

If the dough is refrigerated for several hours or overnight, let it stand at room temperature briefly before scooping. It should be firm but not so hard that it cracks when portioned.

Step 8: Portion and Bake

Divide the dough into portions weighing approximately 35 grams each, or use a medium cookie scoop. Place the portions on the prepared baking sheet, leaving enough room for them to spread. Press a few reserved white chocolate chips onto the top of each portion.

Bake one tray at a time on the center rack for 9 to 11 minutes. Rotate the tray only if your oven consistently browns one side faster than the other.

The cookies are ready when the edges appear set and the centers have lost their wet shine but still look slightly soft. Their dark color is not a reliable doneness test, so watch the surface and edges rather than waiting for a noticeable color change.

Step 9: Cool the Cookies

Leave the cookies on the baking sheet for about five minutes. The centers will continue setting from the heat of the pan.

Transfer them carefully to a wire rack once they are firm enough to lift. Cool for at least 10 to 15 minutes before serving, or allow them to cool completely before storing.

How to Tell When Chocolate Cookies Are Done

flaky homemade pastries

Chocolate cookies are ready when the edges look set and the centers have lost their wet shine but still appear slightly soft. Because the dough is already dark, color is not a reliable way to judge doneness.

The centers may look slightly underbaked when the tray leaves the oven. This is normal. Residual heat from the baking sheet continues cooking the cookies as they rest, allowing the middle to set without becoming dry.

Leave the cookies on the warm pan for about five minutes, or until they are firm enough to lift without breaking. Then transfer them to a wire rack.

Do not wait for the centers to feel completely firm in the oven. By that stage, the cookies may become hard or crumbly after cooling.

Tips for Soft and Chewy Chocolate Cookies

Accurate measuring, controlled dough temperature, and careful baking make the biggest difference to the final texture. These practical tips help the cookies spread evenly while keeping the centers tender.

1. Weigh the Flour and Cocoa Powder

A kitchen scale gives the most consistent results. Too much flour can make the cookies thick and cakey, while excess cocoa powder can leave the dough dry or crumbly.

When using measuring cups, spoon each dry ingredient into the cup and level the surface without pressing it down. Sift the cocoa powder first if it contains firm lumps.

2. Use Properly Softened Butter

The butter should give slightly when pressed but still hold its shape. It should not look shiny, greasy, or partially melted.

Butter that is too cold will not combine evenly with the sugars. Butter that is too warm can produce loose dough and cause the cookies to spread excessively.

3. Chill the Dough for the Recommended Time

This recipe uses a short chilling period to firm the butter and make the dough easier to portion. Chilling also helps control spreading once the cookies enter the oven.

If the dough is refrigerated for several hours or overnight, let it stand briefly at room temperature before scooping. It should be firm but not so hard that it cracks when portioned.

4. Stop Mixing When the Dough Comes Together

After adding the flour and cocoa mixture, mix only until no dry streaks remain. Continuing to beat the dough can make the finished cookies denser and firmer than intended.

Use a rubber spatula to combine the final streaks rather than running the electric mixer longer than necessary.

5. Portion the Dough Evenly

Use a cookie scoop or kitchen scale so each portion contains a similar amount of dough. Evenly sized cookies spread and bake at approximately the same rate.

When the portions vary significantly, smaller cookies may become dry before the larger ones are fully baked.

6. Use a Cool Baking Sheet and an Accurate Oven

Place every batch on a completely cool baking sheet. Dough added to a warm pan begins softening before it enters the oven, which can lead to excessive or uneven spreading.

Bake one tray at a time when possible. If cookies regularly bake too quickly, remain underdone, or spread differently from one batch to another, check the oven temperature with a separate oven thermometer.


Common Problems and How to Fix Them

Small differences in ingredient measurements, dough temperature, oven heat, and baking time can change how chocolate cookies spread and set. Use the table below to identify the most likely cause, then adjust only one factor at a time.

Problem Likely cause Practical fix
Cookies spread too much Warm butter, soft dough, hot baking sheet, or too little flour Chill the dough, check the flour measurement, and use a completely cool tray
Cookies do not spread enough Too much flour or cocoa, very cold dough, or an oven that runs cool Weigh the dry ingredients, let very firm dough soften briefly, and check the oven temperature
Cookies are thick and cakey Excess flour or cocoa, too much leavener, or an incorrect egg measurement Recheck the recipe quantities and weigh the dry ingredients accurately
Cookies are dry or crumbly Too much flour or cocoa, cold butter, or overbaking Check the measurements, use properly softened butter, and shorten the baking time slightly
Cookies become hard after cooling They remained in the oven until the centers were fully firm Remove them when the edges are set and the centers still look slightly soft
Dough is too sticky to scoop The butter or kitchen is too warm Chill the dough until it holds a rounded scoop without flattening immediately
Cookies bake unevenly Unequal portions, oven hot spots, or several trays baked together Use a scoop or scale, bake one tray at a time, and rotate only when needed
Cookie bottoms brown too quickly Dark or thin baking sheet, low rack position, or excessive oven heat Use a light colored pan, bake on the center rack, and verify the temperature with an oven thermometer

Troubleshoot one change at a time. Adjusting the flour, chilling time, oven temperature, and baking time together makes it difficult to determine what caused the problem.

Variations and Substitutions

The following changes keep the basic chocolate cookie dough intact while adjusting the flavor or appearance. For the most reliable texture, keep the total amount of mix-ins close to the quantity used in the original recipe.

White Chocolate Chunks

White chocolate chunks can usually replace the chips by weight. They melt into larger, less uniform pockets, while chips remain more evenly distributed and hold their shape more consistently.

Cut chopped chocolate into similar sized pieces so the sweetness is spread more evenly between the cookies. Because white chocolate products vary, the final melting pattern may differ from the original version.

Mixed Chocolate Chips

Replace up to half of the white chocolate chips with semisweet or milk chocolate chips. This creates a more varied chocolate flavor while keeping the white pieces visible against the cocoa dough.

Keep the total chocolate weight unchanged. Adding extra chips instead of replacing part of the original amount can make the dough harder to portion and may prevent the cookies from holding together evenly.

Espresso Powder

A small amount of instant espresso powder can make the cocoa flavor more noticeable without giving the cookies a strong coffee taste.

Mix it into the dry ingredients so it disperses evenly. Do not use brewed coffee as a direct substitute because the added liquid can change the dough consistency and spreading.

Toasted Pecans or Walnuts

Finely chopped pecans or walnuts add a firmer texture and mild nutty flavor. Replace part of the white chocolate by weight rather than adding nuts on top of the full quantity of chips.

Toast the nuts for a deeper flavor, then let them cool completely before folding them into the dough. Warm nuts can soften the butter and make the dough more difficult to handle.

Flaky Sea Salt

A light sprinkle of flaky sea salt can balance the sweetness of the white chocolate and make the cocoa flavor more distinct.

Add it immediately after baking while the cookie surfaces are still soft. Use only a small amount because the dough already contains salt.

Peppermint or Festive Sprinkles

For a seasonal variation, replace a small portion of the white chocolate with crushed peppermint candy or add oven safe sprinkles.

Use peppermint sparingly. Candy pieces may melt, become sticky, or create hard spots after cooling. Cookies made with peppermint may also soften more quickly during storage, so they are best prepared close to serving.

How to Store Chocolate Cookies with White Chocolate Chips

Allow the cookies to cool completely before storing them. Sealing warm cookies traps steam inside the container, which can leave the surfaces damp and make the texture uneven.

Place the cooled cookies in an airtight container and store them at room temperature for up to four days. They will usually have the softest texture during the first two days. Keep the container away from sunlight, moisture, and warm areas of the kitchen.

If you need to stack the cookies, separate the layers with parchment paper. This prevents exposed pieces of white chocolate from sticking to the cookies above them.

To refresh a cookie, microwave it for about five seconds. Continue heating in two second intervals only if needed. White chocolate warms quickly, so avoid overheating the cookie.

Room temperature storage gives these cookies their best texture. Refrigeration may make the butter and chocolate firmer, but it can be useful in a very warm kitchen or when the cookies contain a perishable filling or topping. Keep refrigerated cookies tightly sealed and allow them to return to room temperature before serving.

How to Freeze Cookie Dough and Baked Cookies

Both the prepared cookie dough and fully baked cookies can be frozen. Freezing individual dough portions is particularly useful when you want to bake only a few cookies at a time.

Freezing Unbaked Cookie Dough

make-ahead breakfast pastries

Scoop the prepared dough into evenly sized portions and arrange them on a parchment lined baking sheet. Freeze until the portions are firm enough to handle without losing their shape.

Transfer the frozen dough balls to a freezer safe container or resealable bag. Remove as much air as possible, then label the package with the recipe name, freezing date, oven temperature, and regular baking instructions.

For the best quality, use the frozen dough within three months. Unless the recipe has been tested for baking directly from frozen, thaw the required portions in the refrigerator before baking.

Place the frozen portions on a lined tray, cover them, and refrigerate until they are no longer frozen through but still feel cool and firm. Bake them according to the regular recipe instructions.

When baking directly from frozen has been tested, use the verified baking time for that method. Do not add extra minutes without checking the cookies. The edges should look set while the centers remain slightly soft and no longer appear wet.

Freezing Baked Cookies

Cool the cookies completely before freezing. Arrange them in a freezer safe container with parchment paper between the layers, then seal the container tightly.

make-ahead breakfast pastries

For longer storage or additional protection from freezer burn, wrap small groups of cookies before placing them in the container. Properly sealed cookies can be frozen for up to two months for the best texture and flavor.

Thaw the cookies in the closed container at room temperature. Once they are nearly thawed, open the container so any remaining moisture can escape.

To warm one cookie, microwave it for about five seconds and add another two seconds only if necessary. For several cookies, place them in a 300°F oven for about three to five minutes, checking early to avoid drying the centers or overheating the white chocolate.

Serving Suggestions

bakery-style breakfast treats

Serve these chocolate cookies with white chocolate chips slightly warm for soft centers and creamy pieces of chocolate. They are also enjoyable at room temperature once the texture has fully set.

Pair them with milk, coffee, or tea, or include them on a dessert platter with fruit, brownies, and less sweet cookies.

For ice cream sandwiches, place a small scoop of vanilla, chocolate, or coffee ice cream between two fully cooled cookies. Smaller cookies are easier to assemble and eat after freezing.

The cookies also work well for bake sales, lunch boxes, and homemade gifts. Cool them completely before packing and keep them away from direct heat so the white chocolate does not soften.

  • Frequently Asked Questions

  • Can I use white chocolate chunks instead of chips?

  • Yes. White chocolate chunks can usually replace the chips using the same weight. Chips hold their shape and distribute more evenly, while chopped white chocolate creates larger melted pockets. Cut the chunks into similar sized pieces and keep the total amount of chocolate unchanged.
  • Do I need to chill the cookie dough?

  • Yes. Chilling the dough for 30 minutes firms the softened butter, makes the dough easier to scoop, and helps control spreading. Skipping this step may produce flatter cookies, particularly when the kitchen is warm or the butter has become too soft during mixing.
  • Which cocoa powder should I use?

  • This recipe is developed with natural unsweetened cocoa powder. Dutch process cocoa has a different acidity level and may change the cookies’ flavor, color, spreading, and texture. Use natural cocoa for results that match the original recipe unless another type has been tested successfully.
  • Can I prepare the cookie dough ahead of time?

  • Yes. Cover the prepared dough tightly and refrigerate it for up to 24 hours. Longer chilling makes the dough firmer, so allow it to stand at room temperature briefly if it is difficult to scoop. The dough should remain cool and hold a rounded shape when portioned.
  • Can I freeze the cookie dough and baked cookies?

  • Yes. Portion the dough before freezing and store the frozen dough balls in a sealed freezer safe container. Fully baked cookies can also be frozen after cooling completely. Follow the detailed freezing instructions above for packaging, thawing, and reheating guidance.
  • Can I use salted butter?

  • Salted butter can be used when unsalted butter is unavailable, but the final salt level may vary between products. Reduce the added salt slightly and taste may still differ from the original recipe. Unsalted butter remains the more dependable choice because it provides better control over seasoning.
  • Can I add semisweet or milk chocolate chips?

  • Yes. Replace part of the white chocolate chips with semisweet or milk chocolate chips while keeping the total chocolate weight unchanged. Using both types creates a less sweet chocolate balance without overloading the dough with additional mix ins.
  • More Cookie Recipes to Try

  • easy breakfast pastries
  • For another sweet and nutty combination, try the Chocolate Chip and Peanut Butter Chip Cookie Recipe.
  • The Soft and Chewy Oatmeal Raisin Walnut Cookies combine oats, dried fruit, and walnuts in a hearty cookie with a tender center.
  • For a warm seasonal option, make the Brown Butter Pumpkin Oatmeal Cookies, or try the Soft Giant Sugar Cookie Recipe when you prefer a thick vanilla cookie without chocolate.
  • Final Thoughts

  • These chocolate cookies with white chocolate chips combine a deep cocoa base with creamy pieces of white chocolate and tender, chewy centers. Accurate measurements, properly softened butter, and controlled dough temperature help the cookies spread evenly and maintain their intended texture.
  • For the best result, follow the tested chilling and baking times rather than waiting for the dark centers to look completely firm.

Related Blogs

Scroll to Top