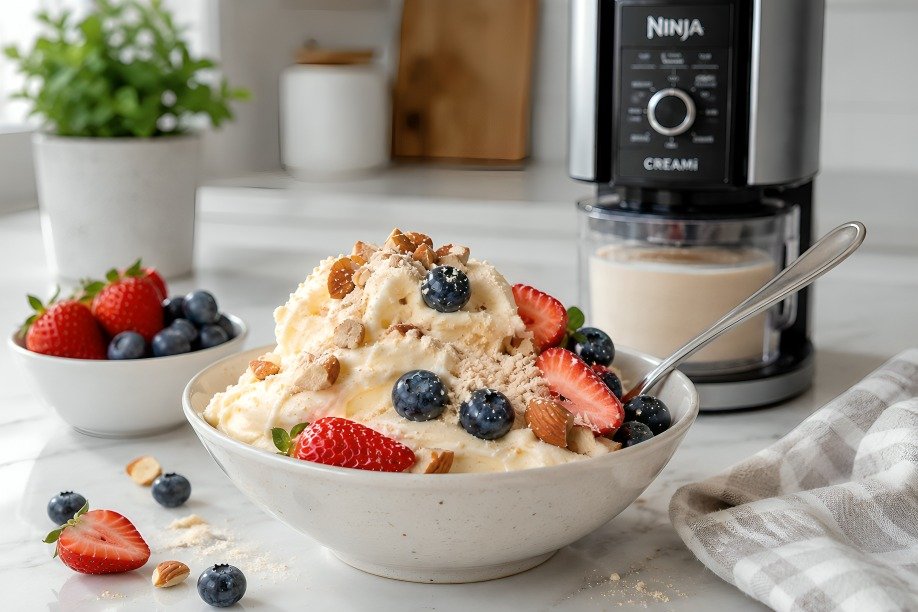
Craving a bowl of creamy ice cream without loading up on sugar and unnecessary calories? This Ninja Creami protein ice cream recipe is an easy way to enjoy a rich, satisfying dessert while increasing your daily protein intake. With just a handful of simple ingredients and a Ninja Creami machine, you can turn a frozen protein base into a smooth, scoopable treat that rivals traditional ice cream.
After experimenting with different milk options and protein powders, one thing became clear: the right ingredient balance makes all the difference. A protein blend that freezes well, combined with the Ninja Creami’s Lite Ice Cream setting and an optional Respin cycle, creates a texture that’s noticeably creamier than a typical frozen protein shake. The result is a dessert that’s perfect after a workout, as an afternoon snack, or whenever you’re craving something sweet without straying from your nutrition goals.
Unlike many store-bought protein ice creams, making homemade protein ice cream lets you control every ingredient. You decide the protein source, sweetness level, milk, and mix-ins, making it easy to create a dessert that suits your taste and dietary preferences.
Quick Answer
Ninja Creami Protein Ice Cream is a homemade high-protein frozen dessert made by freezing a protein-rich mixture and processing it in a Ninja Creami machine. The machine shaves the frozen base into tiny ice crystals, creating a creamy texture that’s much closer to traditional ice cream than a standard frozen protein shake. It’s an excellent choice for anyone looking for a high-protein dessert, a healthy frozen dessert, or a lower-calorie alternative to premium ice cream.
| Detail | Information |
| Prep Time | 5 minutes |
| Freeze Time | 24 hours |
| Processing Time | About 5 minutes |
| Total Time | About 24 hours 10 minutes |
| Yield | 1 Ninja Creami Pint (2–3 servings) |
| Difficulty | Easy |
| Best For | High-protein dessert, post-workout snack, meal prep |
Note: The final protein, calories, carbohydrates, and fat will depend on the milk, protein powder, and optional mix-ins you choose. The nutrition information provided later in this recipe is based on the exact ingredients used.
Why You’ll Love This Ninja Creami Protein Ice Cream
This isn’t just another protein dessert. It’s a recipe designed to deliver the creamy texture people expect from real ice cream while keeping the ingredients simple and easy to customize. Whether you’re making your first Ninja Creami protein recipe or already use your machine every week, this recipe is one you’ll come back to again.
Naturally High in Protein
Unlike traditional ice cream, which gets most of its calories from sugar and fat, this high protein Ninja Creami ice cream uses protein-rich ingredients to create a dessert that’s both satisfying and nourishing. Depending on the ingredients you choose, each serving can contribute a meaningful amount of protein toward your daily intake, making it a great option after exercise or as a filling evening snack.
Lower in Calories Without Giving Up Creaminess
One of the biggest advantages of making low calorie Ninja Creami ice cream at home is that you’re in complete control of the ingredients. Choosing lower-fat milk, adjusting the sweetener, or using a lighter protein powder allows you to create a dessert that fits your goals without sacrificing flavor or texture.
A Smooth, Creamy Texture That Tastes Like Real Ice Cream
The Ninja Creami works differently from a traditional blender. Instead of blending liquid ingredients, it finely shaves a completely frozen pint into tiny ice crystals. That’s what gives this creamy protein ice cream its smooth consistency.
If the mixture looks slightly crumbly after the first spin, don’t worry that’s completely normal. Adding a tablespoon or two of milk and running the Respin cycle usually transforms it into a soft, scoopable dessert with a noticeably creamier finish.
Perfect for Meal Prep
This recipe is ideal for anyone who likes planning meals in advance. Prepare several pints over the weekend, freeze them overnight, and process one whenever you’re ready for dessert. Having a healthy Ninja Creami ice cream ready to spin makes it much easier to choose a protein-rich snack instead of reaching for store-bought ice cream.
Easy to Customize With Your Favorite Flavors
Once you’ve mastered the base recipe, creating new flavors is simple. Small ingredient changes can completely transform the finished dessert without changing the overall method.
Some of my favorite variations include:
- Vanilla Protein Ice Cream for a classic everyday flavor.
- Chocolate Protein Ice Cream made with cocoa powder for a rich, chocolatey dessert.
- Strawberry Protein Ice Cream using fresh or frozen berries for a fruity option.
- Peanut Butter Protein Ice Cream for extra creaminess and a nutty flavor.
- Cookies & Cream Protein Ice Cream with crushed chocolate sandwich cookies added after the final spin.
These variations make it easy to enjoy a different dessert every week while using the same reliable base recipe.
Ingredients You’ll Need
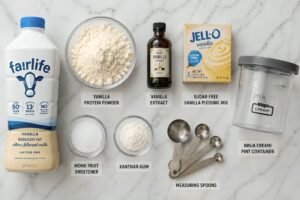
One of the reasons this Ninja Creami protein ice cream recipe has become a regular in my freezer is its simplicity. You don’t need specialty ingredients or expensive supplements to achieve a smooth, creamy texture. Every ingredient in this recipe serves a purpose, whether it’s increasing protein, improving consistency, or enhancing flavor.
If you’re making homemade protein ice cream for the first time, I recommend starting with the ingredient combination below before experimenting with substitutions. Small changes in the type of milk or protein powder can noticeably affect the final texture, so having a reliable base recipe makes it much easier to customize future batches.
Base Ingredients
For one Ninja Creami pint, you’ll need:
- 1 cup Fairlife 2% milk (or your preferred milk)
- 1 scoop (about 30g) vanilla protein powder
- 1 tablespoon sugar-free vanilla pudding mix (optional, for extra creaminess)
- 1 teaspoon vanilla extract
- 1–2 teaspoons granulated sweetener, monk fruit sweetener, or another sweetener of your choice (adjust to taste)
- ¼ teaspoon xanthan gum (optional)
- Pinch of salt
The measurements above create a balanced base that freezes well and processes smoothly in both the original Ninja Creami and the Ninja Creami Deluxe.
Protein Powder
Protein powder is the most important ingredient in this high protein Ninja Creami ice cream, so it’s worth choosing one that produces a creamy texture.
In my testing, protein blends that combine whey and casein generally create a smoother consistency than whey isolate alone. Whey isolate still works well, but it’s more likely to look dry or crumbly after the first spin. Fortunately, that’s usually easy to fix by adding one or two tablespoons of milk and running the Respin cycle.
Vanilla protein powder is the most versatile choice because it works well with fruit, chocolate, peanut butter, and cookie mix-ins. If you’re making a chocolate version, chocolate protein powder provides a deeper flavor without needing much additional cocoa.
Milk
Milk affects both the texture and nutritional profile of your finished ice cream.
Fairlife milk is one of my preferred options because its higher protein content helps produce a rich, creamy consistency while adding extra protein to each serving. Regular dairy milk also works well, with whole milk creating a softer texture and skim milk producing a lighter dessert.
Unsweetened almond milk is a good option if you’re trying to reduce calories, but expect a slightly less creamy result because it contains less protein and fat than dairy milk.
Whatever milk you choose, keep the total liquid amount consistent. Changing the ratio too much can affect how evenly the frozen base processes in the Ninja Creami.
Sweetener
Many flavored protein powders already contain sweeteners, so it’s always worth tasting the mixture before adding more.
Monk fruit sweetener and erythritol are popular choices if you want to keep the recipe lower in sugar, while regular granulated sugar creates a slightly softer texture. Honey and maple syrup also work, although they add additional moisture and may produce a softer finished ice cream.
Vanilla Extract
It might seem like a small ingredient, but vanilla extract makes a noticeable difference. Even if you’re using vanilla protein powder, adding a teaspoon enhances the flavor and gives the finished dessert a more balanced, homemade taste.
Sugar-Free Pudding Mix (Optional)
Many popular Ninja Creami healthy recipes include a small amount of sugar-free pudding mix because it contains stabilizers that improve texture.
While this recipe can be made without it, adding a tablespoon often creates a smoother, creamier result, especially when using lower-fat milk or whey protein isolate.
Xanthan Gum (Optional)
Xanthan gum is another optional ingredient that helps reduce ice crystals and improves scoopability.
Some protein powders already contain xanthan gum or guar gum, so check the label before adding extra. Using too much can make the mixture slightly gummy, so a small amount is usually all that’s needed.
Optional Mix-Ins
Once your Ninja Creami protein ice cream has finished its first spin, it’s time to customize the flavor. This is where the recipe becomes truly your own.
Fresh strawberries, blueberries, raspberries, or diced peaches add natural sweetness and work particularly well with a vanilla base. For chocolate lovers, mini chocolate chips, cocoa nibs, or chopped dark chocolate create extra texture without overwhelming the protein flavor.
If you prefer richer desserts, swirl in a spoonful of natural peanut butter, almond butter, or cookie butter after the first spin. Chopped pecans, walnuts, or toasted almonds add a satisfying crunch while increasing healthy fats.
You can also experiment with ingredients like cinnamon, espresso powder, unsweetened cocoa powder, toasted coconut, or sugar-free chocolate syrup to create completely different flavor profiles from the same base recipe.
When adding mix-ins, less is usually more. Too many chunky ingredients can overpower the creamy texture that makes this protein ice cream recipe so enjoyable.
Pro Tip: Process the frozen base first, then add chunky ingredients using the Mix-In program. Avoid freezing large fruit pieces or candy directly into the base, as they can prevent the Ninja Creami from shaving the mixture evenly and may leave the finished ice cream with an inconsistent texture.
Best Protein Powder for Ninja Creami
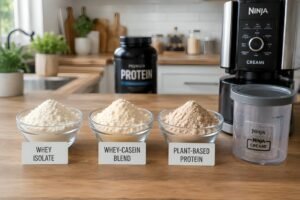
The protein powder you choose can make a bigger difference than many people expect. It doesn’t just affect the nutrition it also influences how the frozen base thickens, how smoothly it processes in the Ninja Creami, and how creamy the finished ice cream feels.
If your protein ice cream has ever turned out dry, crumbly, or slightly icy, the protein powder is often part of the reason. Different formulas contain different amounts of protein, stabilizers, and thickening agents, so two powders can produce noticeably different results even when the recipe stays exactly the same.
Rather than looking for a single “best” protein powder, it’s more helpful to choose one that matches your goals, whether that’s maximum creaminess, higher protein, fewer calories, or a dairy-free recipe.
Whey Protein
Whey protein is one of the most popular options for a Ninja Creami protein ice cream recipe because it dissolves easily and delivers a high amount of protein without making the mixture overly thick.
Whey isolate is especially useful if you’re aiming for a low calorie Ninja Creami ice cream, as it’s typically lower in carbohydrates and fat than many protein blends. However, because it contains less casein, it may produce a drier texture after the first spin.
If that happens, don’t assume the recipe has failed. Adding one or two tablespoons of milk and running the Respin cycle usually creates a much smoother, creamier consistency.
Casein Protein
Casein behaves differently from whey because it naturally absorbs more liquid and forms a thicker mixture before freezing.
That additional moisture retention often helps reduce large ice crystals, giving the finished dessert a softer, creamier texture that’s closer to traditional ice cream. The trade-off is that the base can become quite thick, so whisking or blending thoroughly before freezing helps create a smoother result.
If creaminess is your highest priority, casein is an excellent choice.
Whey-Casein Blend
For many recipes, a whey-casein blend offers the best balance of texture, protein content, and ease of preparation.
The whey contributes a clean flavor and high protein content, while the casein helps improve moisture retention and creates a smoother mouthfeel after processing. That’s one reason many meal replacement and baking protein powders combine both protein sources.
If you’re making high protein Ninja Creami ice cream for the first time, this type of blend is often the easiest place to start because it consistently delivers reliable results in a wide variety of recipes.
Plant-Based Protein
Plant-based protein powders can also produce excellent results, although their texture depends heavily on the ingredients used in the blend.
Single-source proteins, such as pea protein, sometimes create a slightly grainier consistency. Blends that combine pea, rice, fava bean, or pumpkin seed protein often produce a smoother frozen dessert because each protein contributes different functional properties.
If you’re preparing a dairy-free healthy Ninja Creami ice cream, don’t be discouraged if the first batch isn’t perfect. Small adjustments to the liquid, an additional Respin, or choosing a creamier plant-based milk can noticeably improve the final texture.
Protein Powders That Can Be More Challenging
Most protein powders work with the Ninja Creami, but some require extra adjustments.
Collagen peptides don’t provide the same thickening properties as whey or casein, so the finished dessert may be softer and less creamy. Clear whey proteins can also produce a lighter texture because they’re formulated for beverages rather than frozen desserts.
Highly flavored protein powders with large amounts of gums or fillers may change the consistency as well, so it’s worth checking the ingredient label if your results vary between brands.
Which Protein Powder Creates the Creamiest Texture?
The comparison below reflects general texture differences that many home cooks experience. Keep in mind that milk choice, sweetener, stabilizers, and the Respin cycle also influence the final result.
| Protein Powder | Creaminess | Protein | Respin Usually Needed? | Best For |
| Whey Isolate | ★★★★☆ | High | Sometimes | Light, lower-calorie recipes |
| Casein | ★★★★★ | High | Rarely | Extra creamy texture |
| Whey-Casein Blend | ★★★★★ | High | Occasionally | Balanced everyday recipes |
| Plant-Based Blend | ★★★☆☆ | Moderate to High | Often | Dairy-free recipes |
If you’re new to making creamy protein ice cream, a whey-casein blend is one of the most reliable starting points because it offers a good balance of texture, protein, and consistency.
Best Milk Options for Ninja Creami Protein Ice Cream
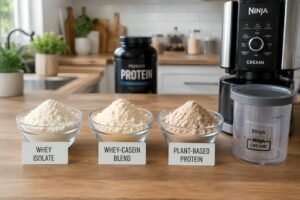
The milk you use has a direct effect on both nutrition and texture. Protein, fat, and milk solids all influence how smoothly the frozen base processes and how creamy the finished dessert becomes.
Although every option below works, each one produces a slightly different result. Choosing the right milk depends on whether you’re aiming for maximum creaminess, higher protein, fewer calories, or a dairy-free alternative.
Fairlife Milk
Fairlife milk is one of the most popular choices for high protein Ninja Creami ice cream because it’s ultra-filtered, giving it more protein and less lactose than regular milk.
The additional milk protein helps build a richer body while naturally increasing the protein content of the recipe. Many home cooks find it produces a consistently smooth texture with minimal adjustments.
Almond Milk
Unsweetened almond milk is a practical option for anyone trying to reduce calories.
Because it’s naturally lower in protein and fat than dairy milk, the finished dessert may not be quite as rich. Using a small amount of pudding mix, xanthan gum, or a creamier protein blend can help compensate for that difference.
Skim Milk
Skim milk offers a nice balance between nutrition and texture.
Although it contains very little fat, it still provides enough milk protein to create a satisfying frozen dessert, especially when paired with a whey-casein protein powder.
Whole Milk
Whole milk contains more milk fat, which helps lubricate tiny ice crystals during processing and creates a smoother mouthfeel.
If your priority is the richest possible texture rather than the lowest calorie count, whole milk is an excellent choice.
Oat Milk
Oat milk is another good dairy-free option with a naturally mild flavor.
Barista-style oat milk often produces a creamier consistency than standard oat milk because it usually contains additional fats and stabilizers. Since nutrition varies by brand, it’s worth checking the label if protein content is important to you.
Milk Comparison
| Milk | Creaminess | Protein | Calories | Best For |
| Fairlife Milk | ★★★★★ | High | Moderate | Best overall balance of creaminess and protein |
| Whole Milk | ★★★★★ | Moderate | Higher | Richest texture |
| Skim Milk | ★★★★☆ | Moderate | Lower | Everyday high-protein recipes |
| Oat Milk (Barista Style) | ★★★★☆ | Low | Moderate | Creamier dairy-free recipes |
| Almond Milk | ★★★☆☆ | Low | Lowest | Lower-calorie desserts |
If you’re making this recipe for the first time, starting with Fairlife milk and a whey-casein protein blend is a dependable combination that balances creaminess, protein, and ease of preparation. Once you’ve mastered the base recipe, it’s easy to adjust the milk and protein powder to suit your own taste, nutrition goals, and preferred texture.
How to Make Ninja Creami Protein Ice Cream
Making Ninja Creami protein ice cream is straightforward, but a few simple techniques can make the difference between a creamy frozen dessert and a pint that’s dry or icy. The key is to mix the ingredients thoroughly, freeze the base completely, and let the Ninja Creami do the work one step at a time.
Step 1: Mix the Ingredients
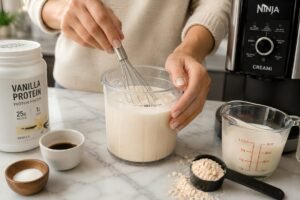
Add the milk, protein powder, vanilla extract, sweetener, and any optional ingredients, such as sugar-free pudding mix or xanthan gum, to the Ninja Creami pint container.
Whisk until the mixture is completely smooth and no dry pockets of protein powder remain. If you’re using a thicker protein blend, a hand blender or regular blender can help create an even smoother base in just a few seconds.
Before placing the pint in the freezer, taste the mixture and adjust the sweetness if needed. Frozen desserts naturally taste less sweet than liquid mixtures, so making small adjustments now usually produces a more balanced flavor later.
Step 2: Freeze the Pint
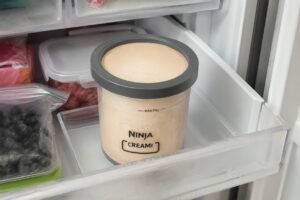
Secure the lid and place the pint on a flat shelf in your freezer.
Freeze the mixture for at least 24 hours. Even if the top appears solid sooner, the center needs time to freeze completely. Processing a partially frozen pint often leads to an uneven texture and may require additional processing.
Before installing the pint in the machine, check the surface. If the mixture has frozen into a raised dome above the fill line, gently level it with a spoon. A flat surface allows the Ninja Creami blade to shave the frozen base more evenly.
Step 3: Process the Frozen Base
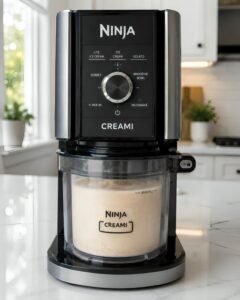
Insert the frozen pint into the outer bowl and lock it into the Ninja Creami following the manufacturer’s instructions.
For most high protein Ninja Creami ice cream recipes, the Lite Ice Cream program is the best place to start because it’s designed for recipes that contain more protein and less fat than traditional ice cream.
After the first spin, don’t be alarmed if the mixture looks powdery or crumbly. That’s common with protein-based recipes and doesn’t mean the recipe has failed.
Step 4: Use the Respin Function
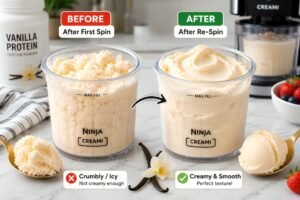
If the texture isn’t smooth after the first cycle, add 1 to 2 tablespoons of milk to the center of the pint.
Run the Respin program once and check the consistency again. In many cases, this extra cycle is all that’s needed to transform a dry-looking mixture into creamy, scoopable protein ice cream.
If a second Respin is necessary, add only a small amount of additional liquid. Too much milk at once can make the finished ice cream softer than intended.
Step 5: Add Mix-Ins
Once the base is smooth, it’s time to customize your ice cream.
Add fresh berries for a fruity version, mini chocolate chips for a little crunch, crushed cookies for a cookies-and-cream variation, or a spoonful of peanut butter for extra richness. Use the Mix-In program to distribute the ingredients evenly while keeping their texture intact.
Adding chunky ingredients after the first spin produces a much better result than freezing them directly into the base.
Step 6: Serve
For the creamiest texture, enjoy your homemade protein ice cream immediately after the final spin.
If you store leftovers in the freezer, let the pint sit at room temperature for 5 to 10 minutes before scooping. If it becomes too firm after refreezing, a quick Respin usually restores its creamy consistency.
Expert Tips for Ultra Creamy Results
The Ninja Creami is designed to shave a completely frozen base into tiny frozen particles, creating an ice cream-like texture. These simple techniques help the machine perform at its best while improving consistency from one batch to the next.
Freeze the Base Completely
A full 24-hour freeze gives the mixture enough time to solidify all the way through.
Although the outside may appear frozen much sooner, the center often remains softer for several more hours. A fully frozen pint processes more evenly and reduces the chances of icy patches or uneven texture.
For the most consistent results, keep your freezer close to 0°F (-18°C), which is the temperature recommended for long-term frozen food storage.
Don’t Overfill the Pint
Always stay below the maximum fill line on the Ninja Creami pint container.
The mixture expands slightly as it freezes, and overfilling can create a raised surface that prevents the blade from processing the ice cream evenly. Leveling any frozen hump before spinning also helps produce a smoother result.
Master the Respin Technique
One of the most common questions is whether a crumbly first spin means the recipe went wrong.
In most cases, the answer is no.
Because high protein Ninja Creami ice cream contains less fat than traditional ice cream, it’s perfectly normal for the first spin to look dry. Adding a tablespoon or two of milk before using the Respin program usually provides the moisture needed to create a creamy texture.
If the ice cream already looks smooth after the second cycle, there’s no need to continue Respinning. Over-processing can make the texture softer than desired.
Adjust Liquid Gradually
It’s always easier to add more liquid than to remove it.
Start with one tablespoon of milk, process the pint again, and check the texture before deciding whether another tablespoon is needed. Small adjustments provide much better control than adding a large amount all at once.
Choose the Right Protein Powder
The protein powder you use has a noticeable effect on the finished texture.
In general, whey-casein blends create one of the smoothest consistencies because they combine fast-mixing whey protein with moisture-retaining casein. Whey isolate is an excellent choice for lighter recipes but may require an extra Respin, while many plant-based protein blends benefit from slightly more liquid to reach a similar level of creaminess.
Once you find a combination of milk and protein powder that works well for your taste, you’ll be able to recreate consistently smooth Ninja Creami protein ice cream with very little trial and error.
Common Mistakes to Avoid
One of the biggest advantages of making your own Ninja Creami protein ice cream is that nearly every texture problem has a simple solution. If your first batch isn’t perfectly creamy, don’t worry. Small adjustments usually make a much bigger difference than changing the entire recipe.
Before modifying multiple ingredients, identify the most likely cause and change only one variable at a time. This makes it much easier to understand what improves the texture in your particular recipe.
Powdery or Crumbly Texture
Seeing a dry, crumbly pint after the first spin is one of the most common concerns among new Ninja Creami users. Fortunately, it usually isn’t a sign that the recipe has failed.
Because high protein Ninja Creami ice cream contains less fat and often less sugar than traditional ice cream, the frozen base can appear powdery after its first pass through the machine. This is a normal characteristic of many protein-rich recipes.
To fix it, add 1 to 2 tablespoons of milk directly into the center of the pint and run the Respin program. The additional moisture allows the shaved ice crystals to bind together, creating a much smoother texture.
If this happens regularly, consider switching from whey isolate to a whey-casein blend, as blends generally retain moisture more effectively during freezing.
Icy Texture
An icy texture usually develops when excess water freezes into larger ice crystals.
This can happen if the base wasn’t frozen for a full 24 hours, the recipe contains very little fat or protein, or there aren’t enough stabilizing ingredients to hold moisture evenly throughout the mixture.
To reduce iciness, freeze the pint for at least 24 hours, use a higher-protein milk such as Fairlife, and consider adding a small amount of sugar-free pudding mix or xanthan gum if your recipe consistently freezes hard.
Ice Cream Is Too Soft
If your protein ice cream recipe looks more like a thick milkshake than scoopable ice cream, too much added liquid is usually the cause.
Always add milk gradually when using the Respin function. Start with one tablespoon, process the pint again, and only add more if necessary.
Also avoid leaving the frozen pint at room temperature for too long before processing, as a partially softened base can become overly creamy after spinning.
If the ice cream becomes softer than you’d like, place the pint back in the freezer for 15 to 30 minutes before serving.
Ice Cream Is Too Hard
Protein ice cream naturally freezes firmer than traditional ice cream because it usually contains less fat and sugar.
If the pint has been stored after processing, let it rest on the counter for 5 to 10 minutes before scooping. This short resting time softens the outer layer enough for easier serving.
If the texture still feels too firm, add a small splash of milk and run one additional Respin cycle. In most cases, that’s enough to restore a creamy consistency.
Expert Tip: When troubleshooting, avoid changing several ingredients at once. Adjust only one factor vsuch as the milk, protein powder, or amount of liquid then evaluate the results. This simple approach helps you identify exactly what works best for your favorite Ninja Creami protein recipe.
Quick Troubleshooting Guide
| Problem | Most Likely Cause | Easy Fix |
| Powdery or crumbly | Low-fat, high-protein mixture | Add 1–2 tablespoons of milk and use Respin |
| Icy texture | Base not fully frozen or low in stabilizers | Freeze for 24 hours and consider pudding mix or xanthan gum |
| Too soft | Too much added liquid or repeated Respins | Freeze the pint for 15–30 minutes before serving |
| Too hard | Normal after extended freezing | Let sit for 5–10 minutes or run one Respin with a splash of milk |
Flavor Variations
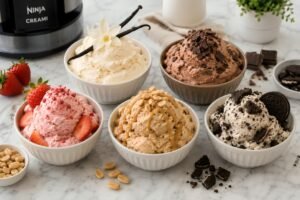
One of the best things about this Ninja Creami protein ice cream recipe is how easy it is to customize. Once you’ve perfected the base recipe, you can create dozens of flavors simply by changing the protein powder, extracts, fruit, or mix-ins.
The following variations are some of the most popular, but don’t be afraid to experiment with your own combinations.
Vanilla Protein Ice Cream
A smooth vanilla base is the perfect starting point because it pairs well with almost every topping.
Use vanilla protein powder with pure vanilla extract for a rich, balanced flavor. Fresh berries, toasted almonds, cinnamon, shredded coconut, or sugar-free caramel sauce all complement the creamy base without overpowering it.
Chocolate Protein Ice Cream
For chocolate lovers, replace the vanilla protein powder with chocolate protein powder and add one tablespoon of unsweetened cocoa powder.
This creates a deeper chocolate flavor while keeping the recipe high in protein and lower in sugar than many commercial frozen desserts. Finish with mini dark chocolate chips after the first spin for added texture.
Strawberry Protein Ice Cream
Strawberry is a fresh, naturally sweet option that’s especially popular during spring and summer.
Blend fresh or frozen strawberries into the liquid base before freezing for an even flavor throughout the pint. If using frozen berries, allow them to thaw slightly and drain any excess liquid to help prevent extra ice crystals from forming.
For more texture, stir chopped strawberries into the finished ice cream using the Mix-In program.
Peanut Butter Protein Ice Cream
Peanut butter adds richness while naturally complementing both vanilla and chocolate protein powders.
Swirl one or two tablespoons of natural peanut butter into the pint after the first spin for ribbons of nutty flavor. If you’re looking for a lighter alternative, peanut butter powder provides a similar taste with fewer calories and less fat.
Top with chopped roasted peanuts or a handful of mini chocolate chips for a peanut butter cup-inspired dessert.
Cookies & Cream Protein Ice Cream
This variation captures the familiar cookies-and-cream flavor while keeping the recipe significantly higher in protein than traditional ice cream.
Start with the vanilla base, then fold in roughly crushed chocolate sandwich cookies using the Mix-In setting. Leaving the cookie pieces slightly chunky creates a better texture than crushing them into fine crumbs.
For an even richer version, combine the cookies with chocolate protein powder or a teaspoon of cocoa powder.
More Flavor Ideas to Try
Once you’ve mastered the basics, try creating your own signature combinations. Some favorites include:
- Salted Caramel Protein Ice Cream
- Mocha Espresso Protein Ice Cream
- Banana Bread Protein Ice Cream
- Cinnamon Roll Protein Ice Cream
- Birthday Cake Protein Ice Cream
These variations use the same preparation method, making it easy to enjoy a different homemade protein ice cream every week without learning a new recipe from scratch.
Storage & Meal Prep
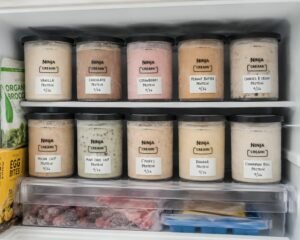
One of the best things about making Ninja Creami protein ice cream at home is that you can prepare several pints in advance and always have a high-protein dessert ready to enjoy. A little planning not only saves time but also helps maintain the creamy texture that makes each batch so satisfying.
Freeze the Base for Future Batches
If you’re meal prepping, prepare multiple Ninja Creami pints at the same time using the same base recipe. Once mixed, secure the lids and freeze each pint on a flat shelf for at least 24 hours before processing.
To stay organized, label every container with the flavor and freezing date. This simple habit makes it easier to rotate your batches and reach for the flavor you want without guessing.
For the best flavor and texture, try to use frozen bases within 30 days. While they generally remain safe if kept continuously frozen, fresher bases usually produce the creamiest results.
Store Leftover Protein Ice Cream Properly
If you have leftovers after processing, smooth the surface with the back of a spoon before replacing the lid. A level surface helps the Ninja Creami shave the frozen mixture more evenly the next time you use it.
Keep the pint tightly sealed in the freezer to help reduce freezer burn and preserve flavor. Avoid repeated thawing and refreezing whenever possible, as temperature changes can gradually affect both texture and taste.
How to Restore the Creamy Texture
It’s normal for homemade protein ice cream to freeze harder than traditional ice cream because recipes made with protein powder typically contain less fat and sugar.
Before serving leftovers, let the pint sit at room temperature for 5 to 10 minutes. If it still feels too firm, add 1 tablespoon of milk and run the Respin program. In most cases, this restores a smooth, creamy consistency without changing the flavor.
Meal Prep Tips for the Best Results
Preparing several flavors at once is an easy way to add variety while reducing prep time during the week.
For example, you might prepare a vanilla pint for everyday snacks, a chocolate version for post-workout treats, and a strawberry variation for a lighter dessert. Because every pint starts with the same base recipe, you only need to change the flavor ingredients.
If you’re experimenting with different protein powders or milk options, change only one ingredient per batch. This makes it much easier to identify which combination creates your favorite Ninja Creami protein ice cream recipe.
Nutrition Facts
The nutrition of Ninja Creami protein ice cream depends entirely on the ingredients you use. Different protein powders, milk choices, sweeteners, and mix-ins can noticeably change the calories and macronutrients in each serving.
Because of these variations, the most reliable nutrition information comes from calculating the exact ingredients used in your own recipe rather than relying on generic estimates.
Recipes prepared with ultra-filtered milk, protein powder, and a zero-calorie sweetener are generally much higher in protein and lower in sugar than many store-bought ice creams, making them a popular choice for anyone looking to enjoy a satisfying frozen dessert while supporting their nutrition goals.
What Changes the Nutrition?
The ingredients below have the greatest influence on the final nutrition profile.
Protein Powder
Protein powder usually contributes the largest share of protein in the recipe. However, every brand is different, so calories, carbohydrates, and protein can vary from one scoop to another.
Milk
Your choice of milk changes both texture and nutrition. Whole milk creates a richer ice cream with more fat, while skim milk lowers calories. Ultra-filtered milk, such as Fairlife, provides additional protein without dramatically increasing calories, while unsweetened almond milk is often the lowest-calorie option but also contains less protein.
Sweetener
Zero-calorie sweeteners help keep calories and sugar low. Sweeteners such as sugar, maple syrup, or honey create a sweeter flavor but also increase both calories and carbohydrates.
Mix-Ins
Mix-ins can quickly change the nutrition of the finished dessert. Fresh fruit adds natural sweetness and fiber, while ingredients such as peanut butter, chocolate chips, cookies, or caramel sauces increase calories, fat, and sugar.
Tracking Your Macros
If you’re following a high-protein diet, counting calories, or tracking macros, enter your exact ingredients into a reputable nutrition calculator after finalizing your recipe. This gives you nutrition values that accurately reflect your serving size and ingredient choices, making it easier to stay consistent with your personal health or fitness goals.
Frequently Asked Questions
Why is my Ninja Creami protein ice cream crumbly after the first spin?
A crumbly texture after the first spin is completely normal for many Ninja Creami protein ice cream recipes. High-protein mixtures usually contain less fat than traditional ice cream, so they often need one Respin cycle with 1 to 2 tablespoons of milk to become smooth and creamy.
Which protein powder works best for Ninja Creami protein ice cream?
Whey-casein blends generally produce the creamiest texture because they retain moisture better during freezing. Whey isolate is another popular choice but may require an extra Respin. If you’re using a plant-based protein powder, you may need slightly more liquid to achieve a similar consistency.
Can I use almond milk instead of regular milk?
Yes. Unsweetened almond milk is a great option if you’re trying to reduce calories. However, because it contains less protein and fat than dairy milk, the finished ice cream may be slightly less creamy. Adding a small amount of xanthan gum or sugar-free pudding mix can help improve the texture.
How long should I freeze the Ninja Creami base?
Freeze the base for at least 24 hours before processing. Although the top may feel frozen sooner, the center often needs additional time to become completely solid. A fully frozen base helps the Ninja Creami create a smoother texture.
Can I make Ninja Creami protein ice cream without protein powder?
Yes, but expect a different result. Protein powder contributes both flavor and structure, helping create a thicker texture while increasing the protein content. Without it, you’ll likely need to adjust the liquid and stabilizers to maintain a creamy consistency.
How can I make my protein ice cream creamier?
For the creamiest results, use a whey-casein protein blend, freeze the base for a full 24 hours, and run the Respin program with 1 to 2 tablespoons of milk if needed. Choosing ultra-filtered milk can also improve both texture and protein content.
Is Ninja Creami protein ice cream healthy?
It can be. One of the biggest benefits of making homemade protein ice cream is that you control every ingredient. By selecting a quality protein powder, your preferred milk, and a lower-sugar sweetener, you can create a dessert that better fits your nutrition goals than many store-bought alternatives.
Can I add fruit, cookies, or chocolate chips?
Absolutely. Add mix-ins only after the first spin and use the Mix-In program. This distributes the ingredients evenly while helping them keep their texture instead of blending completely into the base.
Can I refreeze leftover protein ice cream?
Yes. Store leftovers in the original Ninja Creami pint with the lid securely closed. Before serving again, let the pint sit at room temperature for 5 to 10 minutes. If it’s still too firm, add a tablespoon of milk and run one Respin cycle.
How long does homemade protein ice cream stay fresh?
For the best flavor and texture, enjoy your homemade protein ice cream within about 30 days when stored in a sealed Ninja Creami pint. Although it generally remains safe if continuously frozen, quality gradually declines over time.
Final Thoughts

This Ninja Creami protein ice cream recipe proves that you don’t have to choose between enjoying dessert and meeting your nutrition goals. With just a handful of simple ingredients and the right technique, you can create a creamy, satisfying frozen treat that’s easy to customize for your taste and lifestyle.
Whether you’re preparing high-protein snacks for the week, looking for a healthier dessert after dinner, or experimenting with new Ninja Creami flavors, this recipe gives you a reliable foundation that works for beginners and experienced users alike.
Once you’ve found your favorite combination of protein powder, milk, and mix-ins, you’ll be able to recreate consistently delicious results with very little effort. That’s one of the biggest advantages of making Ninja Creami protein ice cream at home you stay in control of the flavor, texture, and nutrition every time.
If you enjoyed this recipe, be sure to explore more healthy dessert recipes on Daily Bite Recipes. You’ll find easy protein-packed treats, lighter frozen desserts, and simple homemade recipes that make healthy eating both enjoyable and sustainable.