Can You Grill Frozen Corn on the Cob?
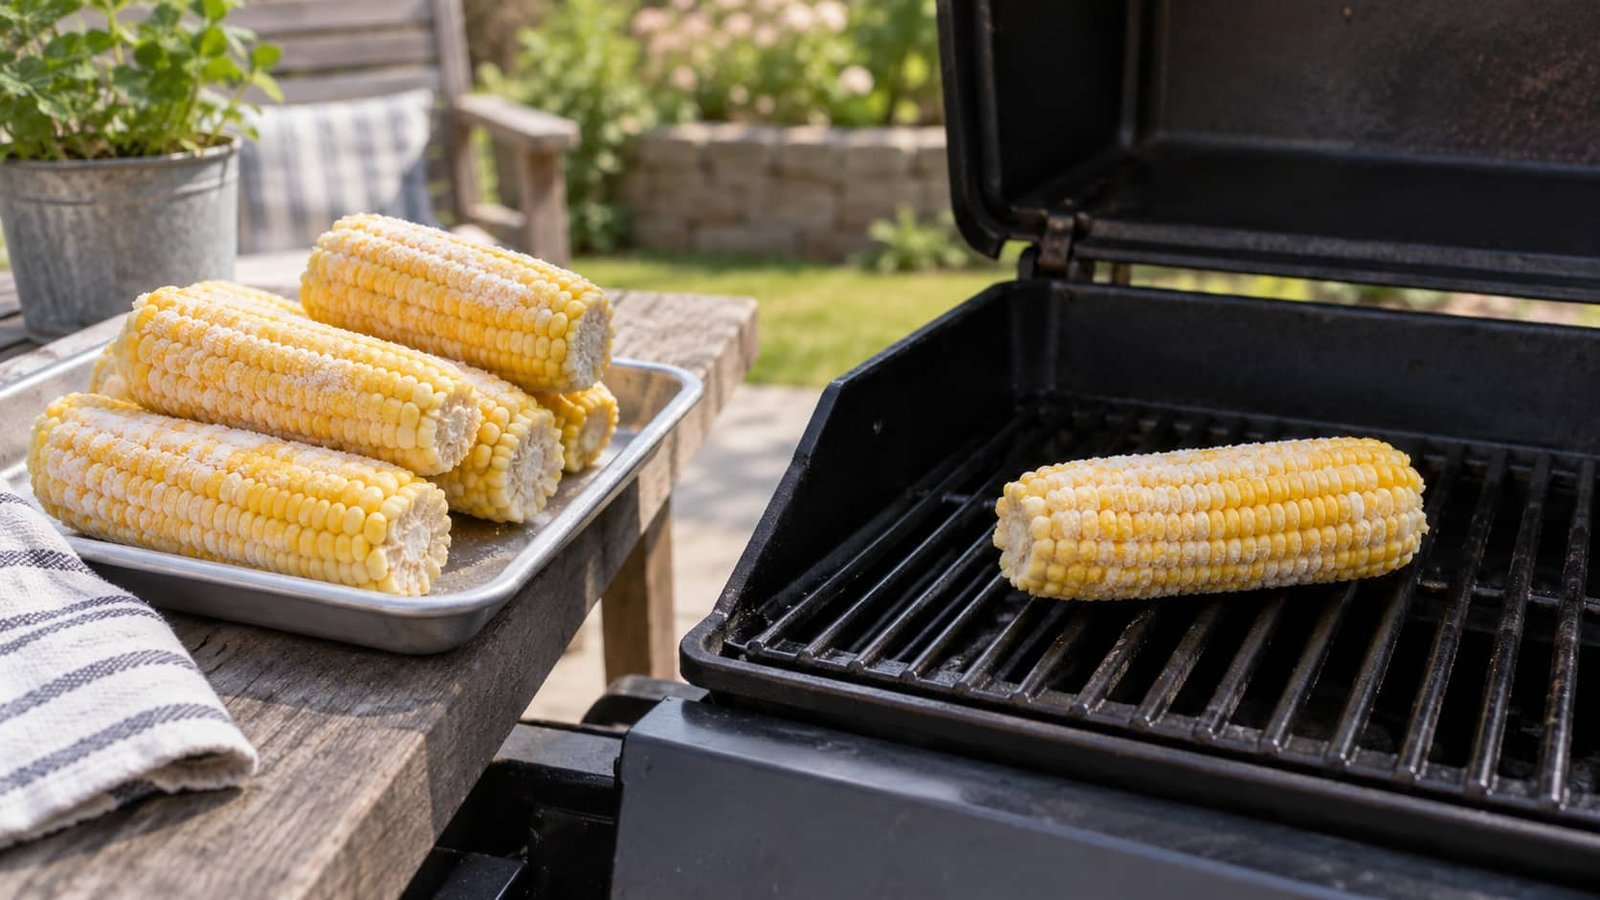
Yes. Frozen corn on the cob can be cooked on a grill, but the goal is to heat the cob through without over-browning the outer kernels.
Frozen corn should not automatically be treated as fully cooked or ready to eat simply because it has been frozen. Blanching is commonly used when preparing corn for freezing because it helps slow quality changes during storage. However, blanching is a preservation step and does not mean that every frozen corn product is ready to eat without further cooking.
Commercial frozen corn may also have product-specific preparation requirements. The FDA advises following cooking directions provided on commercially frozen foods when they are available. Those instructions should take priority over general grilling guidance.
Grilling exposes the corn to direct or indirect heat while the center warms. How quickly this happens can vary with the size of the cob, whether it is fully frozen or partly thawed, and the grill setup.
Surface browning can indicate that the kernels have been exposed to strong heat, but browning alone does not show whether the center has heated sufficiently.
Should You Thaw Frozen Corn Before Grilling?
Partially thawing corn on the cob can help the center heat more evenly during cooking. The National Center for Home Food Preservation specifically advises partially thawing frozen corn on the cob before cooking so the cob can heat through as the kernels cook.
For commercially packaged corn, however, the package directions should take priority. Some products may provide instructions for cooking directly from frozen.
The difference mainly comes down to starting temperature. A fully frozen cob needs more heat to move from the surface toward the colder center. A partially thawed cob starts warmer, so it may require less time to heat throughout.
Thawing can also affect browning. Moisture on the surface generally needs to evaporate before stronger browning can develop, so wet corn may brown more slowly than corn with a relatively dry surface.
For frozen corn without specific package instructions, partial thawing is a reasonable approach supported by established food-preservation guidance. It should not, however, be treated as a universal requirement for every commercial product.
How to Grill Frozen Corn on the Cob: Methods, Heat, and Timing
Can You Grill Frozen Corn on the Cob?
Yes. Frozen corn on the cob can be cooked on a grill. The main challenge is heating the center of the cob while preventing the outer kernels from browning too quickly.
Frozen corn should not automatically be considered fully cooked or ready to eat simply because it has been frozen. Corn is commonly blanched before freezing to help preserve quality, but blanching is a preservation step rather than proof that every frozen product is ready to eat without further cooking.
Commercial products can also have different preparation requirements. When frozen corn comes with cooking directions, those instructions should take priority over general grilling advice.
Grilling exposes the outside of the corn to heat before the center has fully warmed. Cob size, starting temperature, grill design, and heat placement can all affect how quickly the corn cooks.
Surface browning can indicate exposure to strong heat, but it does not by itself confirm that the center has heated sufficiently.
Should You Thaw Frozen Corn Before Grilling?
Partially thawing frozen corn on the cob can help the center heat more evenly. Established food-preservation guidance specifically recommends partially thawing frozen corn on the cob before cooking so the cob can heat through as the kernels cook.
Commercial package directions still take priority. If a product specifically instructs the user to cook the corn from frozen, follow those directions instead of assuming that thawing is required.
The difference is mainly related to starting temperature. A fully frozen cob requires more heat to move from the exterior toward the colder center. A partially thawed cob starts warmer and may therefore heat through sooner.
Surface moisture can also influence browning. Moisture generally needs to evaporate before stronger surface browning develops, so wet corn may color more slowly than corn with a relatively dry exterior.
For corn without product-specific directions, partial thawing is a reasonable approach. It should not be treated as a universal rule for every frozen corn product.
How Heat Affects Frozen Corn on the Grill
Why Moderate Heat Can Be Easier to Control
Moderate, controllable heat gives the center of the cob more time to warm without exposing the outer kernels to unnecessarily intense heat.
The surface receives grill heat first. Heat then moves inward toward the colder center, which can take longer when the corn is still fully or partly frozen.
Very strong direct heat may brown or char the exterior before the center has heated sufficiently. When that happens, the corn may need additional cooking even though the outside already appears finished.
For this reason, managing the heat is more useful than relying on one exact grill temperature. Grill type, fuel, cob thickness, starting temperature, and placement over the heat source can all affect cooking.
Direct Heat vs. Indirect Heat
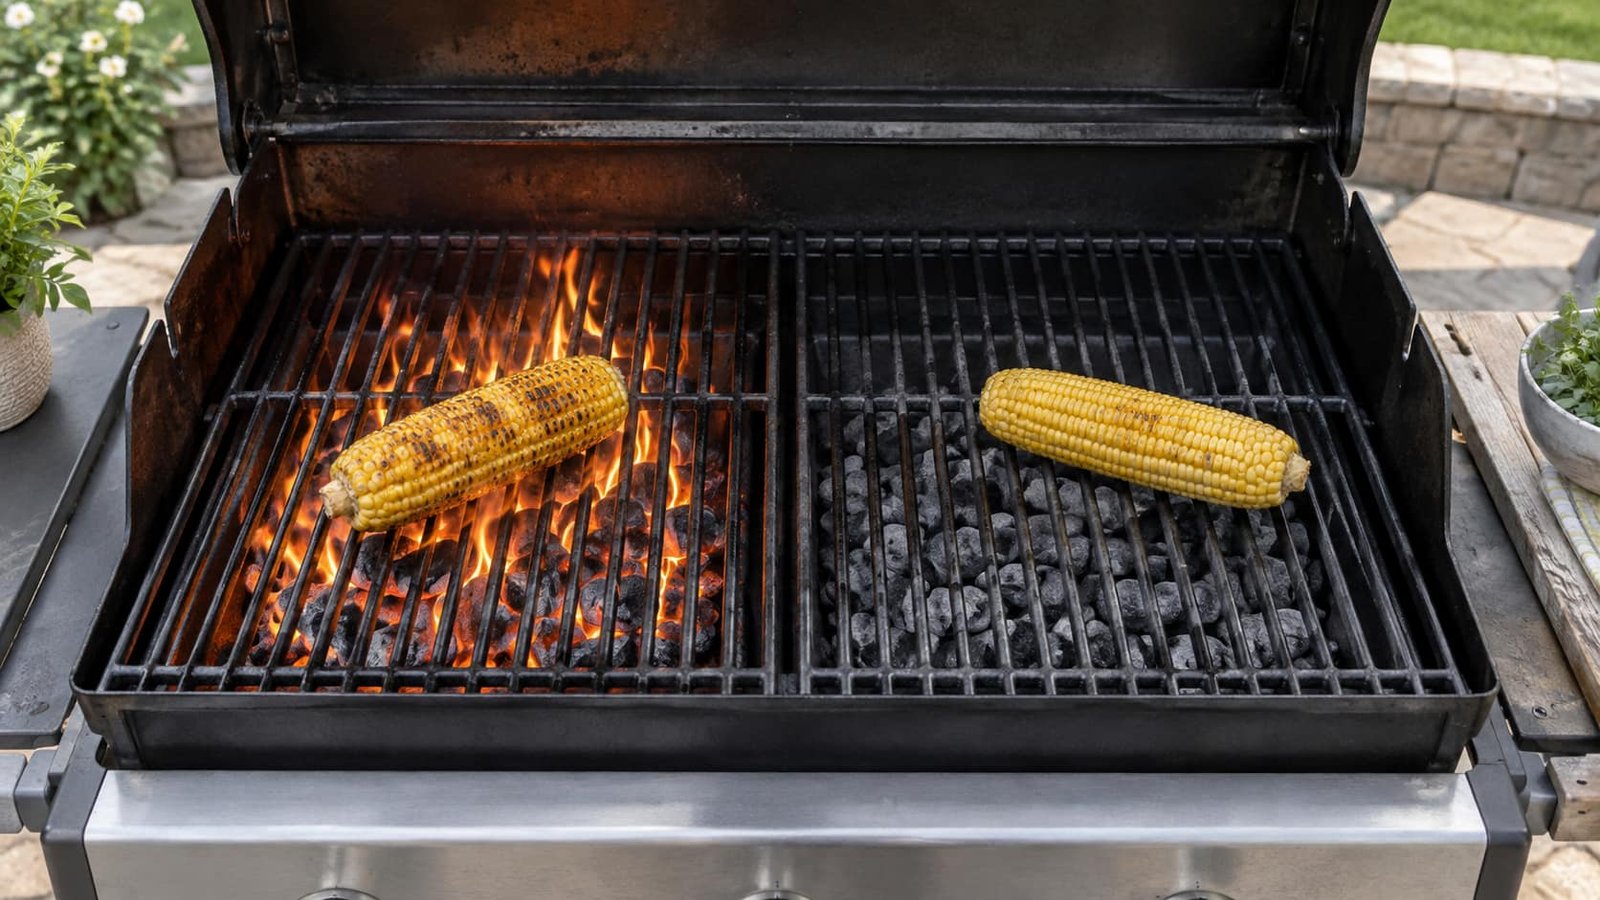
Direct heat means placing the corn over the active burner or coals. This exposes the kernels more strongly to the heat source and hot grate, creating more opportunity for surface browning and grill marks.
Indirect heat means placing the corn away from the strongest heat source. The surrounding hot air continues to warm the cob, but the surface receives less intense direct exposure.
A two-zone grill can combine both approaches. For example, corn that is browning too quickly can be moved to a cooler zone while the center continues to heat. It can later be returned to direct heat if additional surface color is wanted.
Neither method is automatically better. Direct heat provides stronger surface exposure, while indirect heat allows more gradual heating. Using both zones is one possible way to control the balance between the two.
How to Grill Frozen Corn on the Cob
There is no single grilling procedure that works exactly the same for every frozen corn product. Package directions, starting temperature, cob size, and grill setup can all affect the method.
Check the Package Instructions
Read the cooking directions on commercially packaged frozen corn before placing it on the grill.
Frozen vegetables may be sold as products that are intended to be cooked rather than simply reheated. If the manufacturer specifies thawing, cooking from frozen, or another preparation requirement, those instructions should take priority over generalized online guidance.
If the package does not provide grilling instructions, the following steps can be used as general heat-management guidance rather than as a fixed recipe.
Preheat and Arrange the Grill
Preheat the grill so the cooking grate and surrounding grill environment are already hot when the corn is added.
Use moderate, controllable heat rather than assuming that the highest setting is necessary. If the grill allows it, create both a hotter direct zone and a cooler indirect zone. This makes it easier to move the corn if the exterior begins browning faster than the center heats.
Leave enough space between the cobs to turn and reposition them. Tight crowding can make individual pieces harder to manage, especially if the grill has noticeable hot spots.
There is no single mandatory temperature for every frozen corn product and grill type, so heat control is more useful than treating one number as universal.
Grill and Turn the Corn
Place the corn over the chosen heat zone and watch how the surface changes during cooking.
Turning exposes different sides to the heat and hot grate. Repositioning the cobs can also help compensate for hotter and cooler areas of the grill.
A fixed instruction such as turning every few minutes should not be treated as universal. The appropriate interval can vary with grill intensity, cob size, starting temperature, and whether the corn is being cooked over direct or indirect heat.
If one area darkens much faster than the rest, moving the corn to a cooler part of the grill is one possible adjustment. The cob can continue heating with less intense surface exposure.
How to Judge Cooking Progress
Do not use grill marks or surface browning as the only sign that frozen corn is finished cooking.
Browning mainly shows what has happened to the exterior. The center can still be cooler, particularly when the corn started fully frozen.
Instead, consider whether:
- the cob is heated through rather than cold in the center
- the kernels have reached the desired tenderness
- any product-specific cooking directions have been completed
For commercially packaged corn, manufacturer instructions remain the most important reference when they specify how the product should be cooked.
The appearance and texture can vary by product and grilling method. For that reason, neither surface color nor a fixed timer should be treated as a universal measure of doneness.
How to Grill Frozen Corn on the Cob: Methods, Heat, and Timing
Can You Grill Frozen Corn on the Cob?
Yes. Frozen corn on the cob can be cooked on a grill. The main challenge is heating the center without exposing the outer kernels to excessive heat.
Frozen corn should not automatically be considered fully cooked or ready to eat simply because it has been frozen. Corn is commonly blanched before freezing to help preserve quality, but blanching does not mean every frozen corn product can be eaten without further cooking.
Commercial products may also have specific preparation requirements. If the package provides cooking directions, follow those instructions before relying on general grilling guidance.
Grilling can expose the outside of the cob to heat much faster than the colder center warms. For this reason, cob size, starting temperature, grill setup, and heat placement can all affect the cooking process.
Should You Thaw Frozen Corn Before Grilling?
Partial thawing can help frozen corn on the cob heat more evenly. Established food-preservation guidance recommends partially thawing frozen corn on the cob before cooking so the cob can heat through as the kernels cook.
Commercial package directions still take priority. If a product is specifically intended to be cooked from frozen, follow those instructions.
A fully frozen cob starts at a lower temperature than a partially thawed one, so more heat must move from the exterior toward the center. A partially thawed cob may therefore heat through sooner.
Thawing can also affect browning. Moisture on the surface generally needs to evaporate before stronger browning develops, so a wet exterior may color more slowly.
For corn without product-specific directions, partial thawing is a reasonable option rather than a universal requirement.
How Heat Affects Frozen Corn on the Grill
Why Moderate Heat Can Be Easier to Control
Moderate, controllable heat gives the center more time to warm before the outside becomes heavily browned.
The kernels on the surface receive heat first, while the center warms more gradually. This difference is more noticeable when the cob is still fully or partly frozen.
Very strong direct heat can brown or char the exterior before the center has heated sufficiently. Heat control is therefore more useful than treating one exact grill temperature as correct for every situation.
Grill type, fuel placement, cob thickness, starting temperature, and position on the grate can all change how quickly heat reaches the corn.
Direct Heat vs. Indirect Heat
Direct heat places the corn over an active burner or hot coals. This gives the kernels greater exposure to the heat source and cooking grate, creating more opportunity for browning and grill marks.
Indirect heat places the corn away from the strongest heat source. The surrounding hot air continues to heat the cob while reducing intense direct exposure to the surface.
A two-zone grill allows both methods to be used. If the corn begins browning faster than the center is heating, it can be moved to the cooler side. It can later return to direct heat if more surface color is wanted.
Neither method is automatically better. Direct heat emphasizes surface browning, while indirect heat provides more gradual heating.
How to Grill Frozen Corn on the Cob
There is no single grilling procedure that applies to every frozen corn product. Package directions, starting temperature, cob size, and grill setup can all affect the method.
Check the Package Instructions
Read the package before grilling commercially frozen corn.
Some frozen vegetables are intended to be cooked rather than simply reheated. If the manufacturer gives instructions about thawing, cooking from frozen, or another preparation step, follow those directions first.
If no grill-specific instructions are provided, the following steps can be used as general heat-management guidance rather than as a fixed recipe.
Preheat and Arrange the Grill
Preheat the grill before adding the corn so the cooking environment is already hot.
Use a moderate, manageable level of heat rather than assuming the highest setting is necessary. When possible, create a hotter direct zone and a cooler indirect zone. This gives you somewhere to move the corn if the exterior begins darkening too quickly.
Leave enough space between the cobs to turn and reposition them easily.
There is no single mandatory grill setting that applies to every frozen corn product, so the ability to adjust the heat is more important than following one exact temperature.
Grill and Turn the Corn
Place the corn over the chosen heat zone and monitor the surface as it cooks.
Turn the cobs so different sides are exposed to the grate and heat source. Repositioning them can also help compensate for hot spots on the grill.
A fixed turning interval is not necessary. How often the corn needs to move can depend on heat intensity, cob size, grill design, and whether it started frozen or partially thawed.
If one area darkens much faster than the others, moving the corn to a cooler zone is one possible adjustment.
How to Judge Cooking Progress
Do not use grill marks or surface browning as the only indication that the corn is finished.
Browning shows what has happened to the exterior, but it does not confirm that the center has heated through.
Instead, check whether the cob is heated throughout and whether the kernels have reached the desired tenderness. If the product includes specific cooking instructions, make sure those requirements have also been followed.
Appearance and texture can vary with the product and grilling method, so a browned surface or fixed timer should not be treated as a universal measure of doneness.
How Long Does Frozen Corn Take to Grill?
There is no single verified grilling time that applies to every frozen corn on the cob product.
The time needed can vary because several factors influence how quickly heat reaches the center:
- whether the corn starts fully frozen or partially thawed
- cob size and thickness
- heat intensity at the cooking grate
- grill design and hot spots
- whether the lid is open or closed
- direct versus indirect heating
- foil versus uncovered cooking
A fully frozen cob generally requires more heating than a partially thawed one because its center begins colder. Thicker cobs may also take longer for heat to reach the middle.
The grill itself introduces additional variation. The temperature shown on a lid thermometer does not necessarily represent the exact conditions at every point on the cooking grate, especially when burners or coals create separate hot and cool areas.
Lid position can also change the cooking environment. Closing the lid retains more hot air around the food, while an open grill allows more heat to escape.
Foil, direct heat, and indirect heat further change how heat reaches the corn. Because these factors interact, a cooking time taken from fresh corn or from one specific grill should not automatically be applied to frozen corn.
If the package gives cooking directions, use them as the primary timing reference. Without grill-specific instructions, monitor whether the corn has heated through instead of relying on an unsupported universal time range.
Grilling Frozen Corn in Foil vs. Directly on the Grates
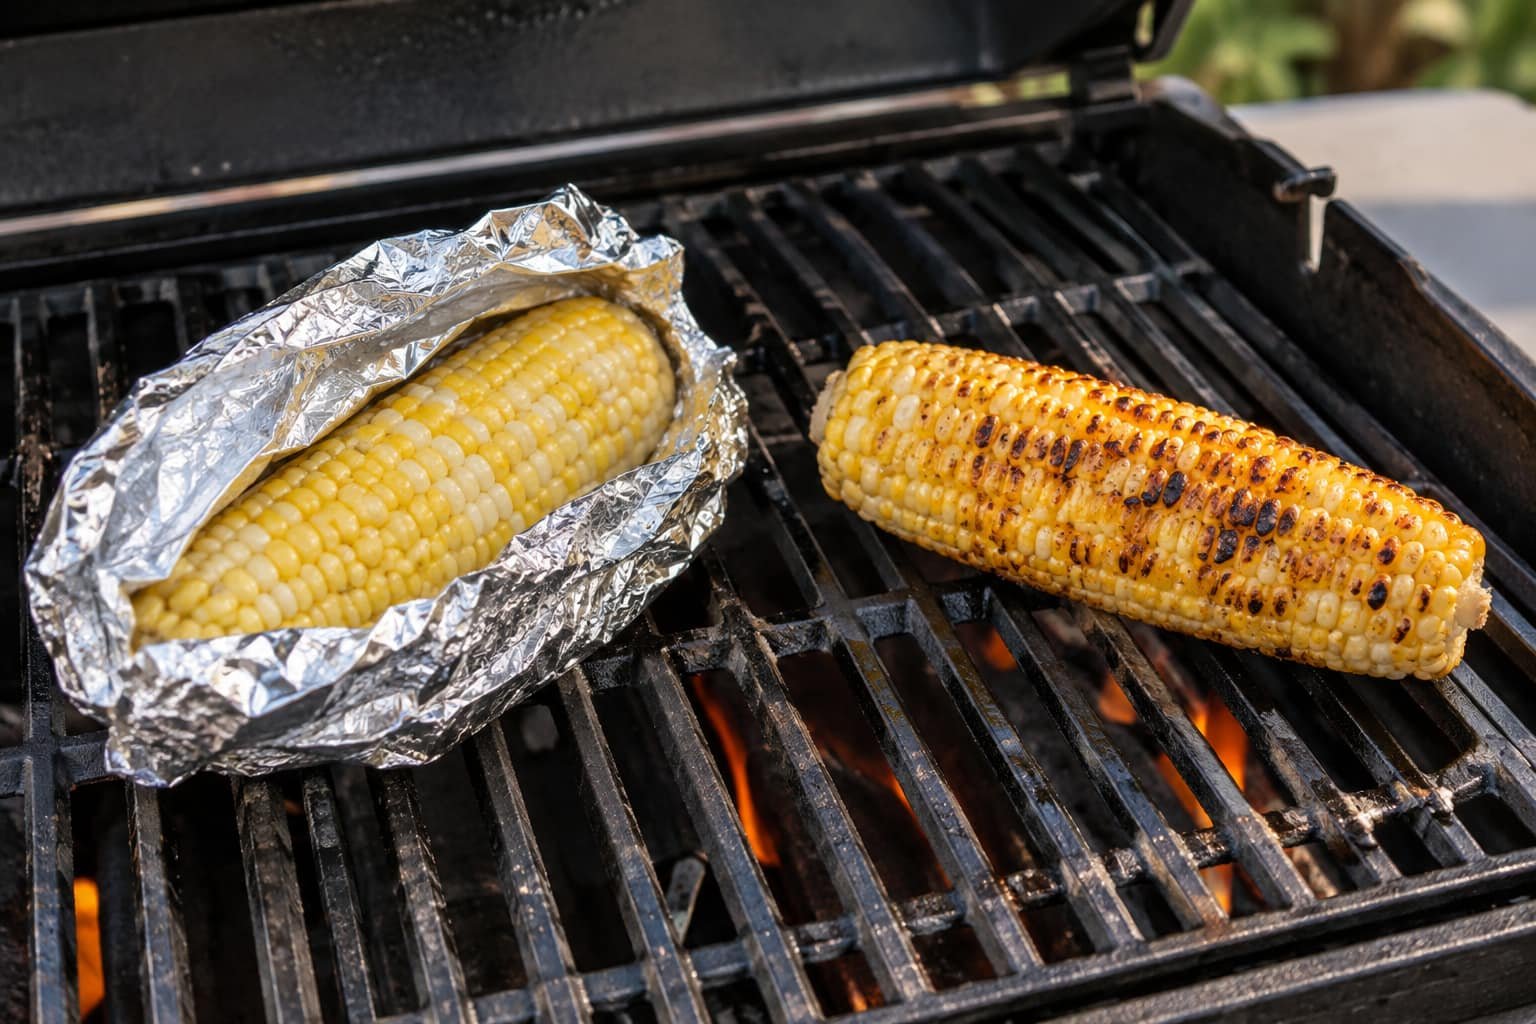
Foil and direct grilling create different cooking environments. The main difference is how much direct heat and grate contact reaches the surface.
What Changes When Corn Is Wrapped in Foil?
Foil limits direct contact between the kernels and the cooking grate.
A closed packet also traps some of the moisture released as the corn heats, creating a more enclosed environment where steam may form around the cob.
Because the kernels are shielded from the grate, foil-wrapped corn generally has less opportunity to develop pronounced grill marks or direct surface browning.
Foil should not automatically be described as producing softer, juicier, or better corn. The final texture can vary with the product and cooking conditions.
Take care when opening a hot foil packet because steam may escape.
What Changes With Direct Grilling?
Direct grilling exposes the kernels more strongly to both the heat source and the hot grate.
This creates more opportunity for browned areas and grill marks. It also means the exterior can develop color while the colder center is still heating, particularly when the corn starts frozen or the grill is very hot.
Turning, repositioning, or moving the corn to indirect heat can help control excessive surface browning.
Using Both Methods
Foil and direct heat can also be combined.
One possible approach is to heat the corn in foil first, then remove the wrapping and place the cob over direct heat when additional surface browning is wanted.
This should be treated as an optional technique rather than a required or superior method. The appropriate approach can vary with the product, starting temperature, grill setup, and desired amount of browning.
Why Frozen Corn May Cook or Brown Unevenly
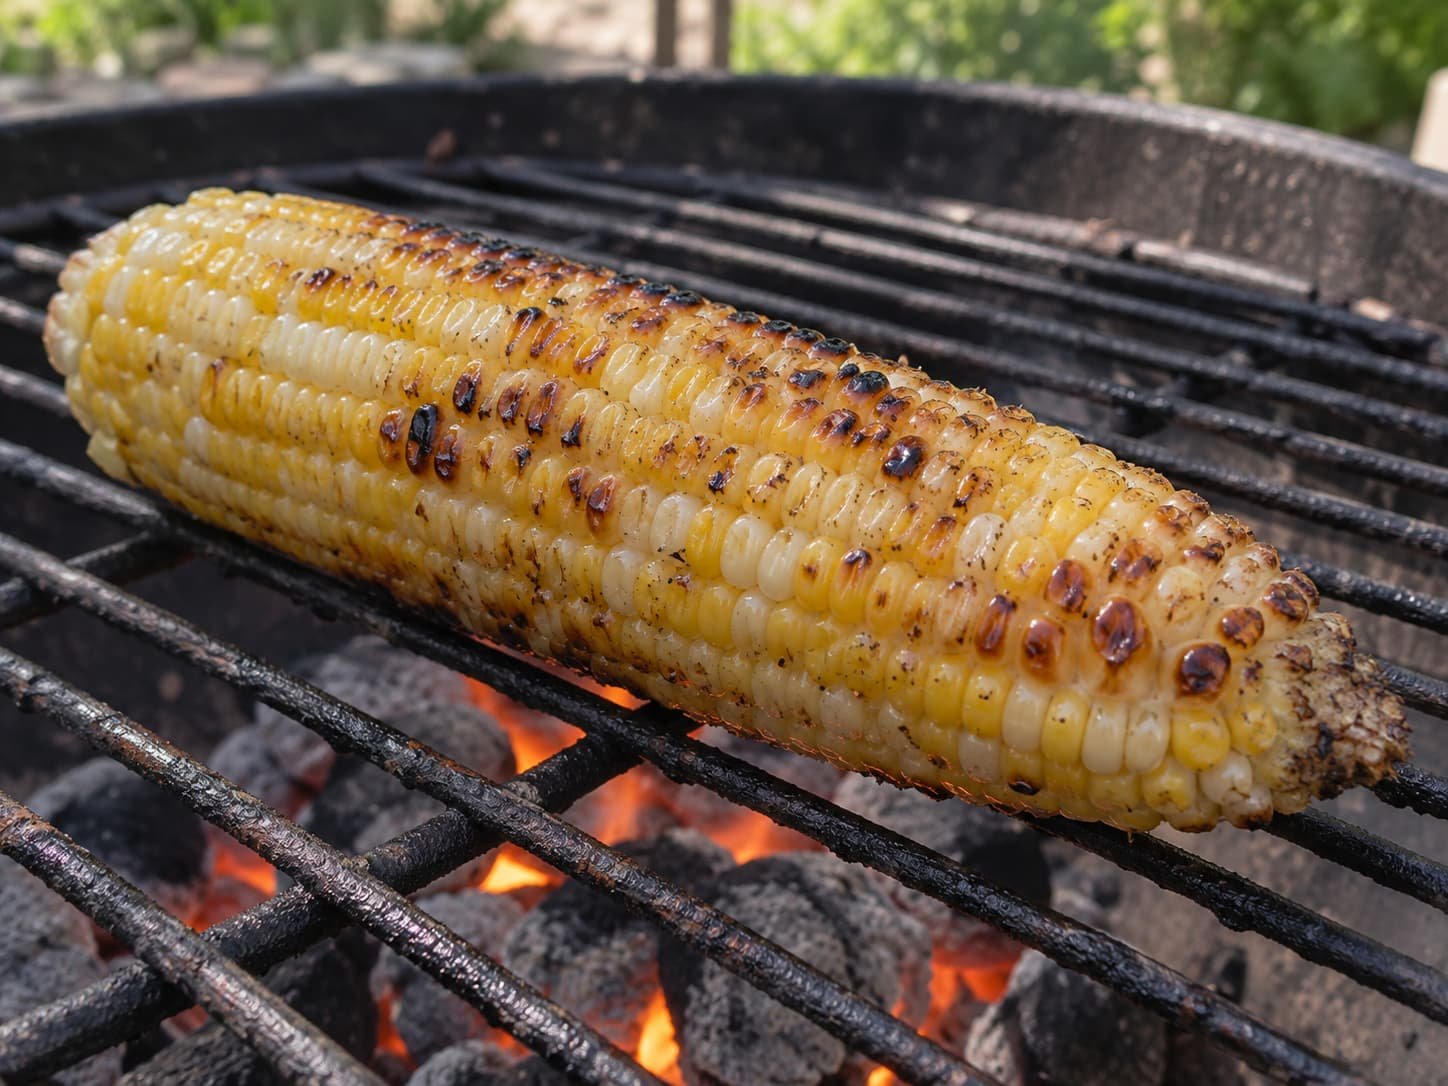
Frozen corn may heat and brown unevenly because the surface, center, and different parts of the grill do not receive heat at the same rate. Cob thickness, surface moisture, grate contact, and grill hot spots can all influence the result.
Outside Browns Before the Center Is Heated
If the kernels darken while the center is still cool, the exterior is heating faster than the inside of the cob.
Strong direct heat can cause the surface to brown quickly. A thicker or colder cob may need more time for heat to reach the center, while a hot area of the grill can make one section darken faster than expected.
Possible adjustments include lowering the intensity of direct heat, moving the corn to a cooler or indirect zone, or allowing more gradual heating.
Surface color alone should not be used to judge whether the corn has heated through.
Corn Stays Pale
Pale corn is not necessarily undercooked. Browning depends on surface conditions as well as cooking progress.
A wet surface can brown more slowly because moisture must evaporate before stronger browning develops. Foil wrapping, gentler heat, and limited contact with the hot grate can also reduce visible grill marks and browned areas.
For the same reason, a deeply browned exterior does not necessarily mean the center is fully heated. Surface color and internal heating are related to different parts of the cooking process.
Some Areas Darken Faster Than Others
Uneven browning often reflects differences in heat exposure and grate contact.
Grills can develop hotter and cooler areas because of burner position, charcoal placement, airflow, and grill design. Corn is also irregular in shape, so some kernels may sit closer to the grate than others.
Turning and repositioning the cobs can help expose different surfaces to the heat. If one section continues to darken faster, moving the corn away from the hottest area is another possible adjustment.
Perfectly even color is not necessary. The more useful goal is to manage the heat so the cob can warm through without isolated areas becoming excessively dark.
Seasoning and Finishing Options
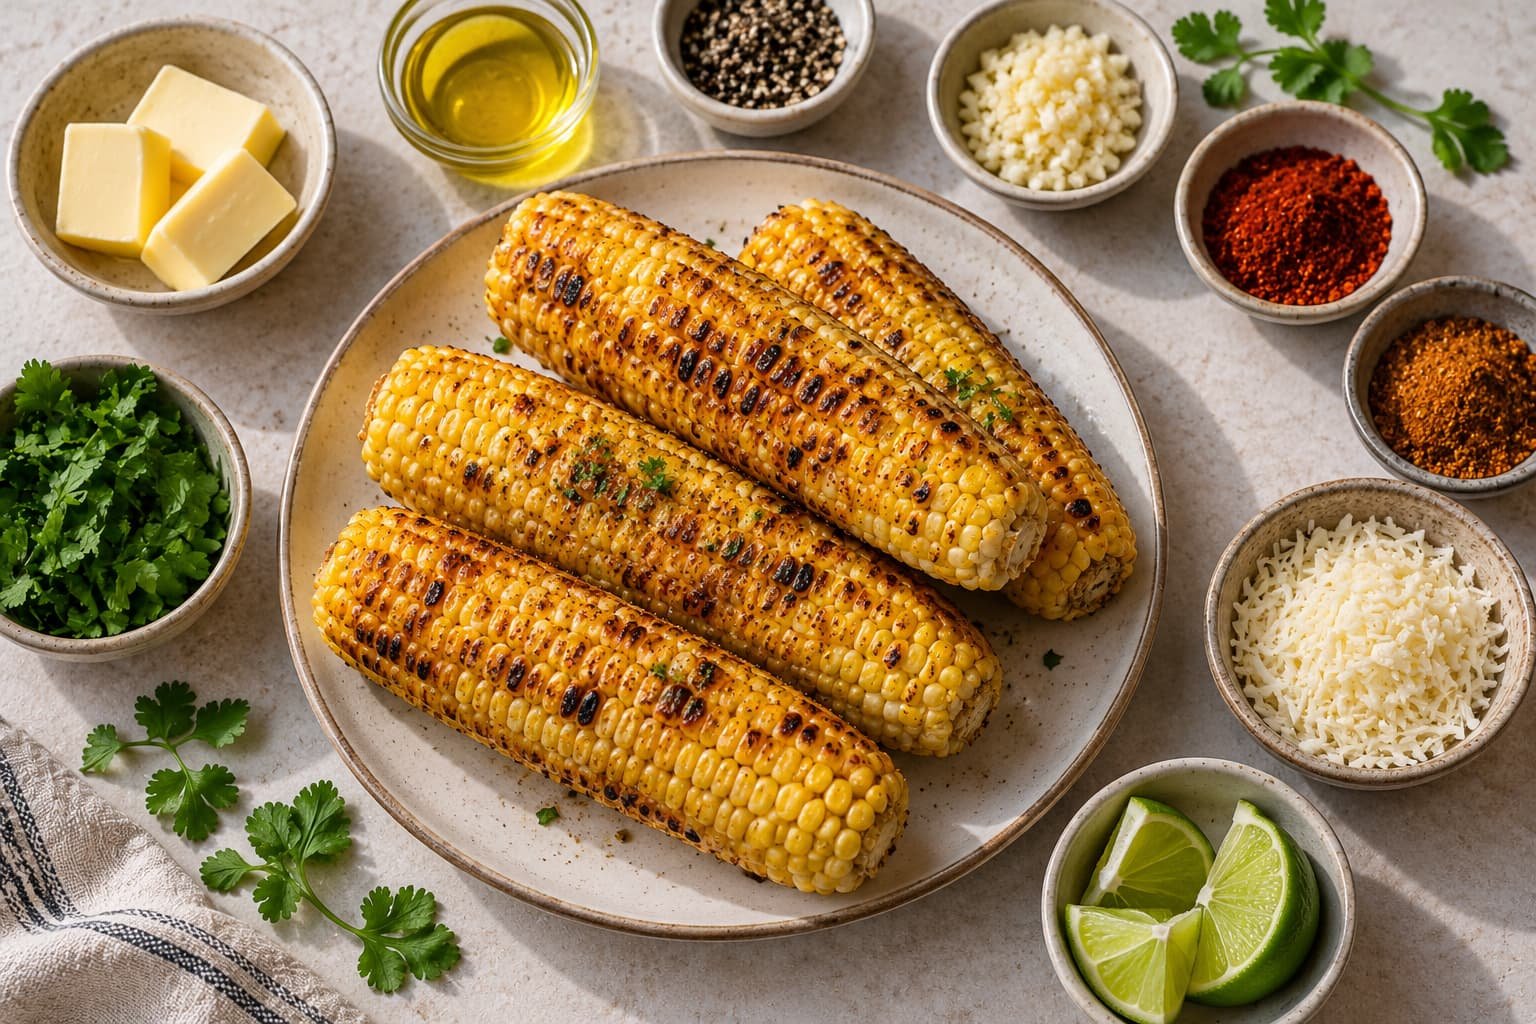
Grilled corn can be seasoned in many ways, so there is no single required combination.
Common options include butter or oil, salt and black pepper, garlic, chili powder or smoked spices, citrus juice or zest, fresh herbs, and grated cheese. The choice depends mainly on the flavor profile wanted.
Some ingredients are easier to control when added after grilling. Fresh herbs, citrus, and grated cheese, for example, do not need prolonged exposure to grill heat.
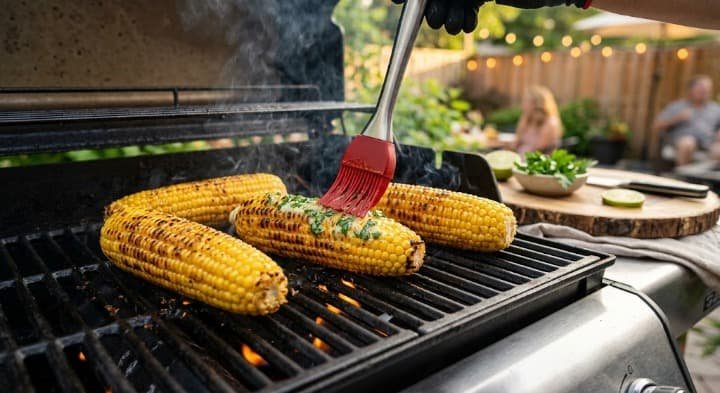
Butter can be added before cooking, but its milk solids can brown or burn when exposed to sufficiently high heat. Adding butter toward the end of cooking or after the corn leaves the grill is another option.
Seasoning amounts can be adjusted to taste rather than treated as fixed recipe measurements.
Can Different Types of Grills Be Used?
Yes. Frozen corn can be cooked on gas, charcoal, or pellet grills, although each type manages heat differently.
Gas grills generally make heat adjustment straightforward because burner output can be changed with controls. On multi-burner grills, separate direct and indirect cooking zones can often be created.
Charcoal grills can also provide direct and indirect zones. Concentrating the coals in one area creates stronger heat there while leaving another section cooler. This can make it easier to move the corn when the exterior is browning faster than the center is heating.
Many pellet grills cook mainly with indirect, circulating heat. Their exact heat patterns depend on the design and model, so the manufacturer’s instructions remain useful when deciding how to position food.
These differences affect heat management, but they do not establish that one grill type produces better corn than another.
Frequently Asked Questions
Can You Grill Frozen Corn Without Foil?
Yes, provided the product’s cooking instructions do not require another preparation method.
Placing corn directly on the grates gives the kernels more exposure to the heat source and creates more opportunity for browning. If one area begins darkening too quickly, turning or repositioning the cob can help manage that exposure.
Can Butter Be Added Before Grilling?
Yes. Butter can be applied before grilling, although it can brown or burn under strong direct heat because it contains milk solids.
Adding butter near the end of cooking or after grilling is another option when more control over browning is wanted.
Why Doesn’t Frozen Corn Develop Strong Grill Marks?
Frozen corn may develop weak grill marks because of surface moisture, foil wrapping, gentle heat, or limited contact with the hot grate.
Moisture on the surface can delay stronger browning, while foil prevents direct contact between the kernels and the grate. Corn cooked mostly with indirect heat may also develop less noticeable marks.
Grill marks describe surface browning rather than whether the center has heated through, so they should not be used as the main measure of cooking progress.