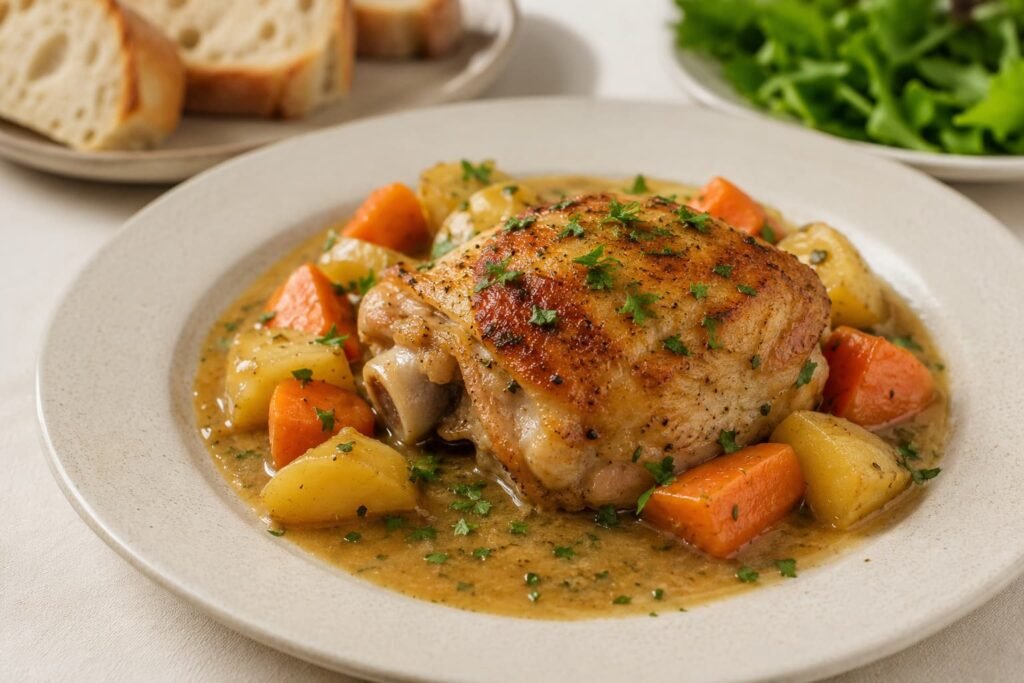
roast with gravy

Easy Chicken Pot Roast with Potatoes and Carrots

Facebook
LinkedIn
Pinterest
WhatsApp

Table of Contents

This chicken pot roast brings together browned bone-in chicken thighs, tender potatoes and carrots, and a savory herb gravy. The chicken sits skin-side up while roasting, allowing the vegetables to cook in the flavorful broth without completely covering the browned skin.

Bone-in, skin-on chicken thighs are ideal for this recipe because they stay moist during the longer cooking time and develop deeper flavor when browned first. Unlike a traditional beef pot roast that can take several hours, this chicken version cooks faster and uses a lighter broth-based gravy.

The entire meal is prepared in one Dutch oven, from browning the chicken to building the gravy and roasting the vegetables. The method helps prevent dry chicken, hard vegetables, softened skin and lumpy gravy, giving you a dependable one-pot chicken dinner with less cleanup.

Quick Answer: How Do You Make Chicken Pot Roast?

Brown seasoned bone-in, skin-on chicken thighs in a Dutch oven and transfer them to a plate. Sauté onion and celery, add garlic, then stir flour into the vegetables before gradually adding broth. Add thick-cut potatoes and carrots, return the chicken skin-side up, and roast at 375°F (190°C) for 45 to 55 minutes, until the vegetables are tender and the chicken reaches at least 165°F (74°C).

Important: The complete recipe card must also use 375°F, 45 to 55 minutes and flour-thickened gravy. Changing these details later would make the article inconsistent and less trustworthy.

Chicken Pot Roast Recipe at a Glance

This chicken pot roast recipe starts with browning seasoned chicken thighs on the stovetop and finishes with gentle roasting in the oven. A 5 to 6-quart Dutch oven provides enough room for the chicken, potatoes and carrots without crowding them.

Bone-in, skin-on chicken thighs retain moisture well during roasting and add flavor to the herb gravy. The vegetables cook underneath the chicken, where they absorb the seasoned broth while the exposed skin remains above most of the liquid.

Detail Recipe information
Preparation time 20 minutes
Browning time 10 to 12 minutes
Gravy preparation time 8 to 10 minutes
Oven temperature 375°F (190°C)
Oven time 45 to 55 minutes
Resting time 5 minutes
Approximate total time 1 hour 30 minutes to 1 hour 40 minutes
Yield 6 regular servings or 4 larger servings
Recommended cookware 5 to 6-quart Dutch oven
Cooking method Stovetop browning followed by oven roasting
Course Main Course
Cuisine American
Recommended chicken Bone-in, skin-on chicken thighs
Main vegetables Potatoes and carrots
Minimum chicken temperature 165°F (74°C)
Best served as Family dinner or cold-weather comfort food

Insert an instant-read thermometer into the thickest part of each chicken thigh without touching the bone. Every piece should reach at least 165°F (74°C) before serving, which is the safe minimum temperature recommended for poultry. 

The exact cooking time can vary with the size of the thighs, the thickness of the vegetables and the type of Dutch oven used. Begin checking the chicken and vegetables after 45 minutes. The chicken should be safely cooked, the potatoes should pierce easily with a knife, and the carrots should be tender without falling apart.

What Is Chicken Pot Roast?

Chicken pot roast is a one-pot meal made by browning chicken and then cooking it with vegetables in a seasoned broth that develops into gravy. It adapts the comforting flavors and one-pot method of traditional beef pot roast, but chicken becomes tender in much less time.

This recipe uses bone-in, skin-on chicken thighs with potatoes and carrots. The thighs finish roasting uncovered and skin-side up, while the vegetables cook in the savory herb gravy underneath.

Chicken Pot Roast vs. Roast Chicken

The main differences are the amount of cooking liquid, the texture of the skin and how the completed meal is served.

Feature Chicken pot roast Traditional roast chicken
Chicken Bone-in, skin-on thighs in this recipe Usually a whole chicken
Cooking liquid Broth thickened into homemade gravy Little or no added liquid
Vegetables Cooked directly in the broth and gravy Usually dry-roasted around the chicken
Texture Moist chicken with gravy-coated vegetables Roasted exterior with crisper skin
Main result Complete one-pot comfort meal Carved chicken served as a roast dinner

Chicken pot roast is ideal when you want tender chicken, vegetables and gravy prepared together. Traditional roast chicken places greater emphasis on an evenly browned exterior and crisp skin.

Why This Dutch Oven Chicken Pot Roast Works

Bone-in chicken thighs are more forgiving than chicken breasts during roasting. The dark meat contains more fat, which helps it retain moisture while the potatoes and carrots become tender. Browning the thighs first also creates deeper flavor and leaves savory browned bits on the bottom of the pot.

Adding chicken broth loosens those browned bits and incorporates their flavor into the sauce. Flour thickens the seasoned broth into a light homemade gravy without requiring canned soup or packaged gravy mix.

Cut the potatoes into approximately 1½-inch pieces and the carrots into 1½ to 2-inch pieces. Keeping the vegetables thick and evenly sized allows them to become tender without breaking apart before the chicken is fully cooked.

A heavy 5 to 6-quart cast-iron Dutch oven retains heat well and promotes steady cooking. For this Dutch oven chicken pot roast, the thighs finish uncovered at 375°F (190°C), skin-side up, with most of the browned skin above the liquid.

The skin will not become as crisp as it would on a dry-roasted chicken. However, keeping it exposed prevents it from becoming completely soft while the chicken, potatoes and carrots finish cooking.

Ingredients You Will Need

This chicken pot roast uses sturdy vegetables that hold their shape during oven cooking, along with aromatics and herbs that flavor the homemade gravy. The exact measurements are provided in the recipe card, but the notes below explain how to select and prepare each ingredient.

golden-brown

Bone-In Chicken Thighs

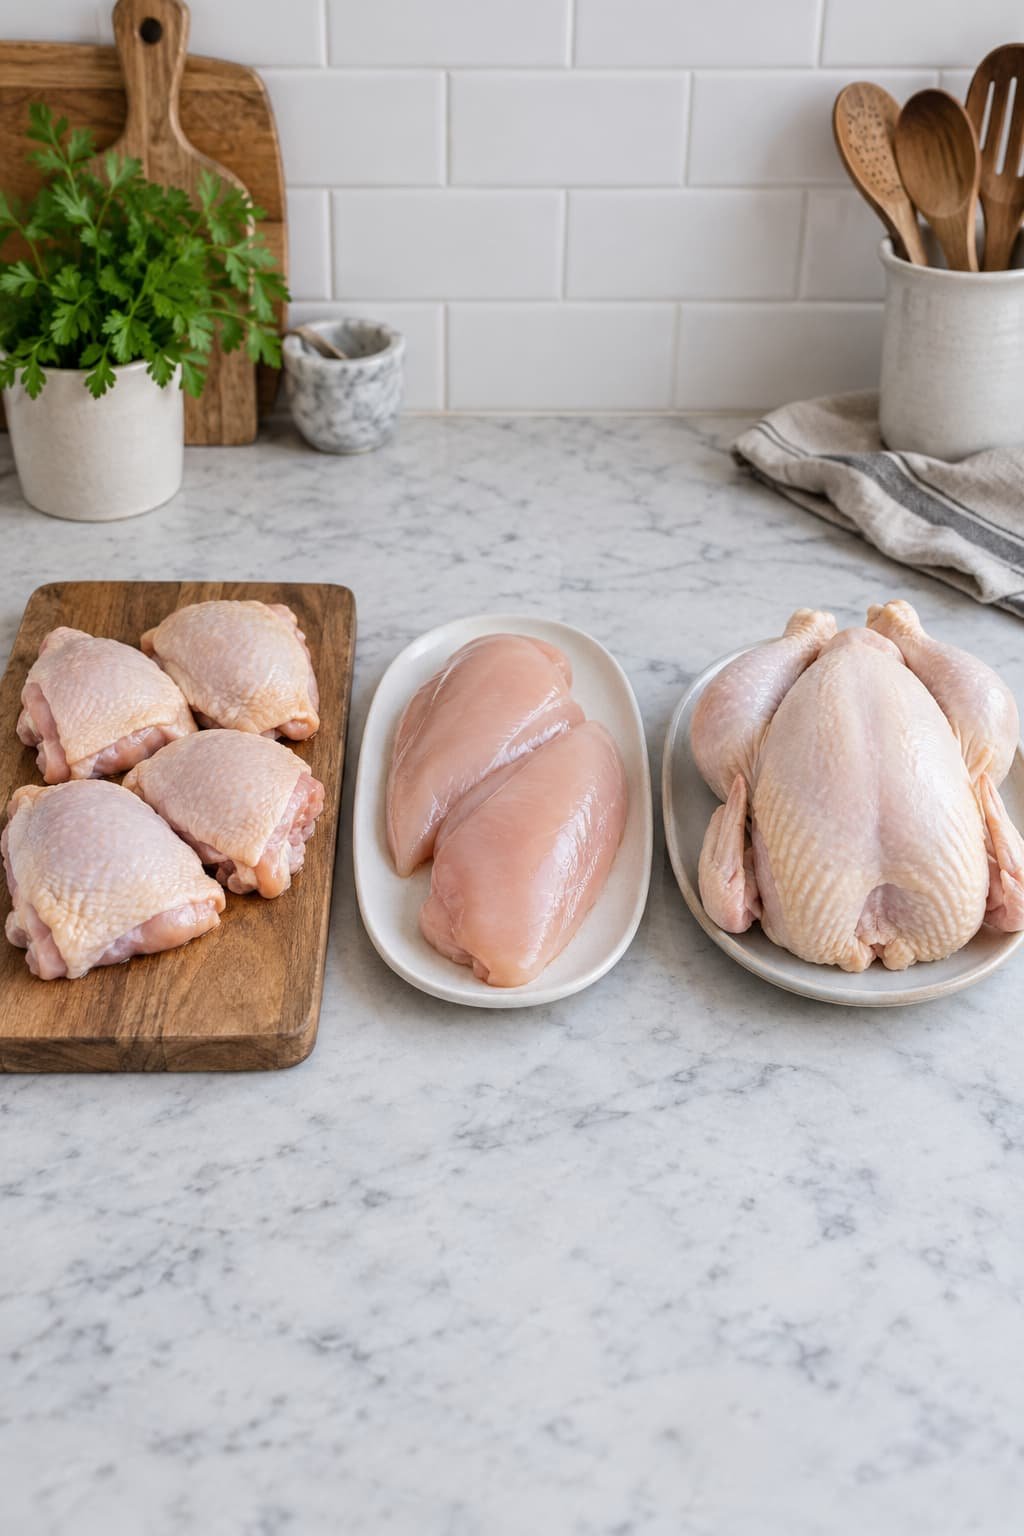
Bone-in, skin-on chicken thighs are well suited to an oven chicken pot roast because dark meat is more forgiving than lean chicken breast. The thighs retain moisture well during roasting, while browning the exposed skin creates color and develops a deeper savory flavor.

Choose thighs that are similar in size and thickness so they cook at approximately the same rate. Smaller pieces may reach a safe internal temperature before larger ones, so check each thigh separately near the end of cooking.

Chicken breasts are not a direct substitute in this recipe. Their lean meat can dry out before thick pieces of potatoes and carrots become tender. Using breasts successfully would require different vegetable preparation and a shorter cooking time.

Pat the thighs dry with paper towels before seasoning. Surface moisture creates steam in the hot Dutch oven, which interferes with browning and can increase oil splatter. Drying the skin helps it develop a more even golden surface. Discard the used paper towels immediately and wash your hands after handling the raw chicken.

Potatoes and Carrots

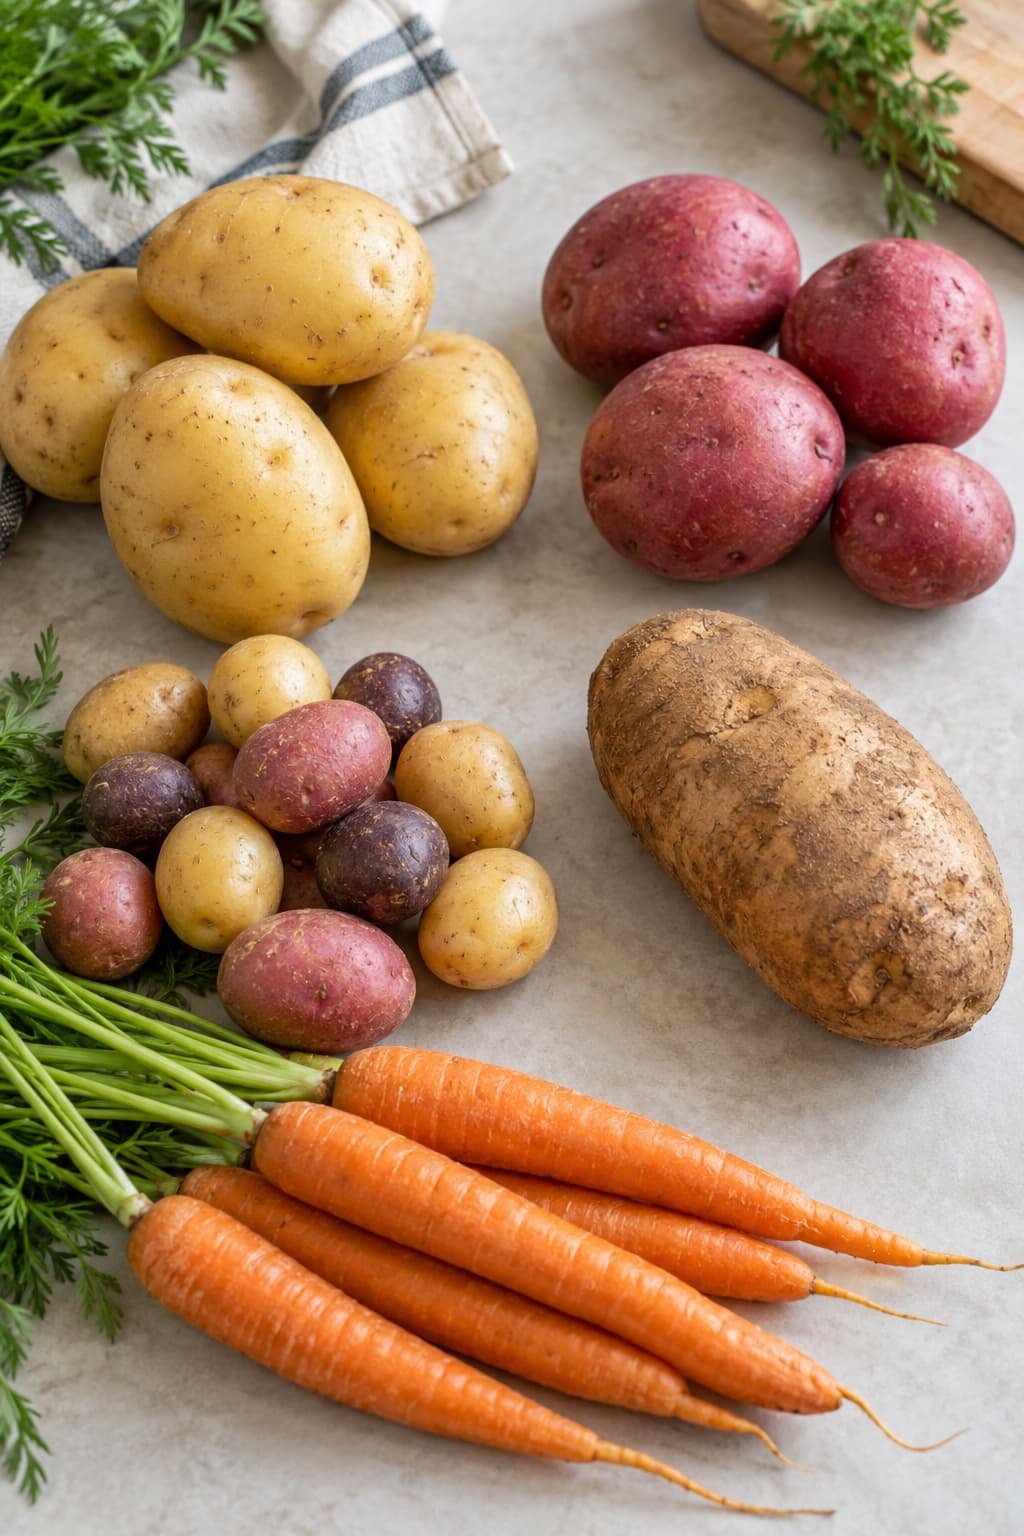
Yukon Gold potatoes are a dependable choice for chicken pot roast with potatoes and carrots. Their creamy flesh becomes tender while holding its shape better than a high-starch potato. Baby potatoes also work well and require less preparation.

Cut larger potatoes into approximately 1½-inch chunks. Baby potatoes measuring about 1 inch across can remain whole, while larger ones should be halved. Keeping the pieces similar in size helps them finish cooking together.

Cut the carrots into 1½ to 2-inch pieces. Split unusually thick carrots lengthwise so their centers soften at the same rate as the potatoes. Avoid thin slices or small diced vegetables because they can become overly soft and begin breaking down in the gravy.

Aromatics and Herbs

Onion and celery form the savory base of the dish. Cooking them in the browned chicken drippings softens their texture and brings out their natural sweetness. Garlic is added after they begin to soften because it needs less cooking time and can become bitter if allowed to burn.

Thyme and rosemary add an earthy flavor that complements the chicken and root vegetables. Use less rosemary than thyme because rosemary has a stronger flavor and can overpower a lighter chicken gravy. A bay leaf gradually seasons the broth during roasting and should be removed before serving.

Fresh parsley is added after cooking. Its mild flavor and bright color provide a fresher finish than parsley cooked for the entire roasting time.

Ingredients for the Homemade Gravy

The gravy begins with the browned bits and chicken drippings left in the Dutch oven. All-purpose flour thickens the sauce, while low-sodium chicken broth provides the cooking liquid for the potatoes and carrots.

Add the broth gradually while stirring to prevent pockets of dry flour from forming. Using low-sodium broth also provides better control over the final seasoning because the liquid concentrates slightly during roasting.

Salt and black pepper balance the gravy, chicken and vegetables. A small amount of neutral cooking oil may also be necessary for browning, especially when the chicken thighs do not release much fat at the beginning.

Homemade Gravy Ingredients

The homemade gravy begins with the fat rendered while browning the chicken thighs. Leave approximately 2 tablespoons of fat in the Dutch oven. If the chicken releases less, add enough olive oil to reach that amount. Spoon out any substantial excess so the finished gravy does not become greasy.

Add 1 tablespoon of tomato paste to the softened onion and celery. Cook it for about one minute, stirring frequently. This reduces its raw flavor while adding savory depth, mild acidity and a richer color.

Stir in 3 tablespoons of all-purpose flour and cook for 1 to 2 minutes. Keep stirring until the flour is completely incorporated into the fat and no dry patches remain. This short cooking step prevents the gravy from tasting like raw flour.

Gradually add 2½ cups of warm or room-temperature low-sodium chicken broth. Begin with a small amount and stir until the mixture is smooth before adding the remaining broth. Scrape the bottom of the Dutch oven with a wooden spoon to release the flavorful browned bits left by the chicken.

Add 1 teaspoon of Worcestershire sauce for extra savory depth. Because both the broth and Worcestershire sauce contain sodium, wait until the gravy has finished cooking before deciding whether it needs more salt.

After roasting, the gravy should lightly coat the back of a spoon. If it is too thin, transfer the chicken and vegetables to a serving dish and simmer the gravy for several minutes. If it is too thick, stir in additional broth one tablespoon at a time.

No canned soup, gravy packet or au jus packet is needed. Rendered chicken fat, flour, tomato paste, broth and the browned bits from the pot create a flavorful homemade chicken gravy.

Equipment and Dutch Oven Size

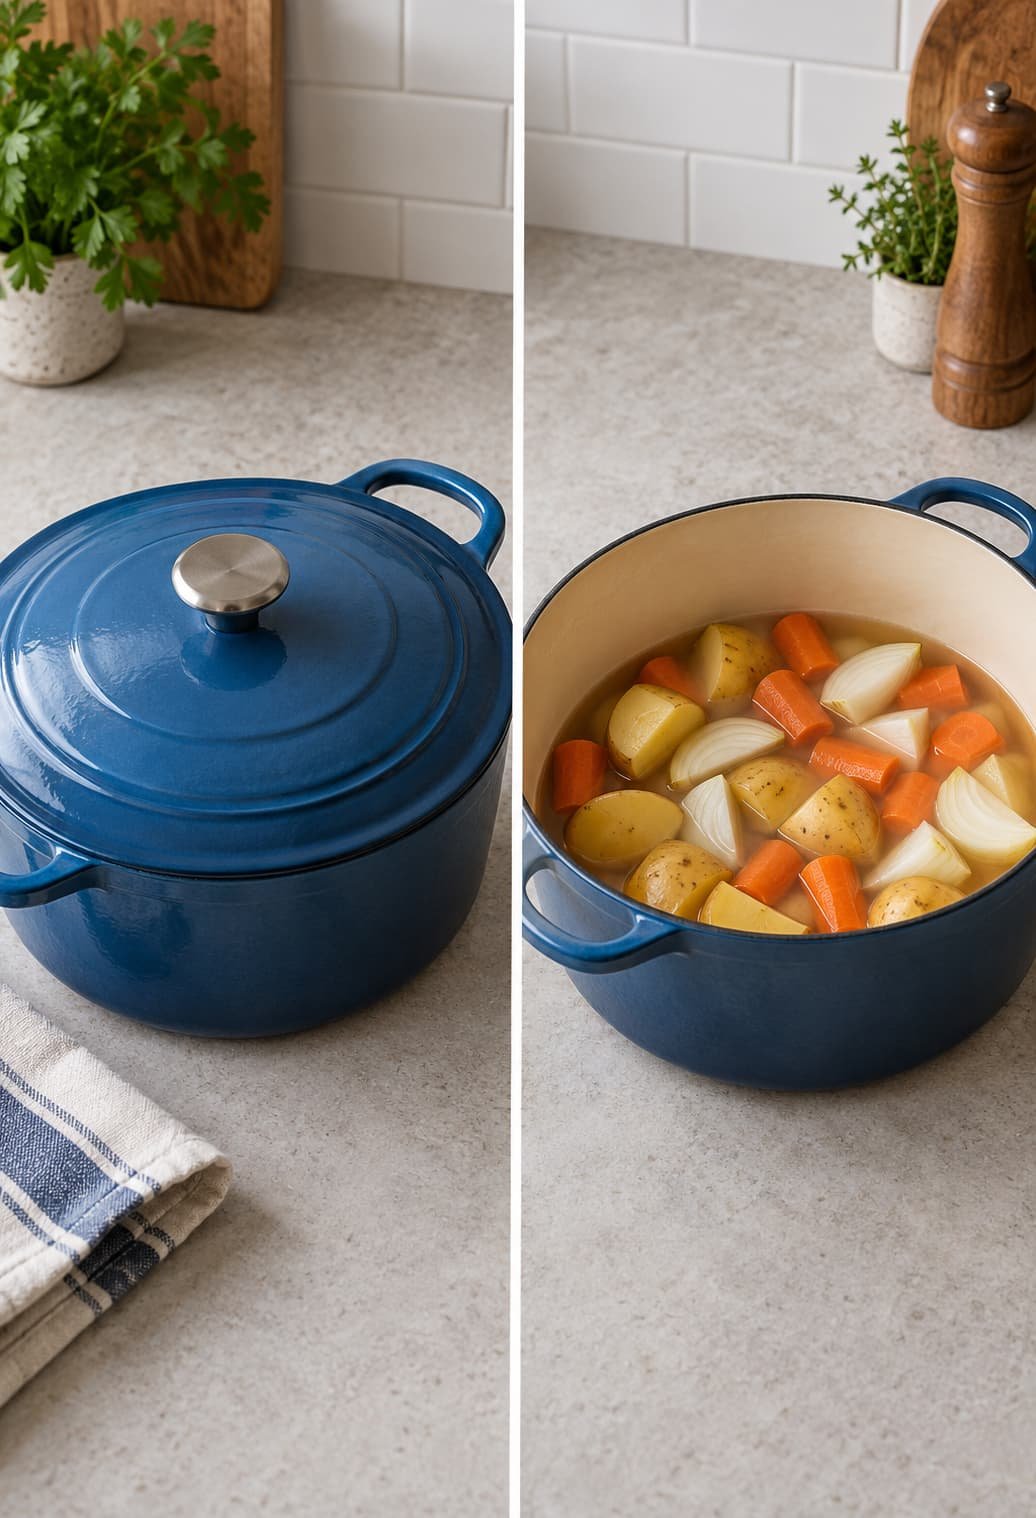
A wide 6-quart Dutch oven is recommended for this chicken pot roast. It provides enough room for the chicken thighs, potatoes, carrots and gravy without packing the ingredients too tightly. A 5-quart Dutch oven can work, but the chicken will probably need to be browned in batches.

The width of the cooking surface matters as much as the pot’s capacity. Each thigh needs direct contact with the hot surface to brown properly. Crowding traps moisture around the chicken, causing it to steam instead of developing a golden exterior.

Use sturdy tongs to turn and transfer the thighs. If the skin remains firmly attached to the pot, allow it to cook for another minute before lifting it. Properly browned skin usually releases more easily, while turning it too soon can cause it to tear.

A wooden spoon is useful for softening the aromatics and scraping the browned bits from the bottom of the Dutch oven. It is also less likely to damage the surface of an enameled pot.

Use an instant-read thermometer to check the thickest part of every thigh without touching the bone. Temperature is more reliable than cooking time, skin color or the appearance of the juices when determining whether the chicken is safely cooked.

How to Make Chicken Pot Roast

This chicken pot roast begins with browning the thighs on the stovetop and finishes uncovered in a preheated oven. Preparing every ingredient before heating the Dutch oven prevents delays, while cutting the potatoes and carrots evenly helps them become tender at approximately the same time.

Step 1: Prepare the Chicken and Vegetables

golden-brown chicken

Preheat the oven to 375°F (190°C) and position a rack in the center.

Cut the Yukon Gold potatoes into approximately 1½-inch chunks. Baby potatoes measuring about 1 inch across can remain whole, while larger ones should be halved. Cut the carrots into 1½ to 2-inch pieces, splitting unusually thick carrots lengthwise.

Chop the onion into evenly sized pieces and slice the celery. Mince the garlic and keep it separate because it will be added after the onion and celery begin to soften.

Prepare the vegetables on a clean cutting board. Handle the raw chicken on a separate board, or thoroughly wash and sanitize the original board before using it again.

Pat the chicken thighs dry with paper towels, including the skin and underside. Discard the used paper towels immediately and wash your hands. Season both sides of each thigh evenly with the measured salt and black pepper from the recipe card.

Measure the broth, flour, tomato paste, Worcestershire sauce and herbs before moving to the stove. Once browning begins, having everything ready makes it easier to control the heat and prevents the browned bits from burning.

Step 2: Brown the Chicken Thighs

Add enough neutral cooking oil to lightly coat the bottom of a wide 6-quart Dutch oven. Heat the oil gradually over medium heat until it shimmers across the surface but does not smoke.

Arrange the chicken thighs skin-side down in a single layer, leaving space between them. If the thighs overlap or fit too tightly, brown them in two batches. Crowded chicken releases moisture faster than it can evaporate, causing the skin to steam instead of brown.

slow cooker chicken pot roast

Cook the thighs skin-side down for approximately 5 to 7 minutes without moving them unnecessarily. Use the appearance and texture of the skin as the final guide rather than relying only on time. It should be evenly golden brown and released from the pot with little resistance.

If the skin remains firmly attached when lifted with tongs, leave it undisturbed for another minute. Pulling it away too early can tear the skin and leave it stuck to the cooking surface.

Turn the thighs and brown the second side for approximately 2 minutes. They do not need to cook through at this stage. The purpose is to develop surface color, render some of the skin fat and create savory browned bits for the homemade gravy.

Transfer the browned thighs to a clean plate. Check the fat remaining in the Dutch oven and leave approximately 2 tablespoons. Spoon out any substantial excess, or add a little more cooking oil if there is not enough.

The browned bits should be golden to medium brown. If they begin turning black, lower the heat immediately because burned bits will make the gravy taste bitter.

Step 3: Cook the Aromatics

After transferring the browned chicken to a clean plate, reduce the heat to medium. Leave approximately 2 tablespoons of rendered chicken fat in the Dutch oven. Spoon out any substantial excess, or add a little olive oil if the pot contains less than this amount.

Add the chopped onion and celery. Cook for 5 to 7 minutes, stirring occasionally, until the onion becomes translucent and the celery starts to soften. Use a wooden spoon to loosen any golden-brown bits that release easily from the bottom.

Watch the bottom of the pot as the vegetables cook. If the browned bits begin turning very dark, reduce the heat and add a small splash of chicken broth. Allow that liquid to evaporate before continuing. Do not scrape black or burned residue into the gravy because it can create a bitter taste.

Add the minced garlic and cook for 30 to 60 seconds, stirring constantly. Continue as soon as the garlic smells fragrant. Do not allow it to become dark brown.

Step 4: Build the Homemade Gravy

Stir 1 tablespoon of tomato paste into the softened aromatics. Cook for about one minute, until the paste darkens slightly and no longer smells raw.

Sprinkle 3 tablespoons of all-purpose flour evenly over the vegetables. Stir continuously for 1 to 2 minutes, making sure the flour absorbs the fat and no dry patches remain. This brief cooking step removes the raw flour taste.

Gradually add 2½ cups of low-sodium chicken broth. Begin with a small amount and stir until a smooth paste forms. Continue adding the broth in several additions, whisking or stirring thoroughly each time to prevent lumps.

Scrape across the bottom and into the corners of the Dutch oven as the broth is added. Continue until most of the golden-brown chicken bits have been released and incorporated into the gravy.

Stir in 1 teaspoon of Worcestershire sauce, 1 teaspoon of dried thyme, ½ teaspoon of dried rosemary and 1 bay leaf. Bring the gravy to a gentle simmer and cook for 2 to 3 minutes, stirring occasionally.

At this stage, the gravy should be smooth and lightly coat the back of a wooden spoon. It should not be extremely thick because it will continue to thicken during roasting and resting. Reserve additional salt until the completed gravy can be tasted.

chicken pot roast

Step 5: Add the Potatoes and Carrots

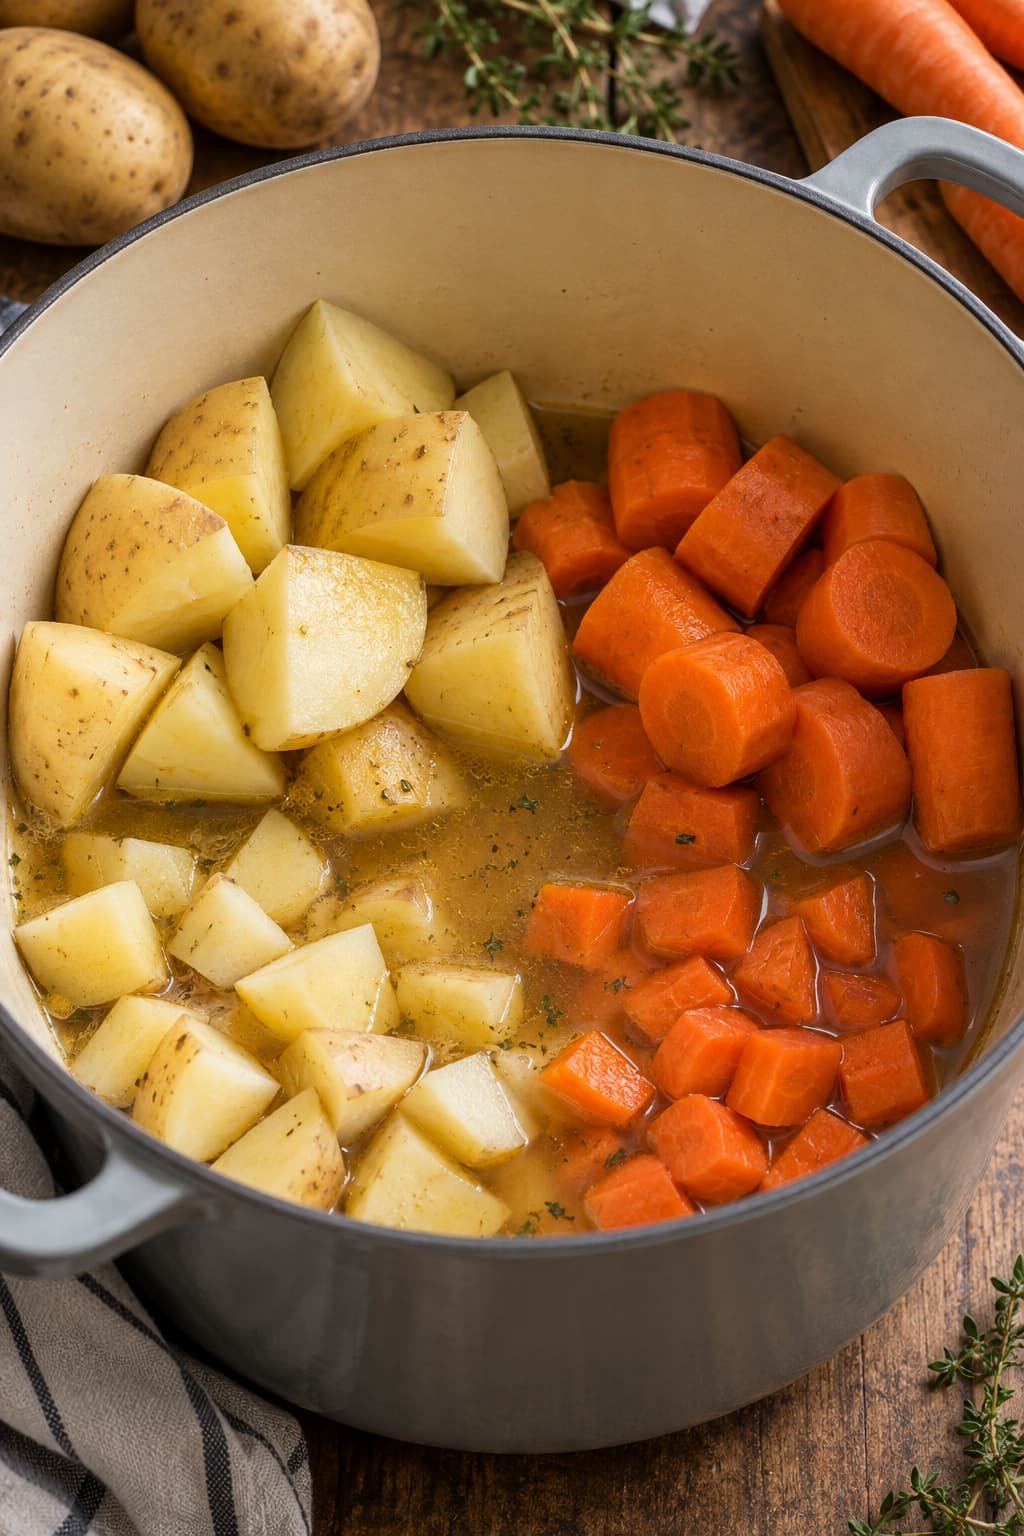
Add the prepared potatoes and carrots to the gravy. Stir gently until every piece is coated, then spread the vegetables into an even layer.

Keep the pieces similar in size so they cook at approximately the same rate. Cut the potatoes into roughly 1½-inch chunks and the carrots into thick 1½ to 2-inch pieces. Split unusually thick carrots lengthwise.

Arrange most of the vegetables across the bottom of the Dutch oven, leaving room for the chicken thighs to rest on top. A few pieces can sit around the thighs, but they should not cover the browned skin.

The gravy should reach approximately halfway up the vegetables. If most of the vegetables remain above the liquid, add a small splash of broth. Avoid adding so much liquid that the chicken skin becomes submerged.

In the next step, return the thighs skin-side up and roast the chicken pot roast uncovered. Keeping most of the browned skin above the gravy prevents it from becoming completely soft.

pot roast with vegetables

Step 6: Return the Chicken and Roast

Arrange the browned chicken thighs over the potatoes and carrots, placing each piece skin-side up. Nestle the thighs gently into the vegetables while keeping most of the browned skin above the gravy.

Transfer the uncovered Dutch oven to the center rack of the preheated 375°F (190°C) oven. Roast for approximately 45 to 55 minutes, beginning the doneness checks at 45 minutes. The exact cooking time will depend on the size of the thighs, the thickness of the vegetables and the shape of the Dutch oven.

Insert a small knife into the center of one of the largest potato pieces. It should slide in with little resistance. Test one of the thickest carrot pieces in the same way. Both vegetables should be tender while still holding their shape.

Check the thickest part of every chicken thigh with an instant-read thermometer, avoiding direct contact with the bone. Each piece must reach a minimum internal temperature of 165°F (74°C). Remove smaller thighs individually if they finish before the larger pieces.

If all the chicken is ready but the vegetables remain firm, transfer the thighs to a clean plate and cover them loosely. Cover the Dutch oven and continue cooking the potatoes and carrots for 5 to 10 minutes. Check that enough gravy remains in the pot and add a small splash of broth if it has reduced too far.

If the vegetables become tender before every thigh reaches 165°F (74°C), transfer them carefully to a serving dish. Return the Dutch oven containing the chicken and gravy to the oven until every thigh is safely cooked.

Oven-ready chicken pot roast
Step 7: Rest the Chicken and Finish the Gravy

Transfer the cooked chicken and vegetables to a serving dish. Allow the chicken to rest for approximately 5 minutes, covering it loosely so the skin is not enclosed in trapped steam.

Remove and discard the bay leaf. Check the gravy after the chicken and vegetables have been removed, when its thickness is easier to judge.

If the gravy is too thin, place the Dutch oven over medium heat and simmer for 3 to 5 minutes. Stir frequently and scrape across the bottom to prevent the flour-thickened sauce from sticking or scorching.

If the gravy is too thick, stir in low-sodium chicken broth one tablespoon at a time. Allow each addition to blend completely before deciding whether more liquid is needed. The finished gravy should be smooth and pourable while still coating the back of a spoon.

Taste only after the consistency has been adjusted. Add more salt and black pepper if needed, remembering that the chicken broth and Worcestershire sauce already provide seasoning.

Keep the tender potatoes and carrots on the serving dish rather than stirring them back into the Dutch oven, which could cause them to break. Spoon the finished gravy around the vegetables and over the chicken as desired. Sprinkle with chopped fresh parsley immediately before serving for a fresh color and a mild herbal flavor.

pot roast with gravy

How Long Does Chicken Pot Roast Take?

This Dutch oven chicken pot roast takes approximately 1 hour 40 minutes to 2 hours from preparation to serving. The exact time depends on whether the thighs require two browning batches, how large the chicken pieces are and how quickly the potatoes and carrots become tender.

Stage Approximate time
Preparation 20 minutes
Browning the chicken 14 to 18 minutes
Cooking the aromatics, building the gravy and adding vegetables 15 to 20 minutes
Dutch oven roasting 45 to 55 minutes
Resting and adjusting the gravy 5 to 10 minutes
Calculated total 1 hour 39 minutes to 2 hours 3 minutes
Rounded total About 1 hour 40 minutes to 2 hours

The browning estimate assumes six chicken thighs are cooked in two batches. A wide Dutch oven may hold them in one uncrowded layer, but the appearance of the skin and its natural release from the pot are more reliable than a strict number of minutes.

Begin checking the chicken and vegetables after 45 minutes in the oven. The potatoes and carrots should be tender when pierced with a small knife, while every chicken thigh must reach at least 165°F (74°C) in its thickest part without the thermometer touching the bone.

These times are calculated from the complete method. Do not describe them as final tested times until the recipe has been cooked and timed under the stated conditions.

Common Chicken Pot Roast Problems

Most chicken pot roast problems come from overcrowding the pot, cutting the vegetables unevenly or using excessive heat. The table below identifies the likely cause and gives a practical correction.

Problem Likely cause Solution
Chicken skin is pale The chicken was wet, the oil was not hot enough or the pot was crowded Pat the thighs dry, heat the oil until shimmering and brown the chicken in batches
Chicken is dry It was overcooked, or smaller thighs were not removed early Use similar-sized thighs and check each piece separately with a thermometer
Potatoes are hard The pieces were too large, too little liquid remained or they needed more time Remove the cooked chicken, cover the Dutch oven and cook the potatoes for another 5 to 10 minutes
Carrots are mushy The carrots were sliced too thinly Cut them into thick 1½ to 2-inch pieces and split only unusually thick carrots
Gravy is watery Too much broth was added or the chicken and vegetables released additional liquid Remove the solids and simmer the gravy uncovered until it lightly coats a spoon
Gravy is lumpy The broth was added too quickly or the flour was not mixed completely into the fat Add the broth gradually; if lumps remain, remove the solids and whisk the gravy vigorously
Vegetables lack flavor The broth was weak, the seasoning was insufficient or the vegetables were not coated in gravy Use well-flavored low-sodium broth, coat the vegetables thoroughly and adjust the final seasoning
Chicken skin is soft The skin was submerged or the Dutch oven was covered Keep most of the skin above the gravy and roast the pot uncovered
Bottom of the pot is scorched The heat was too high or the aromatics and flour were not stirred frequently Stop stirring and transfer the unburned contents to a clean pot without scraping up the black residue

Do not add dry flour directly to watery gravy. It will form lumps and may leave a raw flour taste. Remove the chicken and vegetables, then reduce the gravy briefly over medium heat while stirring frequently.

If the bottom begins to smell burned, do not attempt to loosen the dark residue with broth. Deglazing works with golden-brown fond, but it will spread a bitter flavor when the residue has turned black.

Ingredient Substitutions

Keep substitutions limited because changing the chicken cut, vegetables or gravy thickener can affect the cooking time, moisture level and final texture.

Boneless, skinless chicken thighs can replace bone-in thighs, but they cook more quickly and do not provide browned skin. They also release less fat, so add enough olive oil to leave approximately 2 tablespoons in the Dutch oven before cooking the aromatics.

Check boneless thighs earlier and remove each piece as soon as it reaches a safe internal temperature. The potatoes and carrots may need to continue cooking after the chicken has been transferred to a clean plate.

Chicken breasts are not recommended for this specific method. Their lean meat can become dry before the thick-cut vegetables are tender. A dependable chicken-breast version would require a separately tested cooking time and possibly partially cooking the vegetables before adding the chicken.

Red potatoes and baby potatoes can replace Yukon Gold potatoes in the same approximate weight. Leave potatoes measuring about 1 inch across whole and halve larger ones. Cut every piece evenly so the potatoes finish cooking at approximately the same time.

Russet potatoes can be used, but their higher starch content makes them more likely to break apart and thicken the gravy. Choose red, baby or Yukon Gold potatoes when you want the pieces to remain distinct.

For a cautious variation, replace no more than half the carrots with parsnips cut to the same thickness. Parsnips have a sweeter, earthier flavor, so replacing every carrot would noticeably change the dish.

Mushrooms are better used as an addition instead of a direct carrot replacement. Brown sliced mushrooms after the onion and celery, allowing most of their released moisture to evaporate before adding the garlic, flour and broth. This prevents the mushrooms from unnecessarily thinning the gravy.

A gluten-free version has not been tested, so all-purpose flour should not be replaced with cornstarch or a gluten-free blend in the same amount. These thickeners behave differently and may need to be added at another stage. The broth, Worcestershire sauce and other packaged ingredients must also be checked before describing the complete recipe as gluten-free.

A whole chicken is not a direct substitute for chicken thighs. Its shape and combination of breast and leg meat require a different arrangement and cooking time. A whole-chicken pot roast should be developed as a separate recipe instead of being included as a simple variation here.

golden-brown chicken

What to Serve with Chicken Pot Roast

Chicken pot roast already provides chicken, potatoes, carrots and homemade gravy. It does not need several rich side dishes. One light vegetable side, salad or bread is enough to complete the meal.

Crusty bread is a simple choice for soaking up the herb gravy. Serve a few slices alongside the pot roast rather than adding another heavy starch.

For a fresh contrast, serve a green salad with crisp lettuce and a light vinaigrette. A cabbage salad also works well because its crunch and acidity balance the tender vegetables and savory gravy.

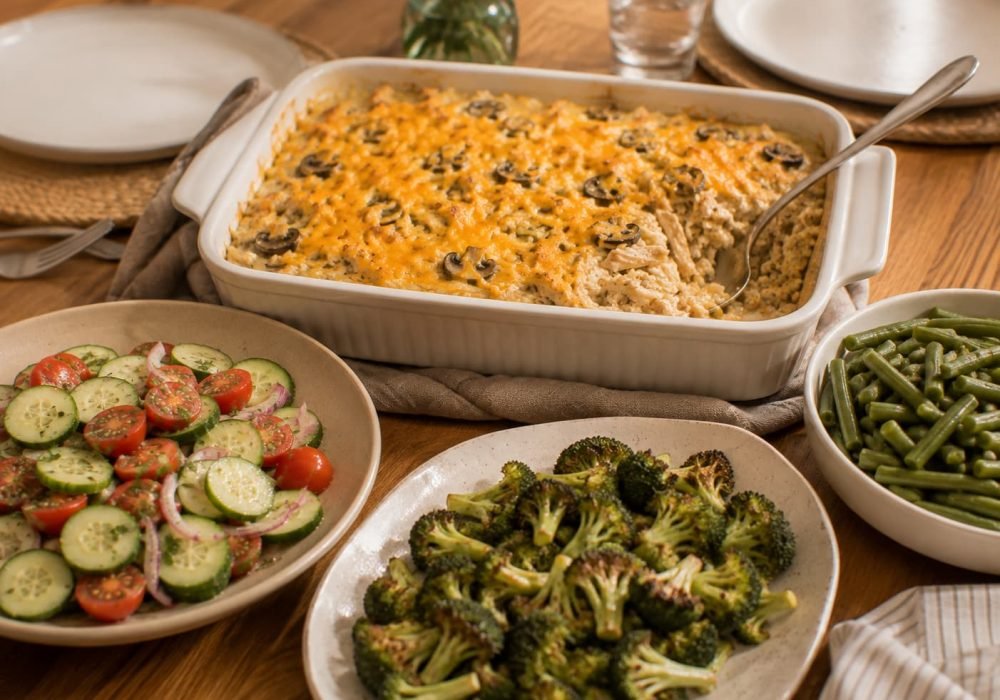
Steamed green beans provide a clean flavor and firmer texture without making the meal heavier. Roasted broccoli is another suitable option, especially when finished with a small amount of lemon for brightness.

Mashed potatoes are not necessary because the main dish already contains potatoes. Serving both creates repetition without adding a useful difference in flavor or texture.

Make-Ahead, Storage and Reheating

Chicken pot roast can be partly prepared in advance, but the raw chicken must remain separate from the vegetables and other ready-to-eat foods. Proper storage and gentle reheating help preserve the tender chicken, vegetables and homemade gravy.

Can You Make Chicken Pot Roast Ahead?

The onion, celery and carrots can be chopped one day ahead and stored in covered containers in the refrigerator. The vegetables can share a container if convenient, but they must remain separate from the raw chicken.

Potatoes are better cut shortly before cooking. If necessary, cut them up to 24 hours ahead and keep them submerged in cold water in the refrigerator to prevent discoloration. Drain and dry them thoroughly before cooking so the extra water does not dilute the gravy.

The chicken thighs can be seasoned up to 24 hours ahead. Store them in a sealed container on the lowest refrigerator shelf, away from the prepared vegetables. If moisture collects on the skin, pat it dry again before browning.

For the best skin texture, brown and roast the chicken shortly before serving. Do not assemble raw chicken, vegetables and gravy in the Dutch oven for overnight storage because this make-ahead method has not been tested for safety, even cooking.

The complete chicken pot roast can be cooked ahead and reheated gently. The skin will soften during refrigeration, but keeping the chicken with some gravy helps prevent the meat from drying out.

Refrigerating Chicken Pot Roast Leftovers

Divide the chicken, vegetables and gravy among shallow containers so the food can cool more quickly. Cover and refrigerate the containers within two hours of cooking. Do not leave the full Dutch oven at room temperature while waiting for every ingredient to become completely cold.

Keep the chicken and vegetables with enough gravy to coat them. This provides moisture during storage and gives you enough liquid for gentle reheating.

Use refrigerated chicken pot roast within 3 to 4 days. If you will not eat it during that period, freeze it instead. 

Freezing Chicken Pot Roast

Freeze the chicken and gravy together in meal-sized portions. Use freezer-safe airtight containers and leave a small amount of space at the top because the gravy will expand as it freezes.

The potatoes and carrots can be frozen with the chicken, but their texture will change. Potatoes may become softer or slightly grainy after thawing, while carrots may lose some firmness.

For the best texture and flavor, use frozen chicken pot roast within 2 to 3 months. This conservative quality window is suitable for a gravy-based meal containing poultry and vegetables. The FoodSafety.gov cold-storage chart also treats freezer periods as quality guidance.

Thaw frozen chicken pot roast in the refrigerator until completely defrosted. A small portion may thaw overnight, while a larger container can require additional time. Do not thaw it on the kitchen counter.

roast with gravy rescipe

Reheating Chicken Pot Roast Without Drying It Out

Place the thawed chicken, vegetables and gravy in a covered pot over low heat. For oven reheating, transfer everything to a covered oven-safe dish and heat at 325°F (163°C). Add a small splash of low-sodium chicken broth if the gravy has become too thick.

Stir the gravy gently and rotate the chicken pieces during stovetop reheating. Avoid aggressive stirring because refrigerated potatoes can break apart easily.

Reheat the entire portion to 165°F (74°C). Check the chicken and the center of the gravy and vegetables in several places rather than measuring only the largest thigh. Temperature, not a fixed number of minutes, should determine when the leftovers are ready.

Avoid prolonged high heat or rapid boiling. Excessive heat can tighten the chicken meat, damage the potatoes and scorch the flour-thickened gravy. The skin will remain softer than it was when freshly roasted, and gentle reheating will not restore its original browned texture.

Frequently Asked Questions

What cut of chicken is best for chicken pot roast?

Bone-in, skin-on chicken thighs are the recommended cut for this cooking method. Dark meat retains moisture better than lean chicken breast, while the browned skin and rendered fat add flavor to the gravy. Choose similar-sized thighs so they cook evenly and fit comfortably over the potatoes and carrots.

Can you use chicken instead of beef for pot roast?

Yes, but chicken is not a direct replacement for beef. It cooks considerably faster and requires a chicken-specific amount of liquid and oven time. Following a traditional beef pot roast method could leave the chicken dry and the vegetables overcooked, so use instructions developed specifically for chicken.

Should you brown the chicken first?

Browning the chicken is strongly recommended because it improves the color and savory flavor of the skin. It also creates golden-brown bits on the bottom of the Dutch oven. Adding broth releases those bits and incorporates their concentrated flavor into the homemade chicken gravy.

Do potatoes go above or below the chicken?

Place most of the potatoes and carrots in the gravy below the chicken. Arrange the browned thighs skin-side up over the vegetables, with a few vegetable pieces around them if necessary. Keep most of the skin above the liquid so it does not become completely soft during roasting.

Should a Dutch oven chicken pot roast be covered?

This Dutch oven chicken pot roast finishes uncovered at 375°F (190°C). The open pot allows some moisture to evaporate while keeping the exposed skin from becoming completely soft. If the chicken finishes before the vegetables, remove the thighs and cover the Dutch oven while the potatoes and carrots continue cooking.

Can I use chicken breasts?

Chicken breasts are not the recommended cut for this recipe because their lean meat can dry out before the thick vegetables become tender. They would require a shorter cooking time and possibly different vegetable preparation. A dependable chicken-breast cooking range has not been tested, so breasts are not a direct substitution.

How do I thicken chicken pot roast gravy?

Cook all-purpose flour in the rendered chicken fat before gradually stirring in the broth. If the finished gravy remains thin, remove the chicken and vegetables and simmer the sauce uncovered while stirring frequently. Do not add dry flour directly to finished gravy because it can form lumps and retain a raw taste.

How do I know when the chicken is done?

Insert an instant-read thermometer into the thickest part of every thigh without touching the bone. Each piece must reach at least 165°F (74°C). Cooking time, skin color and clear juices cannot confirm safety as reliably as temperature.

Can I make chicken pot roast in a slow cooker?

A slow-cooker chicken pot roast requires different liquid, thickening and cooking instructions. The enclosed appliance retains more moisture and does not preserve the browned texture of the chicken skin. Do not use this Dutch oven recipe as a direct conversion because the gravy could become watery and the chicken overcooked.

Can chicken pot roast be frozen?

Yes. Freeze the cooked chicken and gravy together in meal-sized, freezer-safe containers. Use them within 2 to 3 months for the best quality and thaw them completely in the refrigerator. The potatoes may become softer or slightly grainy, and the chicken skin will remain soft after reheating.

Easy Chicken Pot Roast Recipe Card

Bone-in, skin-on chicken thighs roast uncovered over Yukon Gold potatoes and thick-cut carrots in a savory homemade herb gravy. Browning the thighs first builds flavor, while keeping the skin above most of the liquid prevents it from becoming completely soft.

Recipe detail Information
Preparation time 20 minutes
Browning time 14 to 18 minutes
Stovetop cooking time 15 to 20 minutes
Oven time 45 to 55 minutes
Resting and finishing 5 to 10 minutes
Estimated total time 1 hour 40 minutes to 2 hours 5 minutes
Yield 6 servings
Course Main Course
Cuisine American
Cooking method Stovetop browning and uncovered oven roasting
Oven temperature 375°F (190°C)
Recommended cookware Wide 6-quart Dutch oven

Ingredients

  • 6 bone-in, skin-on chicken thighs, about 3¼ pounds or 1.47 kilograms total
  • 1¼ teaspoons fine sea salt, divided
  • ¾ teaspoon ground black pepper, divided
  • 1 tablespoon neutral cooking oil, 15 milliliters, plus more if needed
  • 1½ pounds Yukon Gold potatoes, 680 grams, cut into 1½-inch pieces
  • 1 pound carrots, 454 grams, cut into thick 1½ to 2-inch pieces
  • 1 large yellow onion, about 8 ounces or 225 grams, chopped
  • 2 large celery stalks, about 4 ounces or 115 grams, sliced
  • 4 garlic cloves, about 12 grams, minced
  • 1 tablespoon tomato paste, 16 grams
  • 3 tablespoons all-purpose flour, 24 grams
  • 2½ cups low-sodium chicken broth, 590 milliliters
  • Up to ½ cup additional chicken broth, reserved for adjusting the liquid
  • 1 teaspoon Worcestershire sauce, 5 milliliters
  • 1 teaspoon dried thyme
  • ½ teaspoon dried rosemary
  • 1 bay leaf
  • 2 tablespoons chopped fresh parsley, about 8 grams

Instructions

  1. Prepare the chicken and vegetables. Preheat the oven to 375°F (190°C) with a rack in the center. Cut the potatoes and carrots into evenly sized pieces. Chop the onion, slice the celery and mince the garlic. Pat the chicken dry, then season both sides with 1 teaspoon of salt and ½ teaspoon of black pepper.
  2. Brown the first batch. Add the neutral oil to a wide 6-quart Dutch oven and heat it gradually over medium heat until it shimmers. Arrange three thighs skin-side down without crowding them. Cook for 5 to 7 minutes, until the skin is evenly golden and releases easily. Turn and brown the second side for about 2 minutes. Transfer the thighs to a clean plate.
  3. Brown the second batch. Inspect the cooking surface and add a small amount of neutral oil only if the pot appears dry. Brown the remaining thighs in the same way. Leave approximately 2 tablespoons of rendered fat in the Dutch oven, spooning out any substantial excess.
  4. Cook the aromatics. Reduce the heat to medium. Add the onion and celery and cook for 5 to 7 minutes, stirring occasionally. Add the garlic and cook for 30 to 60 seconds, just until fragrant. If the browned bits begin turning black, lower the heat immediately.
  5. Build the homemade gravy. Stir in the tomato paste and cook for one minute. Sprinkle in the flour and stir for 1 to 2 minutes, until no dry flour remains. Gradually add 2½ cups of broth, stirring until smooth and loosening the golden-brown bits from the bottom.
  6. Season the gravy. Stir in the Worcestershire sauce, thyme, rosemary, bay leaf, remaining salt and remaining pepper. Bring the gravy to a gentle simmer and cook for 2 to 3 minutes. It should lightly coat a spoon but remain pourable.
  7. Add the vegetables and chicken. Stir the potatoes and carrots into the gravy until coated, then spread them into an even layer. Arrange the chicken thighs over the vegetables skin-side up. The liquid should reach approximately halfway up the vegetables while most of the skin remains exposed. Add a small amount of reserved broth only if most of the vegetables remain above the liquid.
  8. Roast uncovered. Transfer the Dutch oven to the center rack and roast uncovered for 45 to 55 minutes. Begin checking at 45 minutes. The potatoes and carrots should be tender when pierced with a small knife.
  9. Check the chicken. Insert an instant-read thermometer into the thickest part of every thigh without touching the bone. Each piece must reach at least 165°F (74°C). Remove smaller thighs individually if they finish earlier.
  10. Handle uneven cooking. If the chicken finishes before the vegetables, transfer the thighs to a clean plate, cover the Dutch oven and continue cooking the vegetables for 5 to 10 minutes. If the vegetables become tender first, transfer them to a serving dish and continue roasting the chicken in the gravy until safely cooked.
  11. Rest and finish the gravy. Transfer the chicken and vegetables to a serving dish and let the chicken rest loosely covered for 5 minutes. Remove the bay leaf. If the gravy is thin, simmer it over medium heat for 3 to 5 minutes while stirring frequently. If it is too thick, add the reserved broth one tablespoon at a time.
  12. Season and serve. Taste the gravy after adjusting its consistency. Add more salt or black pepper only if needed. Spoon the gravy over or around the chicken and vegetables, then finish with chopped fresh parsley.

Internal-Temperature Note

Cooking time, skin color and clear juices cannot reliably confirm safety. Check every thigh with an instant-read thermometer. 

Storage Note

Divide leftovers among shallow containers and refrigerate them within two hours. Use refrigerated chicken pot roast within 3 to 4 days. Freeze meal-sized portions for up to 2 to 3 months for the best quality.

Thaw frozen portions completely in the refrigerator. Reheat the chicken, vegetables and gravy gently until the entire portion reaches 165°F (74°C).

Estimated Nutrition

Estimated per serving, based on six servings and 3¼ pounds of bone-in chicken thighs:

Nutrient Estimated amount
Calories About 520
Protein About 33 grams
Carbohydrates About 36 grams
Total fat About 28 grams
Saturated fat About 7 grams
Fiber About 6 grams
Sodium About 830 milligrams

The estimate assumes 2½ cups of broth and does not include unused reserved broth. It was calculated using standard values and typical product-label data. Actual nutrition will vary with the edible chicken yield, amount of skin eaten, rendered fat discarded, broth brand and final portion size.

Related Blogs

Scroll to Top