What Are Fudgy Espresso Brownies?
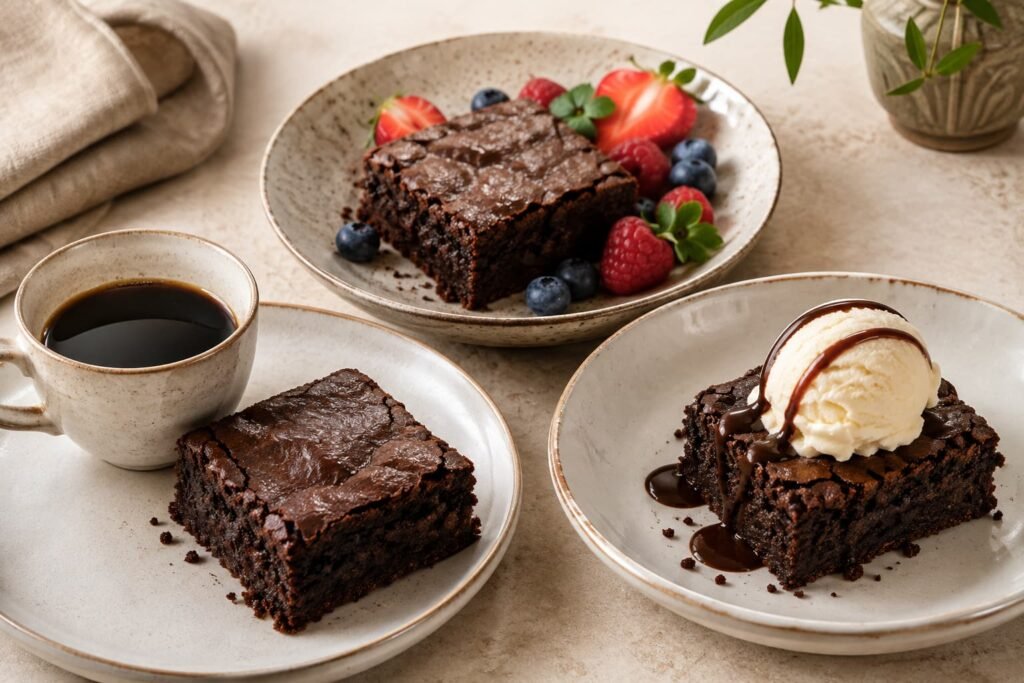
Fudgy espresso brownies are dense chocolate brownies flavored with espresso or another concentrated coffee ingredient. Fudgy describes a tight, rich brownie texture with less of the light, open crumb associated with cake.
Their final texture depends on the overall balance of flour, fat, chocolate, sugar, eggs, and moisture, along with mixing and baking conditions. Espresso contributes flavor, but it does not make a brownie fudgy by itself.
What distinguishes espresso brownies from standard chocolate brownies is the added coffee component. Espresso can contribute roasted, slightly bitter notes that complement cocoa and chocolate.
The coffee flavor may be subtle or clearly noticeable. In some formulations, espresso mainly deepens the chocolate character. In others, a stronger coffee component produces a more obvious chocolate-and-coffee, or mocha-like, flavor.
Because chocolate type, coffee concentration, sweetness, and other ingredients can vary, not all espresso brownies will taste or feel the same.
What Does Espresso Powder Do in Brownies?
Espresso powder adds concentrated coffee flavor while contributing very little additional liquid. This makes it useful in brownies when coffee notes are wanted without substantially increasing the batter’s moisture.
Its main role is flavor. A smaller amount may support the chocolate character without making coffee dominant, while a stronger concentration can produce a more noticeable espresso or mocha flavor.
Espresso powder does not determine whether brownies are fudgy or cakey. Brownie texture depends more heavily on the complete ingredient balance and baking method.
Does Espresso Make Brownies Taste Like Coffee?
Espresso can make brownies taste like coffee, but the strength depends on how much coffee flavor is present relative to the chocolate and other ingredients.
With a restrained amount, the brownie may still taste mainly of chocolate, with the espresso adding roasted depth in the background. As the concentration increases, the coffee flavor may become easier to recognize.
Chocolate intensity also matters. Cocoa powder, dark chocolate, sugar, vanilla, and salt can all affect how strongly the espresso is perceived.
There is therefore no single amount of espresso that will produce the same coffee flavor in every brownie formula.
What Is the Difference Between Espresso Powder, Instant Coffee, and Brewed Espresso?
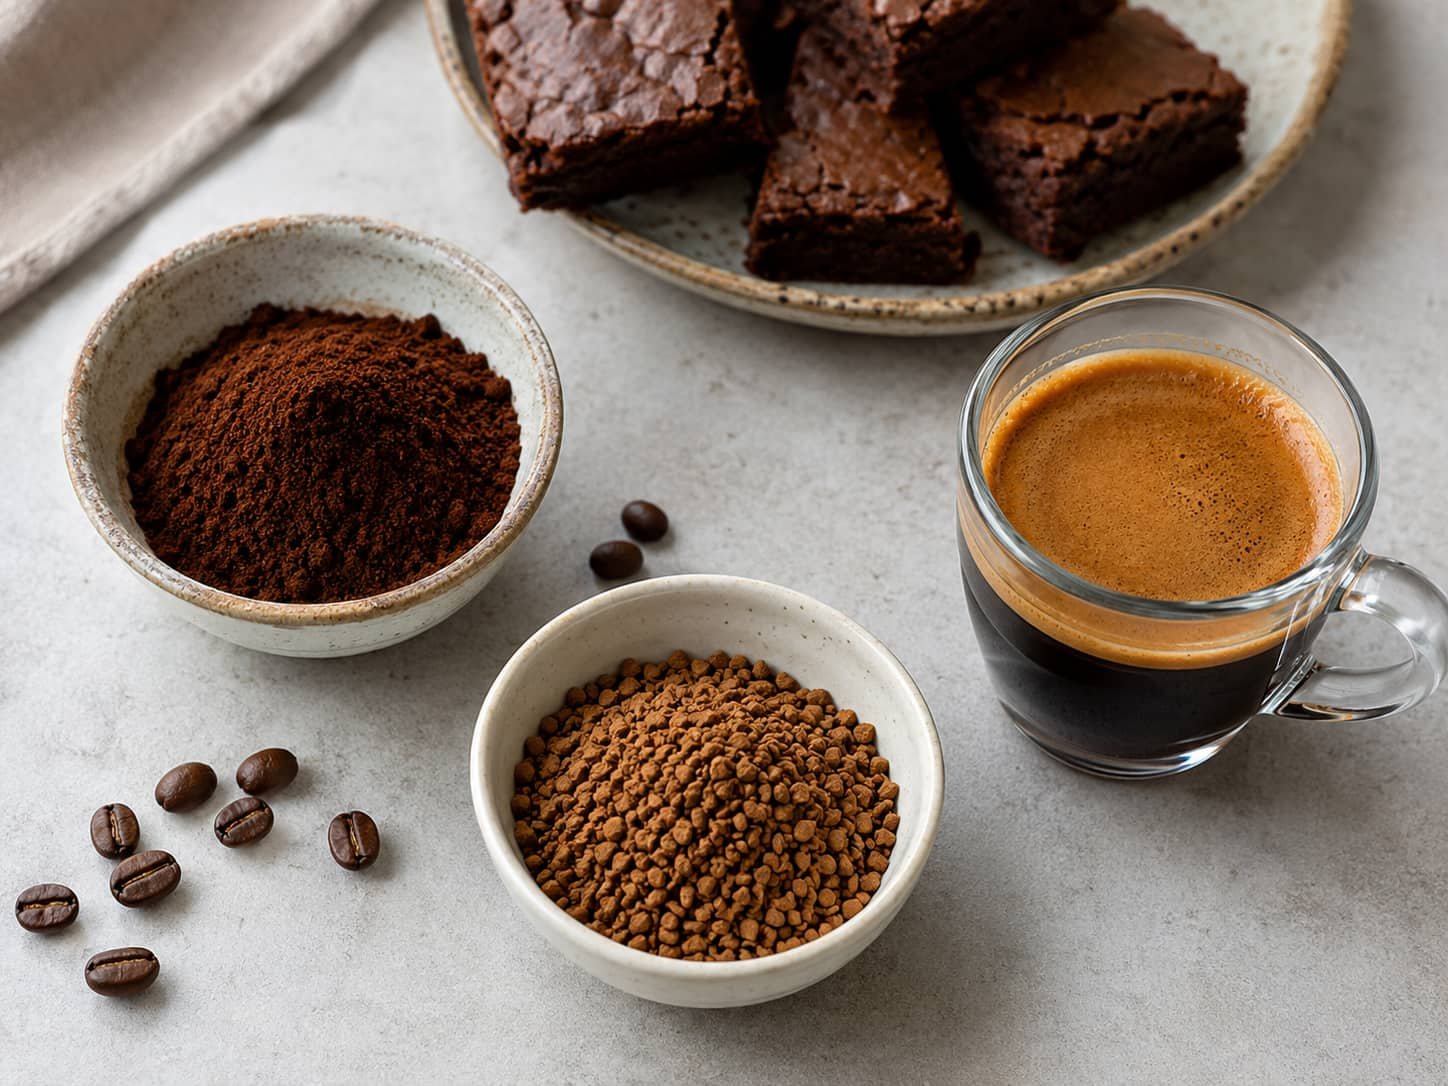
The main difference is concentration and moisture.
Espresso powder is a dry, concentrated coffee product that dissolves into brownie batter while adding little extra liquid.
Instant coffee is also dry and soluble, but its flavor strength and roast character can differ from espresso powder. Different products may therefore produce different levels of coffee flavor or bitterness.
Brewed espresso contains a significant amount of water in addition to coffee flavor. Adding it to a brownie batter can change both the flavor and the liquid balance.
For that reason, these three coffee ingredients should not automatically be treated as equal substitutes. Replacing a dry coffee ingredient with brewed espresso may affect batter consistency and texture, while switching between espresso powder and instant coffee can change flavor intensity.
The practical distinction is simple: espresso powder and instant coffee mainly add concentrated coffee flavor, while brewed espresso also adds substantial liquid.
What Makes Espresso Brownies Fudgy Instead of Cakey?
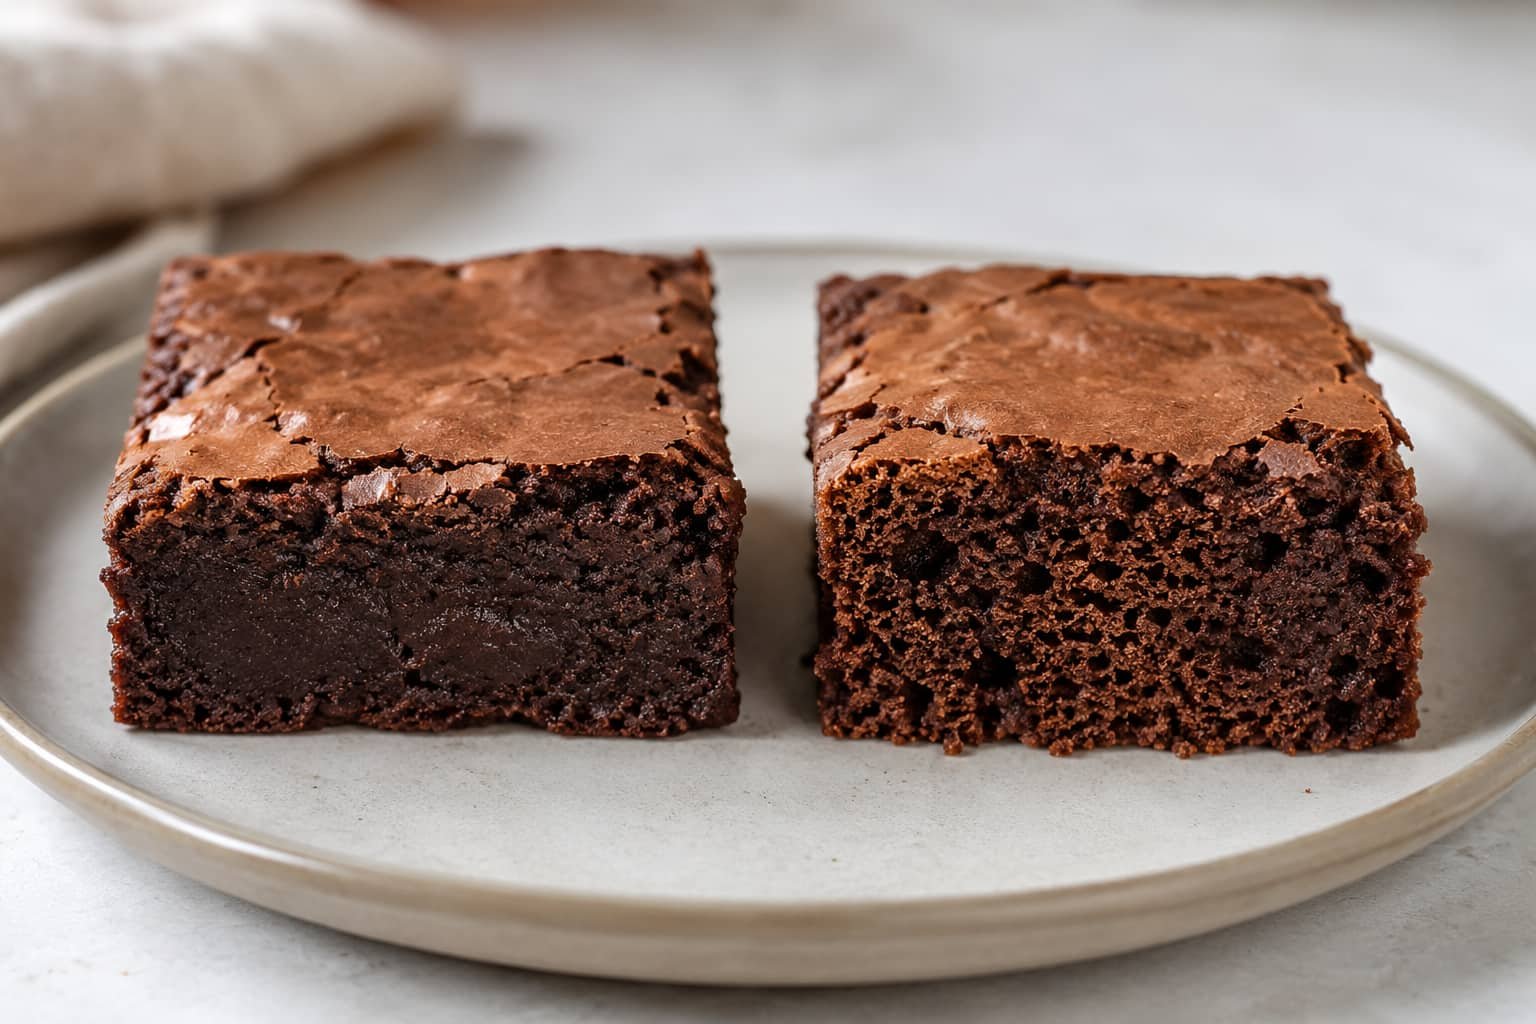
Fudgy brownies are dense and compact, while cakey brownies have a lighter, more open crumb. The difference comes from the overall balance of flour, fat, chocolate, sugar, eggs, moisture, and air in the batter, not from one ingredient alone.
In general, formulas with more structure-building ingredients relative to fat and moisture may produce a firmer or more cake-like texture. Brownies with a higher proportion of fat and chocolate relative to flour may lean denser, provided the batter still contains enough structure to set properly.
Mixing can also affect texture. Beating a batter more aggressively may incorporate additional air, while gentler mixing usually introduces less aeration.
Espresso powder mainly affects flavor. It does not make brownies fudgy by itself.
How Flour, Fat, Eggs, and Chocolate Affect Brownie Texture
Each major ingredient contributes differently to brownie structure.
Flour provides structure. Its proteins help the batter set during baking. Increasing the amount of flour relative to the other ingredients can produce a firmer crumb, while less flour generally creates less structure.
Simply reducing flour is not a reliable shortcut to fudgier brownies. If the batter does not have enough structure, the center may not set as intended.
Fat affects tenderness and richness. Butter, oil, egg yolks, and cocoa butter from chocolate can all contribute fat. A formula with substantial fat relative to flour often develops a denser texture than one built around more flour and aeration.
Butter and oil are not identical ingredients. Butter contains fat, water, and milk solids, while oil is primarily fat. Replacing one with the other can therefore change both texture and flavor.
Eggs help provide structure. Their proteins set as they heat, while egg yolks also contribute fat and emulsifying components. How the eggs are mixed matters because vigorous beating can introduce more air into the batter.
Chocolate contributes more than flavor. Melted chocolate can add cocoa solids, cocoa butter, and sugar, depending on the type used. These components affect the balance of fat, solids, and sweetness in the batter.
The key point is that brownie texture is a result of the whole formula. Changing one ingredient can affect several characteristics at the same time.
Cocoa Powder vs Melted Chocolate in Brownies
Cocoa powder and melted chocolate both add chocolate flavor, but they affect brownie batter differently.
Cocoa powder is rich in cocoa solids and contains less cocoa butter than solid chocolate. Because it behaves mainly as a dry ingredient, it contributes to the batter’s overall balance of dry ingredients and moisture.
Melted chocolate contributes cocoa solids along with cocoa butter and, depending on the chocolate, sugar. This means it adds both chocolate solids and additional fat.
Some formulas use both ingredients. Cocoa powder can provide concentrated cocoa flavor, while melted chocolate changes the balance of fat and solids.
Neither ingredient automatically produces a better or fudgier brownie. The final texture depends on how it fits with the flour, eggs, sugar, fat, and moisture in the complete formula.
What Creates a Shiny Crinkle Top on Brownies?
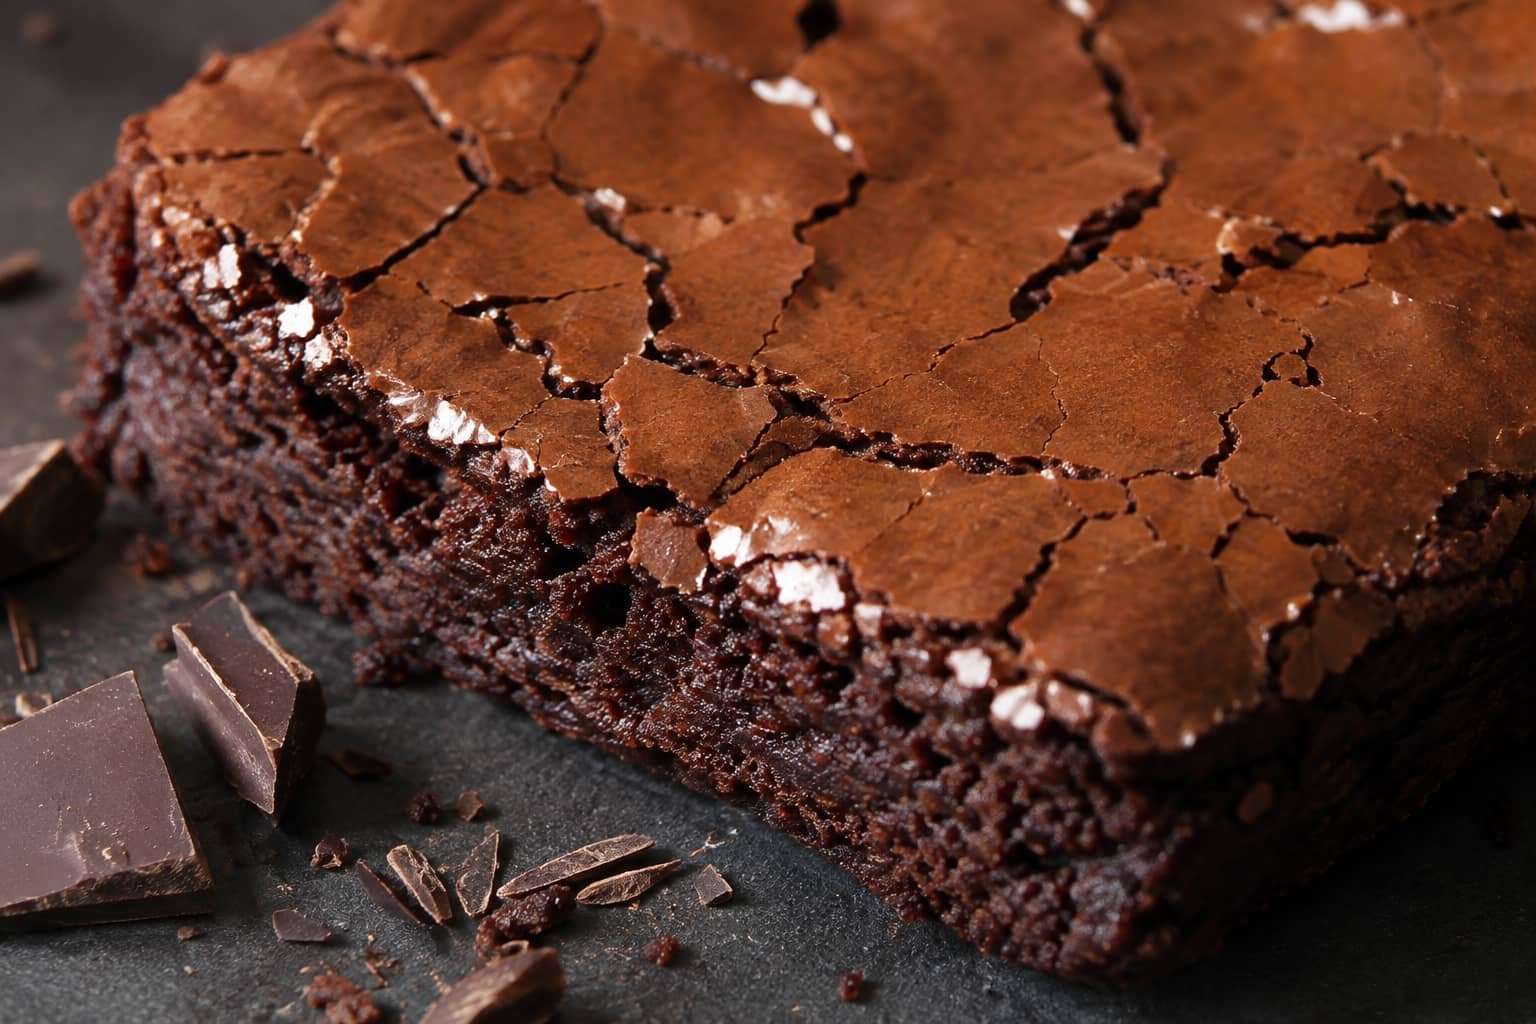
A shiny crinkle top is a thin, delicate crust that develops on the surface during baking. Sugar dissolution appears to play an important role, while eggs, chocolate, fat, mixing, and the overall formulation can also influence the result.
The surface crust and the interior texture are separate characteristics. A brownie can have a shiny top without being especially fudgy, and a dense brownie can have a more matte surface.
Why Does Dissolved Sugar Help Create a Shiny Brownie Crust?
When some of the sugar dissolves in the moisture available in the batter, it can become part of a thin sugar-rich layer near the surface as the brownie bakes. As that surface loses moisture and sets, it can develop the glossy, crackled appearance associated with crinkle-top brownies.
This is one reason some brownie methods focus on thoroughly combining sugar with eggs, warm fat, or other moisture-containing ingredients. Better sugar dissolution may support crust formation, but it does not guarantee the same result in every formula.
Chocolate may also influence the surface. In published brownie experiments from King Arthur Baking, certain formulas containing chocolate chips developed a shinier crust than comparable versions without them. That finding applies to those tested formulas and should not be treated as a universal rule.
The useful distinction is simple: the shiny crust forms at the surface, while fudginess describes the texture inside the brownie.
Why Do Some Brownies Have a Dull Top?
A dull top can result from differences in the formula or mixing method and does not necessarily mean the brownie itself failed.
Factors that may influence crust formation include:
- how much sugar dissolves in the batter
- the type and amount of chocolate used
- how the eggs and sugar are mixed
- the balance of fat, moisture, and dry ingredients
- changes to the original ingredient proportions or method
Because several factors interact, a dull top should not automatically be blamed on one step.
It is more accurate to treat the crinkle top as the result of sugar behavior, egg structure, chocolate, fat, moisture, and baking conditions working together, rather than as something created by a single guaranteed technique.
How Can You Tell When Fudgy Brownies Are Done?
Fudgy brownies are done when the center has set enough to hold together while remaining dense and soft. Because brownie formulas, ovens, and pans vary, doneness is better judged with several cues rather than one fixed baking time.
A soft center does not automatically mean the brownies are underbaked. The important distinction is whether the middle has formed a stable brownie structure or still resembles uncooked batter.
Fudgy vs Underbaked Brownies
A fudgy brownie has a dense, moist interior that holds together after cooling. An underbaked brownie may still contain wet, fluid, or batter-like areas in the center.
A toothpick or skewer can provide another clue, but it should not be treated as a universal test. Depending on the formula, a properly baked fudgy brownie may leave moist crumbs on the tester rather than coming out completely clean.
Liquid batter on the tester is different from moist crumbs and may indicate that the center has not set sufficiently.
The surface can also provide context. The edges often appear more established than the center, while the middle should no longer look loose or fluid.
The goal is not a completely dry interior. It is a brownie that has set enough to hold its structure without losing the dense texture associated with a fudgy style.
Why Do Brownies Become Firmer as They Cool?
Brownies often become firmer as they cool because their internal structure stabilizes and warm fats and chocolate begin to firm.
This means the texture immediately after baking may not represent the final texture. A hot brownie can seem much softer and less stable than the same brownie after cooling.
Cutting while the brownies are still very warm can also make the center look softer or messier than it will later.
Cooling can firm a brownie that has already baked sufficiently, but it cannot correct a center that remains genuinely uncooked.
How Do Pan Size and Material Affect Brownie Baking?
Pan size affects batter depth, which changes how heat reaches the center and edges.
The same amount of batter spread in a larger pan forms a thinner layer. In a smaller pan, it forms a deeper layer. These differences can affect how quickly the center sets relative to the edges.
Pan material also changes heat behavior. Metal and glass do not conduct and retain heat in the same way, so brownies may bake differently when the pan material changes.
For that reason, time and temperature guidance developed for one pan should not automatically be applied to a different size or material. When following a specific brownie formula, using the recommended pan is the most reliable starting point.
Why Do Espresso Brownies Turn Out Dry, Cakey, or Too Soft?
Dry, cakey, and overly soft brownies usually point to different issues. The most useful way to troubleshoot them is to consider ingredient balance, mixing, pan choice, and baking conditions together rather than assuming one ingredient is responsible.
What Can Make Brownies Dry?
Brownies may become dry when too much moisture is lost during baking or when the formula contains more dry ingredients than the available fat and liquid can balance.
Common factors include:
- Too much flour: Extra flour increases structure and can make the crumb firmer.
- Longer baking: More time in the oven can allow additional moisture to escape.
- Changes to cocoa, fat, or liquid: Increasing dry ingredients or reducing fat or liquid may shift the texture toward a drier result.
- A thinner batter layer: Using a larger pan for the same amount of batter can create a thinner layer that may bake through more quickly.
These factors can interact. A thinner brownie layer, for example, may need different baking expectations than a deeper one.
What Can Make Brownies Cakey Instead of Fudgy?
Cakey brownies generally have more structure and aeration than a dense fudgy brownie.
A higher proportion of flour or other structure-building ingredients can produce a firmer crumb. Additional leavening may increase lift, while vigorous mixing can introduce more air into the batter.
Longer baking may make the texture feel even more cake-like by removing additional moisture.
A cakey result does not necessarily mean something went wrong. It may simply reflect a formula or method that produces a lighter, more open crumb.
Why Can the Center Stay Too Soft?
A soft center may mean the brownies are still warm, but it can also mean the middle has not set sufficiently.
Freshly baked brownies often feel softer because the fats and chocolate are still warm. As they cool, the structure can become firmer and easier to cut.
That is different from a center that remains fluid or clearly batter-like. Cooling can help an already baked brownie stabilize, but it cannot fully correct an inadequately baked center.
Because formulas vary, no single toothpick result or visual cue works for every brownie. It is better to consider several signs together, including whether the center has formed a stable structure and whether it firms as it cools.
Why Might a Shiny Crinkle Top Not Form?
A dull or lightly cracked top can result from differences in the formula or mixing method.
Sugar dissolution, eggs, chocolate, fat, and moisture can all influence the thin crust that develops on the surface. Changing one of these elements may change how glossy or crackled the top becomes.
For example, changing the chocolate, altering the sugar level, mixing the eggs and sugar differently, or making a major ingredient substitution may affect crust formation.
A missing crinkle top does not automatically mean the brownies are dry, cakey, or improperly baked. Surface appearance and interior texture are separate characteristics, so one can change without the other.
What Should You Consider Before Substituting Ingredients?
Ingredient substitutions can change more than flavor. They may also affect moisture, fat, sweetness, bitterness, and structure, so two ingredients should not automatically be treated as equal replacements.
This matters especially with coffee ingredients. Espresso powder, instant coffee, and brewed espresso can all add coffee flavor, but they differ in concentration and moisture.
For a specific brownie formula, substitution advice is most reliable when it has been developed for that formula. Without that information, it is better to understand how a substitute may change the batter than to rely on an unverified conversion ratio.
Can Instant Coffee Replace Espresso Powder in Brownies?
Instant coffee may work in some brownie formulas, but it is not identical to espresso powder.
Espresso powder is generally more concentrated than ordinary instant coffee. The products can also differ in roast character, bitterness, and flavor strength, so replacing one with the other may change how noticeable the coffee flavor becomes.
Because products vary, an equal amount should not automatically be expected to produce the same result.
Can You Use Brewed Espresso Instead of Espresso Powder?
Brewed espresso can add coffee flavor, but it also adds liquid. That makes it different from dry espresso powder.
Extra liquid can change batter consistency and the balance between wet and dry ingredients. Depending on the formula, this may also influence how the brownies set and their final texture.
A brownie formula specifically designed with brewed espresso can account for that added liquid. Adding brewed espresso to a formula developed around espresso powder is a different change and may require adjustments elsewhere.
Can You Use Decaf Espresso Powder in Brownies?
Decaffeinated espresso or coffee products can be an option when a lower-caffeine coffee ingredient is preferred.
However, decaffeinated does not mean caffeine-free. Decaf coffee products can still contain some caffeine, and the amount varies by product.
Flavor and baking behavior can also differ between products, so decaf espresso powder should not automatically be expected to perform exactly like a regular version. If caffeine intake matters, check the information provided for the specific product.
Frequently Asked Questions
Do Espresso Brownies Contain Caffeine?
Yes, espresso brownies can contain caffeine when they include caffeinated coffee ingredients. Cocoa and chocolate can also contribute naturally occurring caffeine.
The amount per brownie depends on the specific coffee and chocolate products, quantities used, batch size, and portion size. Without an exact formulation and product data, a reliable caffeine amount per serving cannot be stated.
Are Fudgy Brownies Supposed to Be Gooey?
Not necessarily. Fudgy usually describes a dense, soft interior, while gooey is often used for an especially soft or less firmly set center.
A brownie can be fudgy without containing visibly raw batter. Soft texture and underbaking are not the same thing.
Does a Shiny Crinkle Top Mean Brownies Are Fudgy?
No. A shiny crinkle top describes the surface crust, while fudgy describes the interior texture.
The surface is influenced by factors such as sugar behavior and batter composition. Interior texture depends on the broader balance of flour, fat, chocolate, eggs, moisture, aeration, and baking.
A brownie can therefore have a glossy top with a more cake-like center, or a dense center with a less noticeable crust.
Does Espresso Powder Always Make Chocolate Taste Stronger?
No. Espresso powder can complement chocolate flavor, but the perceived effect depends on the complete formula.
The type and amount of cocoa or chocolate, espresso concentration, sweetness, and other flavoring ingredients can all affect the result.
At a lower concentration, espresso may remain mostly in the background. At a higher concentration, the coffee flavor may become more noticeable and move the brownie toward a chocolate-and-coffee or mocha profile.
Final Takeaway
Three factors are especially useful for understanding espresso brownies.
Espresso mainly affects flavor. Depending on the product and concentration, it may subtly support the chocolate or create a clearer coffee note.
Fudgy versus cakey texture depends on the complete formula. Flour, fat, chocolate, eggs, moisture, aeration, and baking conditions all contribute, so no single ingredient guarantees a dense center.
The shiny crinkle top is primarily a surface characteristic. Sugar behavior and batter composition can influence its formation, but a glossy crust does not prove that the center is fudgy.
Results can vary with ingredient proportions, mixing, pan choice, and baking conditions. Understanding those separate factors is more useful than relying on one ingredient, visual cue, or technique as a guarantee.