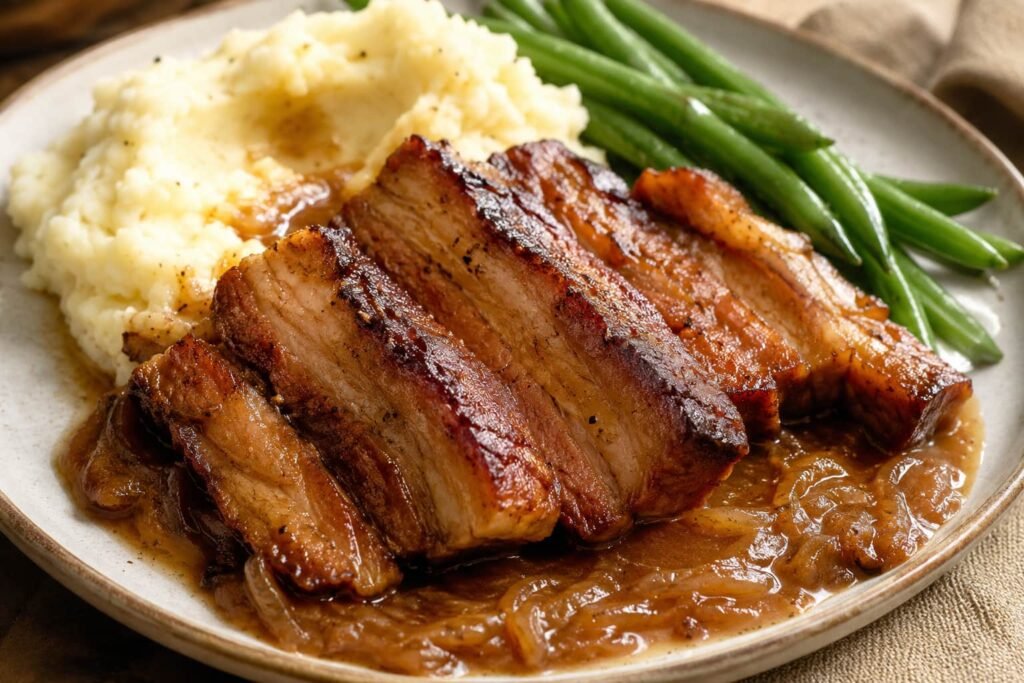
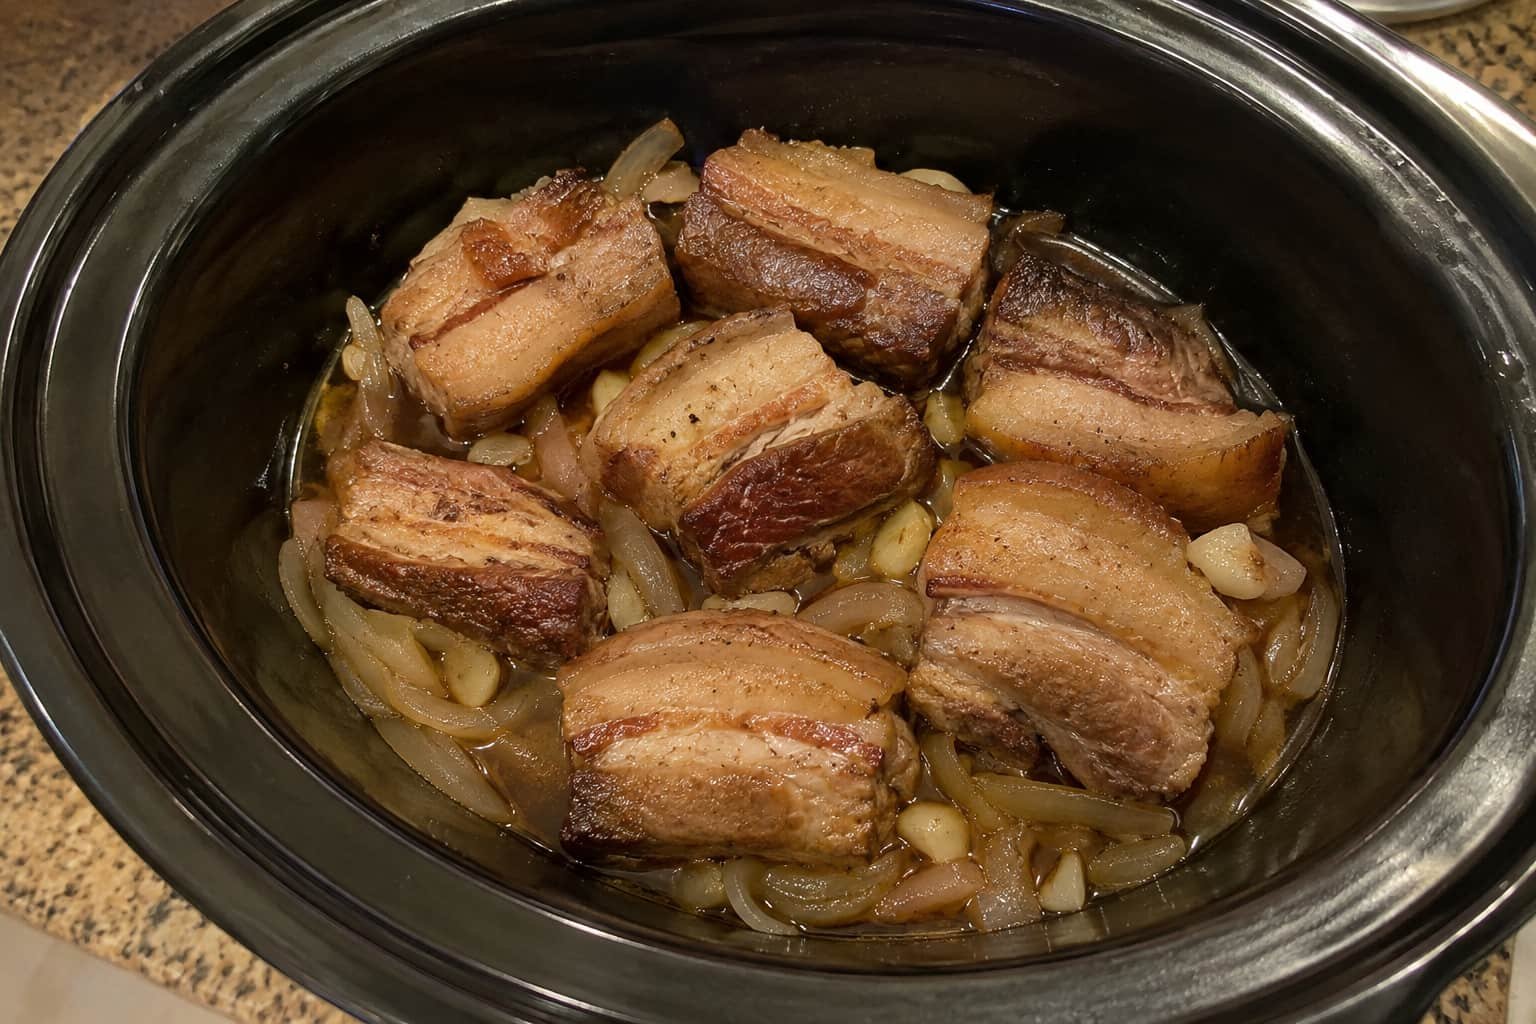
This slow cooker pork belly turns thick boneless strips into tender, savory portions that remain firm enough to slice and serve. The pork cooks gently over onions and garlic with a small amount of stock, giving the fat time to soften without submerging the meat in liquid. Since the slow cooker handles most of the cooking, this recipe requires little attention once everything is prepared.
After slow cooking, the pork belly is placed under a hot broiler for a few minutes to brown the surface and create lightly crisped edges. Excess fat is removed from the cooking juices before the softened onions and remaining liquid are made into a rich onion gravy. Serve this comforting dinner with mashed potatoes and green beans, or pair it with steamed rice and a crisp cabbage salad.
Can You Cook Pork Belly in a Slow Cooker?
Yes. Thick pork belly strips can be cooked in a slow cooker until fork-tender while still holding their shape. Begin checking them after 6 hours on low or about 4 hours on high, as thickness and appliance performance can affect the timing. For browned, crisp edges, dry the cooked pork and finish it briefly under a hot broiler.
Choosing the Best Pork Belly
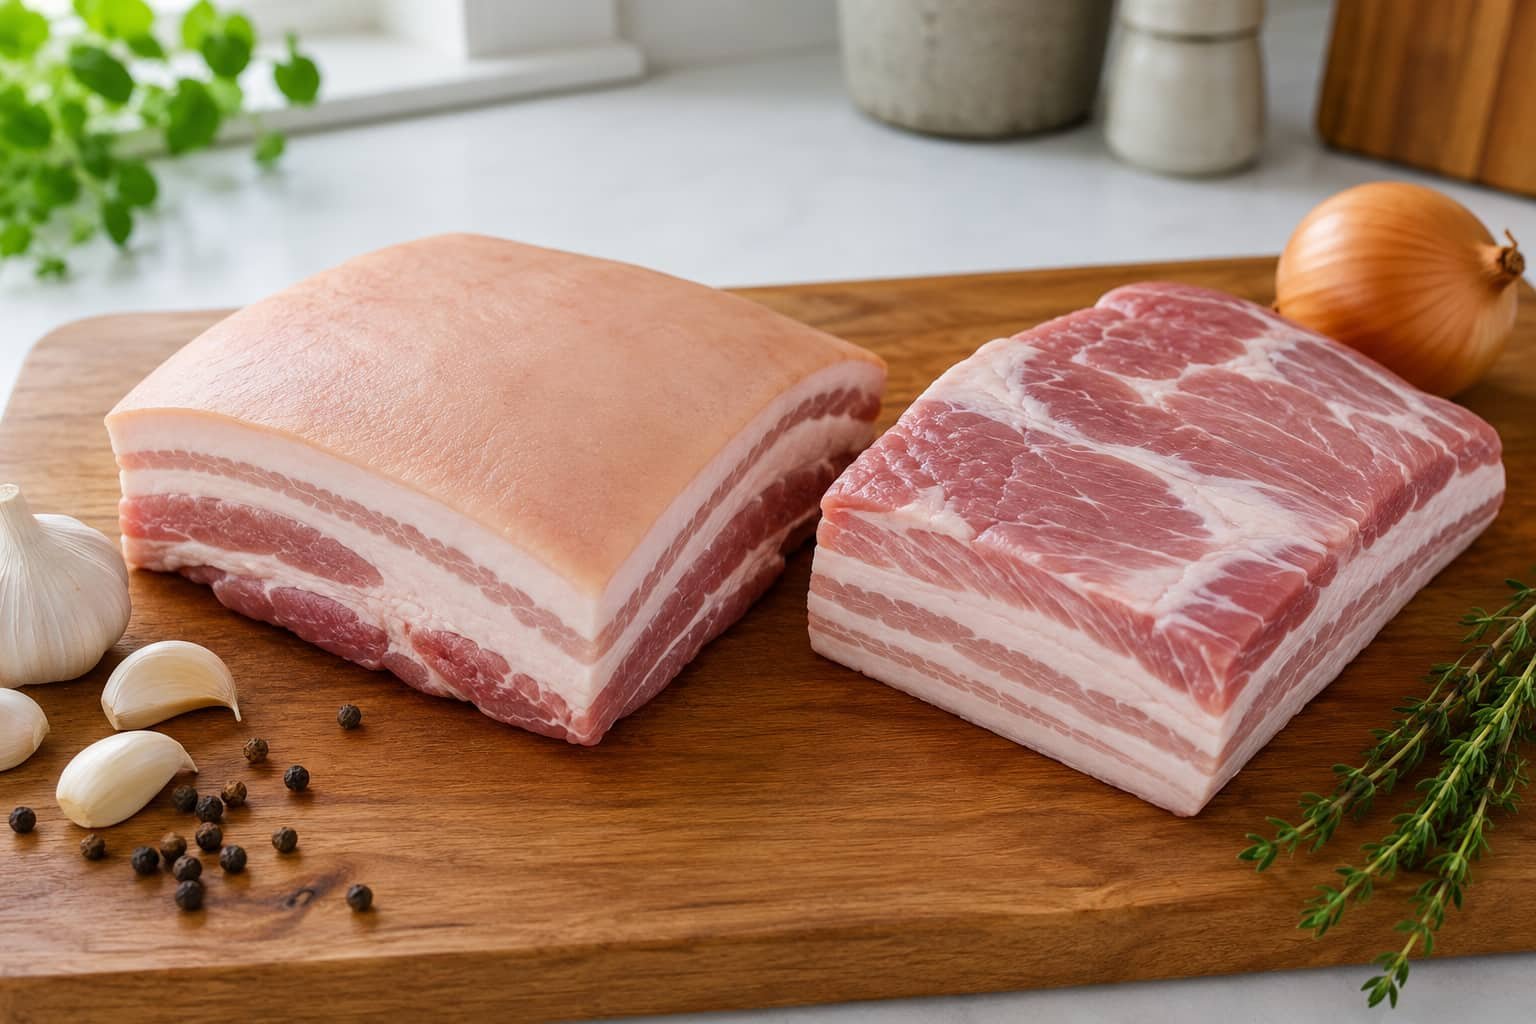
For this recipe, choose a boneless pork belly slab with clear ribbons of meat running between the fat layers. Avoid pieces with one large block of surface fat and very little visible meat. The fat is an essential part of the cut, so leave the attached layers intact and trim only loose or ragged pieces from the edges.
Boneless, skinless pork belly is the most practical option for this slow cooker recipe. It is easier to cut into even strips, season on every side, transfer after cooking, and brown in a skillet or under the broiler.
Skin-On vs. Skinless Pork Belly
Skinless pork belly is the recommended choice when you want a simpler, more predictable result. It develops caramelized edges during the final high-heat step without the risk of serving skin that remains soft or chewy.
Skin-on pork belly can also be used, but only when you plan to dry it thoroughly and finish it under a hot broiler. Slow cooking traps steam, so the skin will not produce traditional brittle crackling inside the cooker. Even after broiling, expect a browned and lightly crisped surface rather than guaranteed oven-style crackling.
Do not remove the attached fat from either option. Pork belly depends on its alternating meat and fat layers for its characteristic tenderness and flavor. Excessive trimming can leave the meaty sections drier and change the final texture.
Whole Slab, Strips, or Slices?
Thick, evenly sized strips are the best shape for this slow cooker pork belly recipe. They cook more predictably than a whole slab while remaining sturdy enough to lift, brown, slice, and serve. Arrange the pork belly strips in the slow cooker in a single layer whenever space allows.
Thin pork belly slices sometimes called belly pork slices or rashers cook considerably faster. If left for the full low-and-slow cooking time, they may become overly soft, lose their shape, or develop dry meat along the exposed edges. They need a separately tested, shorter cooking time.
Small cubes also soften quickly and can break apart during transfer. They are not ideal for this plated dinner because the finished pork should remain intact long enough to brown and serve with onion gravy.
A whole pork belly slab generally needs more time for its center and deeper fat layers to soften. It is also harder to position above the cooking liquid and more difficult to brown evenly afterward. Unless you are following a method tested specifically for a whole slab, thick slow cooker pork belly strips provide the most consistent result.
Ingredients You Will Need
This slow cooker pork belly recipe uses a simple savory seasoning, sliced onions, fresh garlic, and a small amount of stock. As the pork cooks, its juices combine with the aromatics to create the base for a rich onion gravy.
Pork Belly
Use 2 pounds of boneless, skinless pork belly cut into evenly sized strips about 1½–2 inches wide. Pieces of similar size cook more consistently and remain easier to lift, brown, and serve after slow cooking.
Choose a slab with clear ribbons of meat between the fat layers. Avoid pork belly with one large block of fat and very little visible meat, but leave the attached fat intact. Those layers soften during cooking and give pork belly its characteristic richness and tender texture.
Boneless, skinless pork belly is the simplest choice for the main recipe because it is easy to portion and can be browned on several sides. Skin-on pork belly may also be used, but the skin must be scored, dried thoroughly, and finished under a hot broiler. Even then, expect a browned, lightly crisped surface rather than guaranteed brittle crackling.
Savory Seasoning
Salt and black pepper provide the basic seasoning. Paprika contributes warm color and a mild earthy note, while garlic powder and onion powder distribute savory flavor evenly over every side of the thick pork belly strips.
Dried thyme complements the onions and gravy without overpowering the pork. Mustard powder is optional, but it adds gentle sharpness that helps balance the richness of the meat.
Use salt carefully when the recipe also contains stock and Worcestershire sauce. Both can contribute sodium, and the gravy will taste saltier as the cooking liquid reduces. Make the final seasoning adjustment only after the gravy has thickened.
Aromatics
Sliced yellow onions form the base beneath the pork. They soften during cooking, absorb the savory juices, and add mild sweetness and body to the finished onion gravy.
Fresh garlic is added to the onion base so its flavor spreads through the cooking liquid. Garlic powder seasons the meat itself, while fresh garlic gives the gravy a deeper, rounder flavor.
Cooking Liquid
Use a measured amount of unsalted or low-sodium chicken or pork stock. Pork belly releases a significant amount of fat and moisture during slow cooking, so only enough liquid to moisten the onion base is needed.
Pour the stock around the onions rather than over the seasoned meat. The pork should remain above most of the liquid whenever possible. Submerging it can dilute the seasoning, leave the exterior excessively wet, and produce more cooking liquid than the gravy requires.
Worcestershire sauce adds concentrated savory flavor and a mild tang. Use it sparingly so it supports the pork, onions, and herbs rather than dominating the gravy.
Gravy Ingredients
The gravy is made from the softened onions and the usable cooking juices left after the pork is removed. Allow the liquid to settle first, then skim off most of the rendered fat with a spoon or pour it through a fat separator.
Use cornstarch as the main thickener. Mix it with an equal amount of cold water before adding it gradually to the simmering juices. A cold slurry disperses more evenly and is less likely to form lumps.
Add only enough slurry for the gravy to coat the back of a spoon. The exact amount will depend on how much defatted cooking liquid remains. Taste after reducing and thickening, then adjust the salt, black pepper, or acidity.
Flour is not the preferred thickener for this version because it requires a different method and produces a more opaque sauce. It can be offered separately as a tested substitution rather than presented as an interchangeable instruction.
Equipment
A few basic tools are required to prepare the pork, finish the browned edges, and make the onion gravy.
- 5- to 6-quart slow cooker: Provides enough room to arrange the pork belly strips in a mostly single layer.
- Kitchen scale: Confirms the pork weight and helps keep the recipe consistent.
- Measuring cups and spoons: Needed for the stock, seasonings, Worcestershire sauce, and cornstarch slurry.
- Sharp knife: Used to portion the slab into evenly sized strips.
- Stable cutting board: Wash and sanitize it thoroughly after contact with raw pork.
- Tongs and a wide spatula: The tongs guide each strip while the spatula supports the tender meat from underneath.
- Rimmed baking sheet: Contains the rendered fat during the broiler finish.
- Wire rack, optional: Raises the pork above pooled fat and improves airflow during browning.
- Fat separator or heatproof measuring jug: Helps separate rendered fat from the cooking juices.
- Small saucepan: Used to reduce and thicken the onion gravy.
- Instant-read thermometer: Confirms that the thickest meaty section has reached a safe temperature, although tenderness must also be checked before serving.
Slow Cooker Pork Belly at a Glance
| Detail | Information |
| Prep time | About 15 minutes |
| Cook time | 6–7 hours on low or about 4 hours on high |
| Finishing time | About 5–8 minutes under the broiler; skillet timing may vary |
| Total time | About 6½–7½ hours on low or 4½ hours on high |
| Servings | 6 moderate servings |
| Pork cut | Thick boneless pork belly strips |
| Best setting | Low for gradual, more even fat rendering |
| Final texture | Fork-tender meat that holds its shape, with browned edges |
| Best served with | Mashed potatoes, steamed rice, or green vegetables |
Why This Slow Cooker Pork Belly Recipe Works
Pork belly contains thick layers of fat and connective tissue that need time to soften. Cooking it gently on low allows the firm fat to render gradually while the meat becomes fork-tender without immediately falling apart. The high setting is useful when time is limited, but the low setting gives the pork a wider cooking window and generally produces a more even texture.
This slow cooker pork belly recipe uses only a small amount of stock. As the pork cooks, it releases additional fat and flavorful juices, so submerging it in liquid is unnecessary. Too much stock can dilute the savory flavor and leave the surface pale and overly wet, while keeping the pork above most of the liquid makes it easier to brown later.
Because a slow cooker traps steam, it cannot create deeply caramelized edges on its own. A brief finish under a hot broiler or in a hot skillet adds color and improves the contrast between the tender center and browned exterior. After the excess fat is removed, the softened onions and remaining cooking juices are thickened into a savory homemade onion gravy. This extra step turns the pork into a complete comfort-food dinner rather than serving it as plain slow-cooked meat.
How to Cook Pork Belly in a Slow Cooker
1. Prepare the Pork Belly
Remove the pork belly from its packaging and blot every surface dry with paper towels. A dry surface helps the seasoning adhere more evenly and reduces excess moisture before the pork is browned at the end.
If using skin-on pork belly, score the skin with shallow parallel cuts spaced about ½ inch apart. Cut through the skin and only slightly into the fat, taking care not to slice into the meat. Deep cuts are unnecessary and can cause the finished strips to separate or lose their neat shape. Skinless pork belly does not need scoring.
Cut the slab into thick, evenly sized strips so the pieces cook at a similar rate. Rub the prepared seasoning over the top, bottom, and sides, working it lightly into the scored surface without packing it deeply into the cuts.
2. Build the Onion and Garlic Base
Spread the sliced onions evenly across the bottom of the slow cooker and scatter the garlic over them. The onions flavor the cooking juices and form an aromatic base beneath the pork as they soften.
Pour the measured stock around the onions instead of directly over the seasoned meat. Pork belly releases a considerable amount of fat and moisture during cooking, so it does not need to be submerged. Using too much liquid can dilute the pork’s flavor and leave the surface pale and excessively wet.
Arrange the strips in a single layer whenever possible. Place skin-on pork belly skin-side up. For skinless strips, position the broadest fat layer upward when one side is noticeably fattier. Avoid stacking or tightly crowding the pieces, as unevenly arranged strips may not soften at the same rate.
3. Slow Cook Until Fork-Tender
Cover the slow cooker and cook the pork belly on low for approximately 6–7 hours. For a faster option, cook it on high for about 4 hours, but begin checking early because thinner pieces may soften sooner.
These timings are intended for thick pork belly strips rather than thin slices or a whole uncut slab. The exact cooking time can vary with the thickness of the pork, the amount in the cooker, and the appliance model.
Keep the lid closed during most of the cooking time. Repeatedly lifting it releases heat and steam, which can delay cooking. There is also no need to keep turning the pork; the enclosed heat cooks it gently while the onions and stock keep the underside moist.
Begin checking near the lower end of the cooking range. The pork is ready when a fork enters the thickest part with little resistance, the fat layers feel soft rather than firm or rubbery, and each strip can still be lifted without immediately collapsing. If the pork remains tough, replace the lid and continue cooking in 20- to 30-minute intervals.
4. Rest and Brown the Pork Belly
Use tongs and a wide spatula to transfer the cooked pork belly to a foil-lined, rimmed baking sheet. Support each strip from underneath because the meat will be tender and more delicate after slow cooking.
Let the pork rest for 5–10 minutes. Gently blot the skin or exposed surface with clean paper towels to remove moisture and excess fat, taking care not to tear the softened meat.
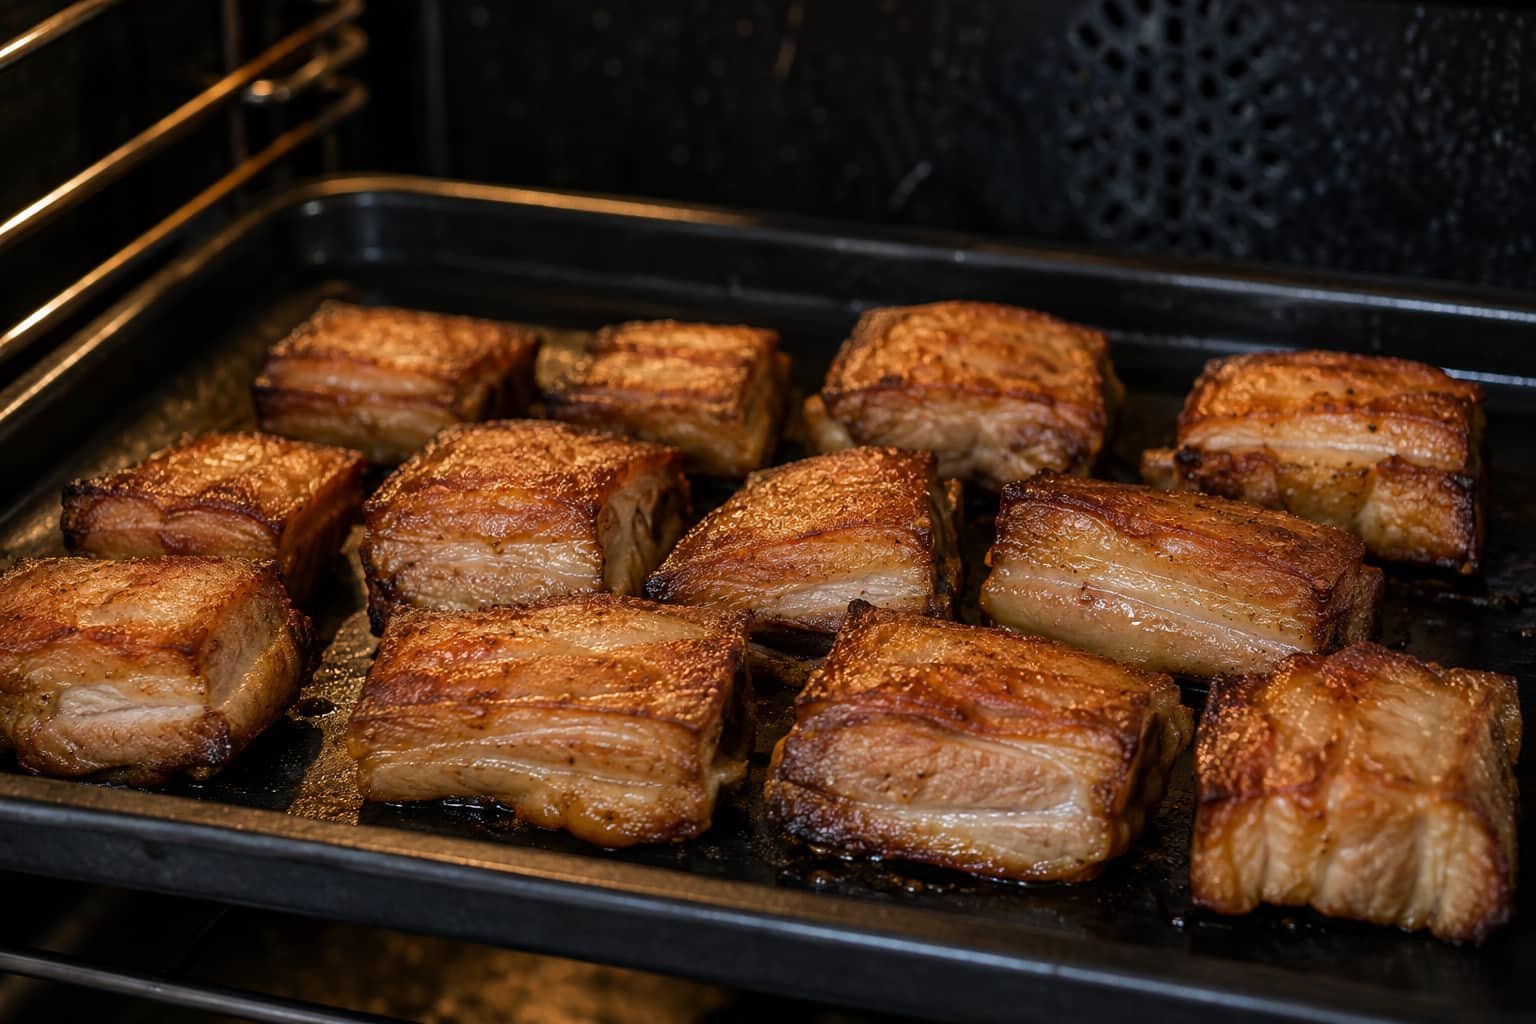
Preheat the broiler and place the baking sheet several inches below the heating element. Broil the pork in short 1- to 2-minute intervals, watching it continuously. Skin-on strips should remain skin-side up, while skinless pieces may be turned carefully to brown more than one side.
Depending on the broiler and rack position, browning may take approximately 3–8 minutes in total. Remove individual pieces as soon as the surface is deeply browned and the edges are lightly crisped. Rendered pork fat can scorch quickly, so do not leave the tray unattended.
5. Make the Onion Gravy
Allow the cooking juices to stand for several minutes while the pork is under the broiler. As the liquid settles, the rendered fat will rise to the surface. Remove most of this fat with a spoon or use a fat separator, keeping the softened onions and darker cooking liquid underneath.
Transfer the onions and usable cooking juices to a saucepan and bring them to a gentle simmer. For a smoother gravy, blend the onions into the liquid before thickening. Leave them intact if you prefer a more textured onion gravy.
Mix the measured cornstarch with cold water until completely smooth. Pour the slurry into the simmering liquid gradually while whisking, stopping when the gravy is thick enough to lightly coat the back of a spoon. Simmer briefly after each addition so the final consistency can be judged accurately.
Taste the gravy only after it has reduced and thickened. The stock and seasoned pork may already have supplied enough salt, so adjust the salt, black pepper, or acidity at the end.
Serve the gravy underneath or beside the pork belly. Avoid pouring it directly over the browned surface before serving, as the moisture will quickly soften the lightly crisped edges.
How Long to Cook Pork Belly in a Slow Cooker
For this recipe, thick pork belly strips generally need about 6–7 hours on low or approximately 4 hours on high. These times are intended for evenly sized strips arranged in a single layer. The exact cooking time can still vary with the thickness of the pork, the amount placed in the cooker, and how hot the appliance runs.
| Pork form | Low setting | High setting | Doneness cue |
| Thick pork belly strips | Begin checking after 6 hours; continue up to 7 hours if needed | Begin checking around 4 hours | A fork enters the meaty section easily, and the fat layers feel soft and yielding |
| Whole pork belly slab | Usually needs longer than thick strips; use recipe-specific tested timing | Not recommended without testing for that cut | The center and deeper fat layers are tender |
| Thin pork belly slices | Check considerably earlier than thick strips | Not recommended because they can overcook quickly | Tender but still firm enough to lift without breaking |
The thick-strip timing is the only range intended for the main recipe. A whole slab should not be cooked using the same schedule because its center and deeper fat layers take longer to soften. Thin slices cook much faster and may become dry, overly soft, or difficult to transfer if left in the slow cooker for the full strip timing.
For the most consistent result, cut the pork into pieces of similar thickness and avoid stacking them. Begin testing near the lower end of the suggested range. If the meat still resists a fork or the fat feels firm and waxy, replace the lid and continue cooking for another 20–30 minutes before checking again.
The low setting is preferred because it gives the fat more time to soften gradually and provides a wider window between tender and overcooked. The high setting can be used when necessary, but thinner strips may finish sooner and should be checked carefully.
How to Tell When Pork Belly Is Done
Food safety and ideal slow-cooked texture are two separate considerations. Whole cuts of pork are considered safe when the thickest meaty section reaches at least 145°F or 63°C and rests for three minutes. Insert an instant-read thermometer into the thickest meat layer, avoiding a reading taken only from the fat and making sure the probe does not touch the slow-cooker insert.
Pork belly will usually reach the minimum safe temperature before it develops the soft texture expected from slow cooking. Its fat and connective tissue require additional time to soften, so the pork should not be removed simply because the thermometer has reached 145°F. Use temperature to confirm safety, then rely on fork resistance and fat texture to judge whether the meat is ready to serve.
Insert a fork into the thickest meaty part of one strip. It should enter with little resistance, and the meat should feel tender rather than tight or rubbery. The fat layers should feel soft and yielding instead of firm, white, or waxy. Their appearance may vary, so texture is a more dependable guide than color alone.
Lift one strip carefully with tongs while supporting it underneath with a wide spatula. Properly cooked pork belly should remain intact during transfer but feel tender when pressed or sliced. If it is difficult to pierce, it needs more cooking time. If the strips break apart during careful lifting, they may be overcooked, cut too small, or too hot and delicate to move without support.
Surface color does not indicate whether pork belly is cooked through. The slow cooker traps moisture, so the exterior will usually remain pale and soft even when the center is fully tender. Judge doneness before the finishing step, then dry the surface and brown it under the broiler or in a hot skillet to create caramelized, lightly crisped edges.
How to Get Crispy Skin or Browned Edges
Slow cooking makes pork belly tender, but it cannot produce proper crackling by itself. The covered cooker traps steam, leaving the exterior moist even when the meat and fat are fully softened. To create browned edges or lightly crisped skin, the pork needs to be dried and exposed to high heat after slow cooking.
Transfer the cooked pork belly carefully to a wire rack set over a foil-lined, rimmed baking sheet. The rack is optional, but it allows rendered fat to drain away instead of collecting around the pork. Let the strips rest for 5–10 minutes, then gently blot the skin or exposed surfaces with clean paper towels. Removing surface moisture is essential because wet pork will steam before it begins to brown.
Preheat the broiler fully and arrange skin-on pork belly with the skin facing upward. Position the tray several inches below the heating element and broil in short 1- to 2-minute intervals. Check continuously and remove each strip as soon as the surface is browned. Rendered pork fat can spit, smoke, and scorch quickly, so do not leave the tray unattended.
This finishing method can produce lightly crisped skin and deeply browned edges, but the result may not be identical to the dry, brittle crackling produced by oven-roasting pork from the beginning. Slow-cooker pork belly contains more surface moisture, so it is better to promise a browned, crisped finish than perfect crackling.
For skinless pork belly, preheat a heavy skillet over medium-high heat and add the strips in a single layer. Begin with a dry pan because the pork should release its own fat. If it starts to stick before the fat renders, add only a small amount of oil.
Brown the pork for approximately 1–2 minutes on each broad side, working in batches when necessary. Avoid crowding the skillet, which traps steam and prevents caramelization. If a large amount of fat collects in the pan, carefully pour off the excess before browning the next batch.
Serve the onion gravy underneath the pork or pass it separately at the table. Pouring wet gravy directly over the browned surface will soften it within minutes. The crisp finish comes from drying and high heat after slow cooking, not from the slow cooker itself.
What to Serve with Slow Cooker Pork Belly
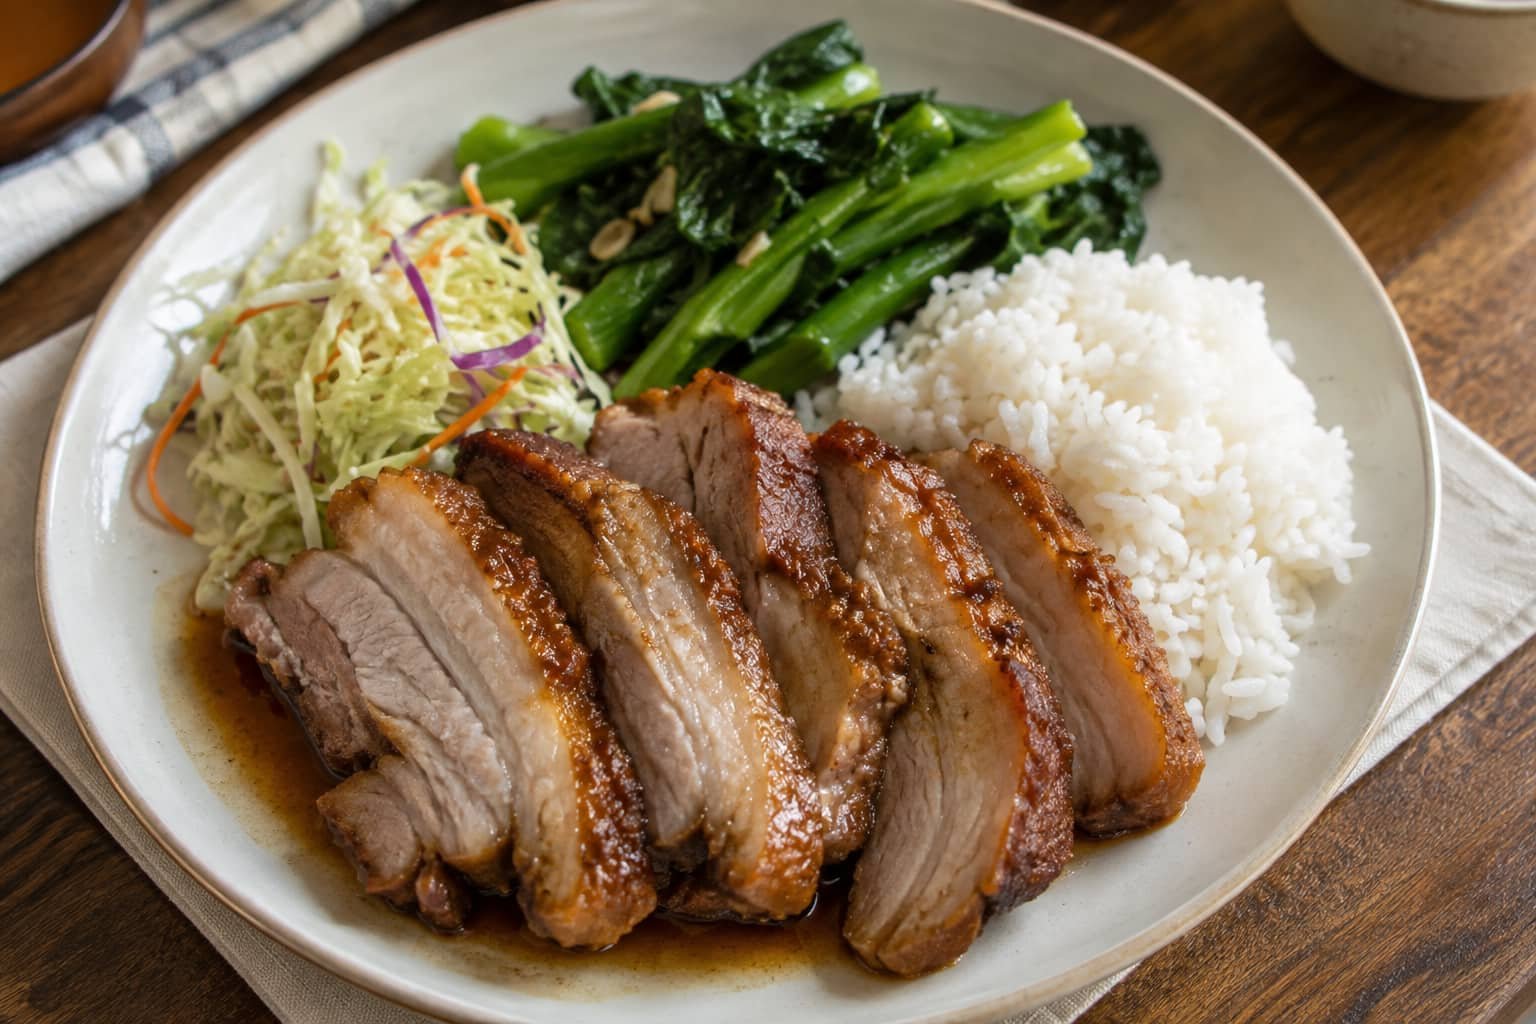
Pork belly is rich, so the best side dishes either absorb the savory onion gravy or provide freshness and acidity. Plan on a smaller serving of pork than you might serve with a leaner cut, then complete the plate with one starch and one vegetable or salad.
Comfort-Food Sides
Creamy mashed potatoes are a natural pairing for pork belly served with onion gravy. Their mild flavor absorbs the sauce without competing with the seasoned meat.
Buttered rice is another simple option, particularly when you want a lighter starch. These easy slow-cooked rice dishes offer additional ideas, although a plain or lightly seasoned rice works best with this rich pork recipe.
Roasted potatoes provide a firmer, crispier contrast, while soft polenta creates a smooth base for the pork and gravy. Choose one starch rather than serving several heavy sides together.
Fresh or Acidic Sides
A crisp, acidic salad helps balance the rendered fat. This cabbage crunch salad adds freshness and texture without overpowering the pork.
Apple slaw also works well because the fruit adds mild sweetness while the dressing cuts through the richness. Pickled red onions provide a sharper contrast, and a simple cucumber salad offers a cool, refreshing side for a heavier dinner.
Green Vegetables
Green beans and broccoli are dependable choices because they can be steamed, roasted, or sautéed with minimal seasoning. A squeeze of lemon juice added before serving keeps them from tasting flat beside the rich meat.
Roasted Brussels sprouts add crisp texture, although they should be seasoned lightly if the pork gravy is already salty. Wilted spinach, kale, or Swiss chard also works well, especially when finished with a small amount of vinegar or lemon.
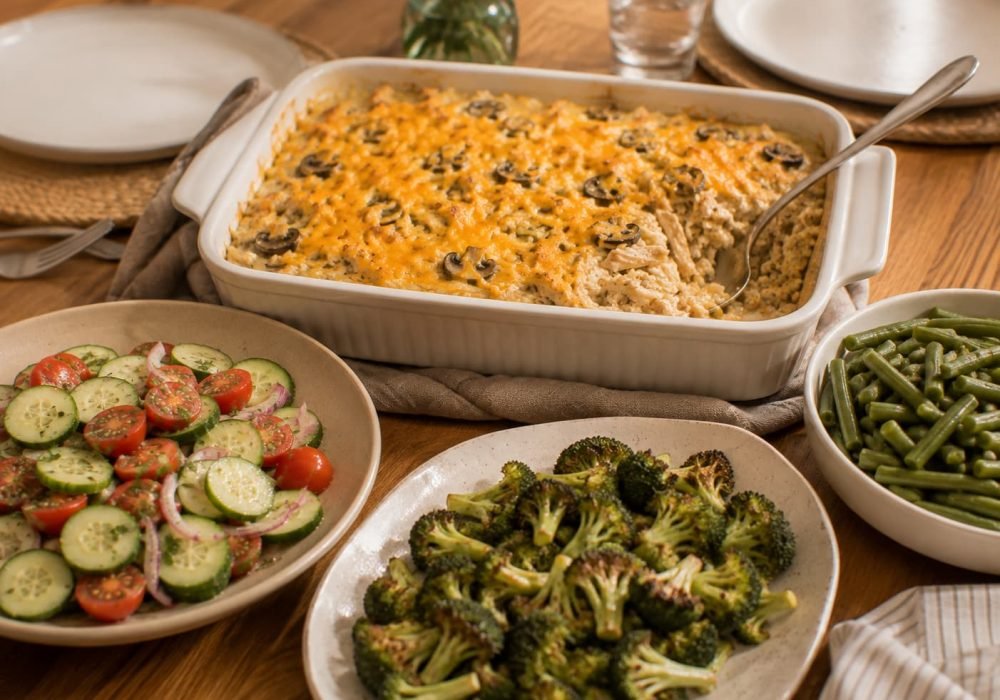
For a balanced comfort-food plate, serve the slow cooker pork belly with mashed potatoes and green beans. For a lighter meal, pair it with steamed rice and cabbage salad. The goal is contrast: rich pork, a simple starch, and something fresh or acidic.
Flavor Variations
The original slow cooker pork belly uses onions, garlic, herbs, and savory onion gravy. These variations keep the same basic cooking method while changing the final flavor.
Apple and Herb Pork Belly
Add one firm apple, such as Granny Smith or Honeycrisp, cut into thick slices. Replace about one-third of the stock with unsweetened apple juice or apple cider, keeping the total amount of cooking liquid unchanged. Add ½ teaspoon dried sage and 1 teaspoon Dijon mustard.
For apple pieces that remain visible, add them during the final 1½–2 hours of cooking. Add them at the beginning only when you want the fruit to soften into the onions and gravy.
Smoky Barbecue Pork Belly
Add 1 teaspoon smoked paprika and up to 1 teaspoon brown sugar to the original seasoning mixture. Avoid using more sugar at the beginning because it can scorch during the final browning step.
Cook the pork using the original method, then brush it with about ¼ cup barbecue sauce shortly before broiling. Broil in short intervals and watch closely because the sugar in the sauce can burn quickly. Serve additional sauce separately instead of covering the crisped surface.
Soy and Ginger Pork Belly
Replace about one-third of the stock with 3 tablespoons low-sodium soy sauce. Add 1 tablespoon finely grated fresh ginger and 1–2 teaspoons brown sugar to the onion base. Reduce the salt in the original seasoning because the soy sauce will become more concentrated during cooking.
For this variation, turn the defatted cooking juices into a light soy-ginger sauce rather than the original onion gravy. Simmer the liquid briefly, then thicken it with a small amount of cornstarch slurry if needed.
Troubleshooting Slow Cooker Pork Belly
The Pork Belly Is Still Tough
Pork belly that feels firm or rubbery usually needs more cooking time. Replace the lid and continue cooking in 20- to 30-minute intervals until a fork enters the thickest meaty section with little resistance and the fat feels soft.
Do not switch to high near the end simply to force the meat to soften faster. The outside may become overly soft before the center and deeper fat layers are ready.
The Pork Belly Is Too Greasy
Let the cooking juices settle for several minutes so the rendered fat rises to the surface. Remove it with a spoon or fat separator before reducing or thickening the onion gravy.
This corrects an oily sauce, while fresh or acidic side dishes help balance the natural richness of the meat. Serve modest portions with cabbage salad, green vegetables, cucumber salad, or pickled onions.
The Skin Is Rubbery
Rubbery skin usually means the surface remained too wet or did not receive enough direct heat. Blot it thoroughly, place it skin-side up, and broil in short intervals until browned and lightly crisped.
Slow-cooked skin may not become as dry and brittle as traditional oven-roasted crackling. Stop broiling once the surface is well browned, because the rendered fat can burn before the skin becomes completely crisp.
The Meat Falls Apart When Lifted
The strips may break if they were overcooked, cut too small, transferred while extremely hot, or lifted with tongs alone. Let the pork rest briefly and support each piece underneath with a wide spatula during transfer.
If the pork repeatedly collapses, shorten the cooking time slightly in the next batch or cut the strips thicker. Properly cooked pork belly should feel tender but remain intact long enough to brown and serve.
The Gravy Is Too Thin
First, simmer the defatted cooking juices uncovered to evaporate excess water. If the flavor is already concentrated, mix cornstarch with cold water and whisk the slurry into the simmering liquid a little at a time.
Let the gravy simmer briefly after each addition before deciding whether it needs more thickener. Cornstarch does not reach its full thickening effect immediately, and adding too much can create a heavy, gluey texture.
The Gravy Is Too Salty
Use unsalted or low-sodium stock and wait until the gravy has reduced before adding final seasoning. Reduction concentrates salt as well as flavor.
For mildly oversalted gravy, add a small amount of unsalted stock or water, then reduce or thicken it again as needed. If it is severely salty, combine only part of the original cooking liquid with fresh unsalted stock and rebuild the gravy. Sugar may disguise some saltiness, but it does not remove the excess salt and can make the sauce unpleasantly sweet.
Storage, Freezing and Reheating
Refrigerating Leftovers
Transfer leftover pork belly to shallow, covered containers and refrigerate it within two hours of cooking. When the surrounding temperature is above 90°F or 32°C, reduce that limit to one hour. Shallow containers allow the food to cool more quickly than one deep container.
Store the pork separately from the onion gravy whenever possible. This protects the browned surface from becoming soggy and allows both parts of the meal to be reheated properly. Use refrigerated pork belly and gravy within three to four days.
Freezing Slow-Cooked Pork Belly
Place cooled pork belly in an airtight freezer container or freezer bag, removing as much air as practical. Freeze the gravy in a separate container so it does not soften the surface of the pork during thawing.
For the best quality, use frozen cooked pork belly within about three months. Freezing keeps properly stored food safe for much longer, but the meat may gradually lose moisture and texture. Previously crisped skin will soften and must be browned again after reheating.
Thaw frozen pork belly and gravy overnight in the refrigerator. Do not thaw either one on the counter, where the exterior can warm into an unsafe temperature range while the center remains frozen.
Reheating Pork Belly
Reheat only the amount you plan to serve. Place the pork in a baking dish, cover it loosely, and warm it in a 350°F oven until the thickest section reaches 165°F or 74°C. Uncover it near the end, then broil briefly to restore the browned edges. USDA recommends reheating leftovers to 165°F and using an oven temperature no lower than 325°F.
For a small portion, use an air fryer or a heavy skillet and check the pork frequently to prevent the meat from drying out. Start a skillet without added oil because the pork will usually release some rendered fat as it heats. Turn the strips carefully and remove them once the center is hot and the exterior is browned.
Warm the onion gravy separately in a saucepan, stirring frequently and bringing it to a boil. Add a small amount of unsalted stock or water if it has become too thick during refrigeration. USDA recommends bringing leftover gravies and sauces to a boil when reheating.
Do not use a slow cooker to reheat cold leftovers. Food warms too gradually in this appliance and may remain too long at an unsafe temperature. After the pork and gravy have been reheated safely, a preheated slow cooker may be used to keep them hot for serving.
Frequently Asked Questions
Can You Cook Pork Belly in a Slow Cooker?
Yes. Thick pork belly strips can be cooked slowly over onions and garlic with a small amount of stock. Begin checking them after about 6 hours on low or around 4 hours on high. Once the meat is fork-tender and the fat feels soft, finish the pork under a broiler or in a skillet to brown the surface.
Should Pork Belly Be Cooked on Low or High?
Low is preferred because it gives the thick fat layers more time to soften gradually and provides a wider window between tender and overcooked. High is a workable alternative when time is limited, but thinner strips may finish earlier and should be checked carefully.
Does Pork Belly Need Liquid in a Slow Cooker?
Use a small, measured amount of stock, but do not submerge the pork. Pork belly releases considerable fat and moisture as it cooks. Too much liquid can dilute the seasoning, leave the surface excessively wet, and make browning more difficult.
Should I Remove the Pork Belly Skin Before Slow Cooking?
Either option works. Skin-on pork belly can be broiled after cooking for a browned, lightly crisped finish, although it may not develop brittle crackling. Skinless pork belly is easier to handle and can be browned on both broad sides in a hot skillet.
How Long Does Pork Belly Take in a Crockpot?
For the thick pork belly strips used in this recipe, begin checking after approximately 6 hours on low or around 4 hours on high. The final time depends on strip thickness, pork weight, cooker capacity, and appliance performance. Continue cooking if the meat resists a fork or the fat remains firm.
Can I Put Frozen Pork Belly in the Slow Cooker?
No. Thaw pork belly completely in the refrigerator before slow cooking it. USDA guidance recommends thawing meat before placing it in a slow cooker because frozen pieces take longer to reach a safe cooking temperature.
Can You Overcook Pork Belly?
Yes. Although its high fat content makes pork belly relatively forgiving, excessive cooking can cause the strips to collapse, lose their shape, or develop dry meat around the edges. Start checking near the lower end of the cooking range and support each tender strip during transfer.
Can I Prepare Slow Cooker Pork Belly the Night Before?
Yes. Cut and season the pork, slice the onions, and prepare the garlic, then refrigerate everything in separate covered containers. Assemble the recipe immediately before cooking. Do not place a refrigerator-cold stoneware insert directly into the heating base unless the appliance manual specifically confirms that it is safe.